
Introduction
Orchids hold a timeless allure with their exquisite blooms and graceful presence, but their reputation for being difficult often holds gardeners back. The truth is, thriving orchids don’t demand a greenhouse or specialized equipment. They need steady, attentive care — especially when grown in pots at home or on your balcony. In this guide, you’ll learn how the right temperature, combined with light, humidity, and watering, helps your orchids flourish year-round. You’ll discover how to understand your orchid’s needs deeply, ensuring healthy roots and gorgeous reblooms season after season, transforming your space into a vibrant haven of elegance.
Preparing the Perfect Setup
Before you even bring your orchid home, let’s gather the tools and materials that form the foundation of success. Each detail—from the pot size to the subtle humidity in the air—shapes your orchid’s wellbeing.
- Pot: Choose a container that matches your orchid’s size, with a diameter just wide enough to allow root growth without excess space. Crucially, the pot must have drainage holes large enough to let all excess water escape quickly. Orchids hate soggy roots, and a pot that holds water beneath the roots invites rot. If your home or balcony tends to heat up, opt for a clay pot—it cools the roots naturally, avoiding stress during warm spells.
- Substrate: Orchids are epiphytes—they grow on trees in nature, not soil. Replicate this by using a breathable mix of medium-sized bark chips, perlite, and sphagnum moss. A common recipe is about 70% bark to 15% perlite and 15% moss, creating an airy, well-draining environment. Always check that the pH is slightly acidic to neutral, between 5.5 and 6.5. This keeps nutrients available and roots vibrant.
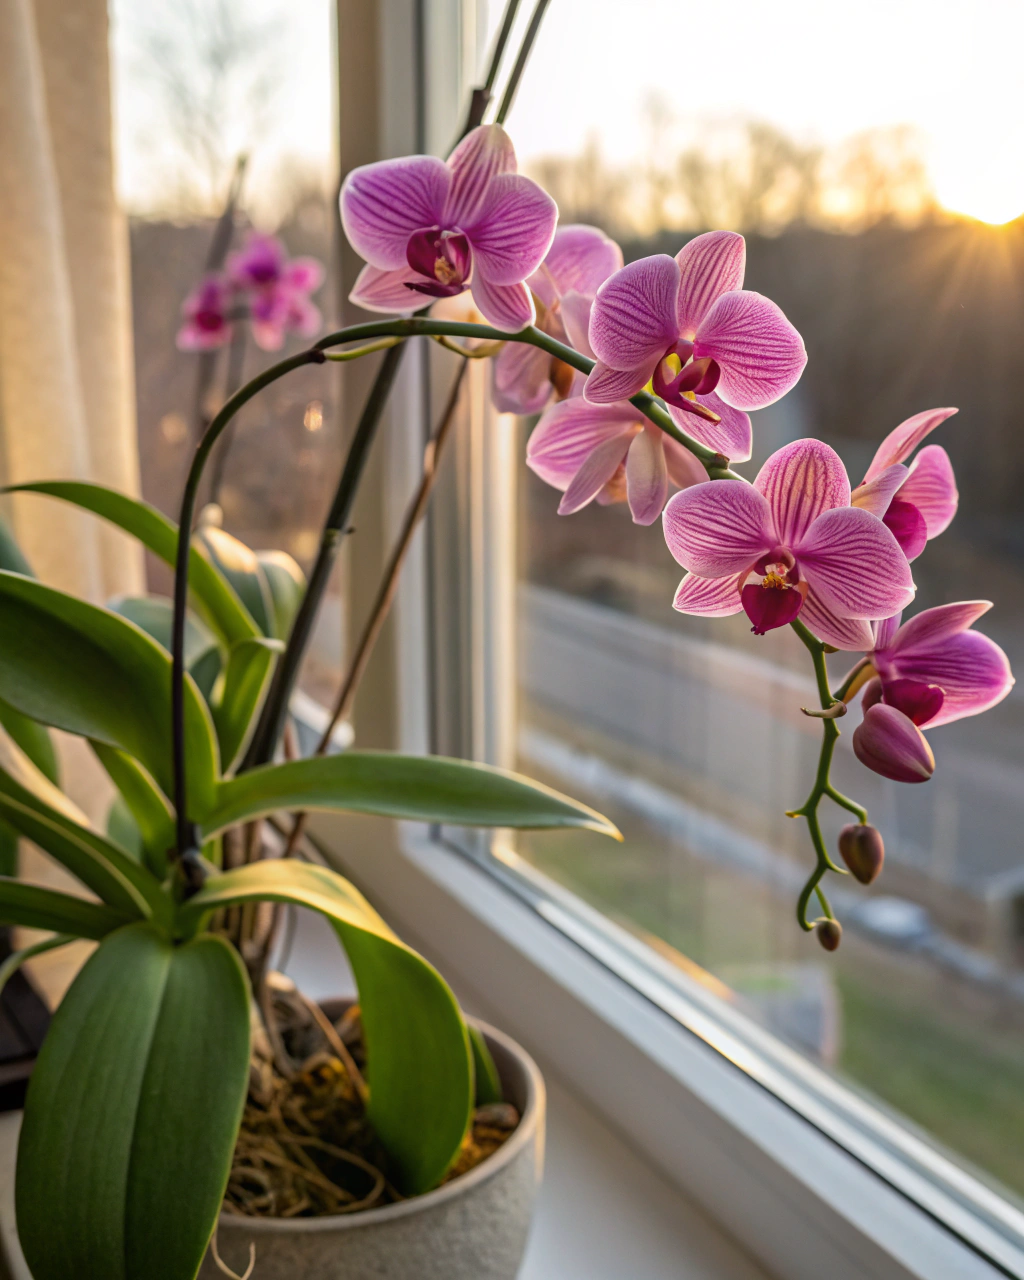
- Light: Orchids adore bright, indirect light—aim for about 6–8 hours daily, with intensity around 10,000–20,000 lux. This is often a spot near an east-facing window where soft morning sun filters through sheer curtains. Direct midday rays can scorch leaves, so a thin, airy curtain or blinds will protect your plant while giving it enough energy to photosynthesize beautifully.
- Humidity: Orchids thrive where air is moist but fresh. Maintain relative humidity between 50–70% using trays of water nestled with pebbles, grouping plants to raise local moisture, or even a compact humidifier if your indoor air is dry. This range mimics their natural environment, promoting turgid leaves and fast root growth without inviting fungal problems.
- Temperature: Consistency is key here. During the day, keep temperatures between 18–24°C (65–75°F). At night, don’t let it drop below 13°C (55°F). This gentle swing imitates nature, helping your orchid’s internal clock trigger healthy blooms.
- Fertilizer: Use a balanced liquid fertilizer with an N-P-K ratio of 20-20-20, diluted tenfold (1 part fertilizer to 10 parts water). Apply this every 3–4 weeks during the orchid’s active growth periods. Avoid overfeeding—an orchid’s roots are sensitive, and excess salts will cause damage over time.
Check Also: How to Water Succulents the Right Way
Step-by-Step Care Routine
1) Understanding the Plant’s Cycle
Your orchid lives by a rhythm marked by alternating phases of vigorous growth and restful recovery. After each blooming cycle, your plant enters a post-bloom phase where energy shifts underground to strengthen roots and leaves. This rest is not downtime but a vital period preparing the orchid for its next burst of flowers. Mistaking this pause for decline, I once flooded an orchid daily right after blooming, hoping to reward the plant’s effort. Instead, roots suffocated and the plant’s health declined rapidly. Now, I water lightly during rest and focus on maintaining stable temperatures and humidity. Knowing this cycle means you tailor your care—more gentle moisture and balanced nutrition during rest, then ramping back up as new shoots emerge.
2) The Right Pot and Substrate
Checking if your orchid needs repotting isn’t a guess — it’s a close inspection. Gently slide the orchid out of its pot and feel the substrate. An ideal substrate feels airy, light, and dry quickly after watering. If it’s compacted or smells musty, that bark has probably broken down too much, reducing airflow around roots. Also, look at the roots themselves—healthy ones are firm, plump, and a vibrant green or white. Brown, mushy roots signal rot and urgent repotting. If your orchid’s roots are healthy and the substrate is sound, keep the pot. Repotting too often stresses the plant and can delay blooming. Avoid the common mistake of using dense potting soil, as it traps water and suffocates orchid roots, leading to poor growth and rot.
3) Watering the Smart Way
Watering orchids correctly is a balancing act—too much invites rot, while too little slows growth dramatically. Your best guide? Touch. Water your orchid once weekly with lukewarm, soft water, ideally rainwater or filtered tap water to avoid chlorine and mineral buildup. Wait until the top 2–3 cm of the medium feels dry before watering again. This depth ensures roots receive enough oxygen between waterings. When you water, soak the pot thoroughly, letting water run through all drainage holes. Never let water stand under the pot; orchids hate “wet feet.” Early morning watering is preferred, allowing moisture to evaporate during the day and reducing fungal risks. In winter, reduce watering frequency to every 10–14 days, as the plant’s water demands decrease. Use the “weight test” by lifting the pot — it feels noticeably lighter when ready to water again.
4) Light, Temperature, and Humidity Balance
Finding harmony between light, temperature, and humidity is where the magic happens. Place your orchid near an east-facing window for 6–8 hours of bright but filtered sunlight; this provides essential energy without burning tender leaves. If light feels too harsh, diffuse it with a sheer curtain. Temperature should remain stable between 18–24°C during the day, never dropping below 13°C at night—these gentle fluctuations mimic nature’s rhythm and stimulate blooming. Keep humidity steady around 60% by grouping plants or placing a humidity tray nearby. Turn your orchid weekly to encourage even leaf growth and prevent lopsided development. Watch for signs of stress: yellow leaf tips often mean too much light or overwatering, while wrinkled leaves suggest dryness or excessive heat. Adjust conditions promptly to keep your plant comfortable and vibrant.
5) Feeding and Fertilization
Feeding your orchid is about providing steady, balanced nourishment without overwhelming its delicate roots. Use a liquid fertilizer with a balanced 20-20-20 N-P-K formula diluted 1:10. Feed every 3–4 weeks during active growth phases—from new root or leaf emergence until flowering. Stop feeding in winter when the plant rests. Watch for feeding signals: pale, less vibrant leaves can indicate nutrient deficiency, while a white crust on the pot surface or substrate signals fertilizer salt buildup. To prevent this, flush the pot monthly with clear, lukewarm water to wash away excess salts and freshen the root zone. Slow, consistent feeding supports healthy blooms, strong leaves, and sturdy roots.
6) Pruning, Cleaning, and Post-Bloom Maintenance
After your orchid has bloomed, pruning and cleaning become key steps in supporting its next growth cycle. If a spike remains green after flowering, cut it about 1 cm above a healthy node to encourage new flower shoots. If the spike has turned brown, prune it back to the base to conserve energy. Use clean, sharp shears, sterilizing them with alcohol before each cut — this prevents disease transmission. Dust your orchid’s leaves gently every two weeks with a soft, damp cloth to enhance photosynthesis by keeping leaf pores clear, improving air circulation and water absorption. As I’ve learned, “The secret isn’t doing more — it’s observing better.” Conversely, too much fussing can stress your plant, so approach maintenance mindfully, keeping an eye on what the orchid needs each day.
7) Repotting — Only If Needed
Repotting is an important task, but only when the orchid signals need—not out of routine. Signs include roots circling tightly in the pot (root-bound), substrate that no longer drains well, or bark breaking down to a mushy state. Otherwise, patience pays off. When you do repot, choose a pot diameter no more than 2–5 cm larger than the current container. Repotting in a pot that’s too large can hold excessive moisture and stress roots. Carefully remove old substrate from roots, trimming any soft or rotten roots with sterilized scissors. Position the orchid centrally, gently filling in bark mix around roots without compacting. Repot early spring, just as new growth appears, giving your plant time to settle before blooming.
8) Propagation and Renewal (If Applicable)
Propagation of orchids can be straightforward when approached with patience. The safest and most successful method is division during repotting. Select divisions with at least 2 or 3 healthy pseudobulbs and a strong root system each. After separating, plant divisions in fresh substrate, maintaining the environment with temperatures between 18–24°C and humidity near 60%. Keep divisions out of direct sun and avoid feeding until you see new growth. This incremental renewal keeps your orchid collection vibrant and thriving over the years.
Common Problems and How to Fix Them
- Yellow leaves: Often caused by too much water or insufficient light. Move your orchid to increase bright indirect light up to 6–8 hours daily and allow substrate to dry before watering again.
- Brown tips: Signs of dry, low humidity air are common indoors. Raise humidity to 60–70% RH using pebble trays or humidifiers.
- No blooms: Usually linked to inadequate light or nutrition. Move the orchid closer to a bright window and consider switching to a bloom booster fertilizer with an 10-30-20 N-P-K ratio.
- Root rot: Results from soggy substrate and poor drainage. Unpot the orchid, trim all damaged roots to healthy tissue, replace with fresh bark mix, reduce watering, and improve airflow.
- Pests: Spider mites, mealybugs, or scale insects can appear if airflow is poor or humidity is low. Treat weekly with neem oil or insecticidal soap and increase ventilation around the plant.
Seasonal Adjustments
Orchids respond to changes in the season by adjusting their internal growth cycles, so your care should mirror these shifts carefully. During warmer months, increase humidity and water more frequently to compensate for faster evaporation and increased metabolic activity. Provide a little extra ventilation in summer to prevent fungal outbreaks. In cooler months, slow the watering schedule to roughly every 10–14 days, and pause fertilization as the plant enters dormancy. Avoid placing orchids near cold drafts, which can shock sensitive roots and leaves. These measured adjustments keep your orchid balanced and healthy year-round, preventing stress that could delay blooms.
Quick Facts — Your Key Numbers
- Light: 6–8 hours bright indirect sunlight (~10,000–20,000 lux).
- Watering: Thoroughly once weekly; ensure top 2–3 cm of medium is dry before watering.
- Humidity: Maintain between 50–70% RH.
- Temperature: Stable 18–24°C during the day; above 13°C at night.
- Fertilizer: Balanced 20-20-20 diluted 1:10, every 3–4 weeks.
- Repotting: Only when substrate breaks down or roots overflow, roughly every 12–24 months.
Checklist for Success
- Provide bright but indirect light; rotate your plant weekly.
- Ensure excellent drainage; never allow water to pool inside or beneath the pot.
- Keep relative humidity steady and maintain air circulation to discourage pests and diseases.
- Apply light, regular fertilization; flush substrate monthly to avoid salt buildup.
- Regularly inspect roots, keeping healthy ones green, firm, and well-aerated.
- Prune flower spikes only when they’re completely dry or brown.
- Repot minimally, respecting your orchid’s signs instead of habit.
Continue Reading: How to Prune Your Rubber Plant for New Growth
Final Words of Advice
Orchid care isn’t a race; it’s a dance of consistency, observation, and gentle adjustment. Remember that these plants respond not to perfection but to your attentive presence. Every orchid teaches patience — it rewards quiet observation with spectacular blooms that feel like a personal triumph. Take comfort that even seasoned growers don’t get it right every time; learning comes with watching carefully, feeling the warmth of your environment, and tuning in to your plant’s subtle signals. Your commitment will turn your orchid from a delicate mystery into a loyal companion, lighting your home with beauty season after season.

Hi there — I’m Kyla, the creator behind Kyla Garden Tips 🌿
I’ve always been passionate about plants, flowers, and the simple joy that comes from growing something beautiful. What started as a small balcony garden has turned into a love for helping others create their own green spaces — no matter how big or small.