
Introduction
Spider plants (Chlorophytum comosum) have earned their spot as beloved indoor companions thanks to their vibrant, arching leaves and resilient nature. Caring for them well ensures they stay lush, propagate easily, and even rebloom with small white flowers. You don’t need a greenhouse or advanced skills to grow these beauties; what matters most is consistent attention—especially to their soil requirements. This article will guide you step-by-step through preparing the ideal soil mix for your spider plant, tailored especially for home or balcony settings. Together, we’ll guarantee yours thrives, enhancing your living space with its elegant foliage.
Preparing the Perfect Setup
Before planting, it’s essential to assemble the right materials and environment for your spider plant’s best start. The pot, soil, light, temperature, humidity, and fertilizer all need to work together harmoniously to create an inviting habitat for healthy growth.
- Pot: Choose a container with a diameter about 2.5 to 5 cm larger than the current root ball, ideally 15–20 cm for most spider plants in home settings. Ensure it has multiple drain holes; spider plants absolutely require excellent drainage to avoid soggy roots. Avoid glazed ceramic pots that retain moisture excessively. If your balcony or room tends to get hot, opt for unglazed terracotta or clay pots—they naturally keep the roots cooler by allowing moisture to evaporate more quickly.
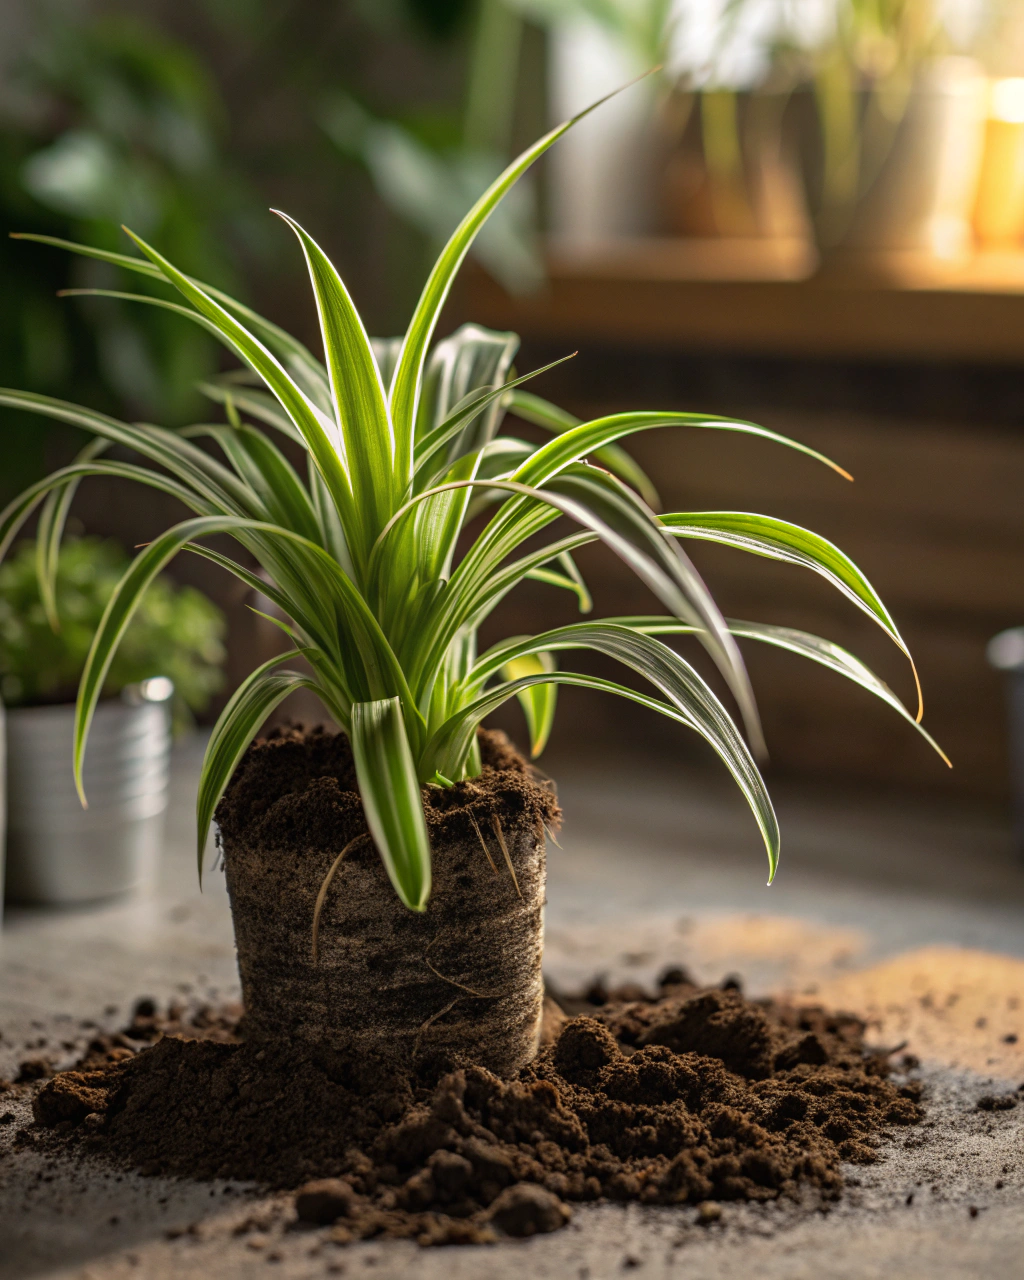
- Substrate: Spider plants thrive in a soil mix that balances moisture retention and aeration. Create a custom blend using 2 parts high-quality potting soil, 1 part perlite or coarse sand, and 1 part peat moss or coconut coir for moisture retention. This mix remains light, airy, and drains well, preventing root suffocation while holding enough water. Keep the pH around 6.0–7.0—slightly acidic to neutral—which is ideal for nutrient absorption.
- Light: Your spider plant enjoys bright, indirect light for about 6–8 hours daily—around 10,000–20,000 lux. A spot near an east or north-facing window is ideal. If direct sun reaches the leaves, filter it with a sheer curtain to stop edges from scorching. On a balcony, use a light fabric screen to diffuse harsher afternoon sun.
- Humidity: Aim for a relative humidity between 50–70%. Spider plants naturally benefit from moderately humid conditions but tolerate average room humidity. To boost humidity, place a water-filled tray with pebbles below the pot or group your plant with other houseplants. A small humidifier on dry days can also help the leaves stay vibrant.
- Temperature: Maintain daytime temperatures between 18–24°C (65–75°F), with nights not falling below 13°C (55°F). Avoid placing your plant near radiators, open windows, or vents that cause extremes of cold or heat, which stress the roots and foliage.
- Fertilizer: Use a balanced liquid fertilizer with an N-P-K of 20-20-20, diluted to one-tenth strength (1:10 ratio). Fertilize your spider plant every 3–4 weeks during the growing season (spring through early autumn). For a natural option, consider compost tea or worm castings dilute similarly, encouraging steady, healthy growth without chemical overload.
Check Also: Simple Tips to Keep Your Bamboo Palm Thriving
Step-by-Step Care Routine
1) Understanding the Plant’s Cycle
Spider plants go through active growing phases during spring and summer, marked by new leaf shoots and the development of “spiderettes” (baby plants). In autumn and winter, they slow down into a rest period, conserving energy and focusing on root development. Recognizing this cycle helps you adjust care accordingly.
I once mistakenly treated my spider plant as though it were constantly growing, watering it heavily in winter. The leaves turned droopy, and the soil stayed soggy for weeks. I learned to taper watering and fertilizing in these colder months, allowing the plant to recharge for spring. This subtle shift revived its vigor and encouraged a robust bloom cycle the following year.
2) The Right Pot and Substrate
Start by inspecting your spider plant’s roots annually. Gently lift the plant from its pot — if you see roots circling tightly along the perimeter or poking out of the drainage holes, it’s time to repot. Also, check the substrate’s smell and texture; an earthy, fresh scent paired with fluffy, light soil confirms it’s still healthy. Delays in repotting when soil has compacted or decomposed lead to oxygen-poor roots and poor growth.
The ideal substrate for spider plants feels soft yet crumbly—never heavy or muddy. Using dense, commercial potting soil alone can trap water, inviting root rot. Mixing in perlite or coarse sand adds airflow within the medium, mimicking spider plants’ natural preference for well-drained soils. If you want to include organic matter, peat moss or coconut coir provides water retention without compaction. Avoid overly rich soil; spider plants prefer moderate nutrition for steady development.
3) Watering the Smart Way
Watering spider plants should feel like a rhythmic dance—you want to feed without drowning. Water thoroughly once a week, allowing water to flow freely through the drainage holes. Use lukewarm, soft water, as cold water can shock roots, and chlorine-heavy tap water may leave buildup over time. Rainwater or filtered water is even better if available.
Before watering again, gently press your finger into the top 2–3 cm of soil to check for dryness. If it still feels moist, hold off. The “weight test” is an excellent additional guide: lift the pot to sense its heft—you’ll notice it feels lighter once the substrate has dried enough. Adjust frequency with seasonal changes; reduce watering in winter to prevent root rot and increase slightly in dry, hot summer months.
4) Light, Temperature, and Humidity Balance
Place your spider plant near an east-facing window for morning sun or a bright location shielded from direct rays. This positioning provides roughly 6–8 hours of bright indirect light daily, essential for vibrant green leaves and those charming variegations. If natural light is limited, a grow light set to deliver around 10,000–20,000 lux for the same duration works well.
Maintain room temperatures between 18–24°C in daytime, avoiding drafts or sudden temperature drops under 13°C. Use a hygrometer near your plant to track humidity, aiming for about 60%. If leaves develop yellow tips or crispy edges, it’s a sign of humidity stress or erratic watering—boost your humidity following the techniques mentioned (trays, grouping) and adjust water accordingly.
Remember to rotate your plant every week to ensure even exposure and balanced growth. You’ll soon notice the leaves stretch uniformly, and your plant maintains an elegant, symmetrical shape.
5) Feeding and Fertilization
Fertilizing spider plants provides the essential nutrients to keep their vibrant foliage lush and encourages steady propagation. During the growing season, use a balanced liquid fertilizer with a formula of 20-20-20 diluted at a 1:10 ratio, applying every 3–4 weeks. Feeding too frequently or with too strong a mix results in salt buildup, visible as a white crust on the soil surface and leaf edges crisping prematurely.
Signs of nutrient deficiency include pale, dull leaves or thin new shoots, while over-fertilizing can cause brown leaf margins and leaf drop. To prevent buildup, flush the soil once monthly with plenty of clear, lukewarm water, letting it fully drain. Pause fertilization during winter months when the plant’s growth naturally slows.
6) Pruning, Cleaning, and Post-Bloom Maintenance
Spider plants often produce small white flowers and baby spiderettes on long stems. Once flowers fade and stems turn brown, it’s time to prune. Using sterilized scissors or pruning shears, cut flower spikes about 1 cm above the base to avoid injuring healthy tissue. If the spike is still green and healthy, wait for it to brown before trimming to not interrupt potential reblooming.
Every two weeks or so, softly wipe leaves with a damp, soft cloth to remove dust and debris. This not only enhances photosynthesis but keeps your spider plant looking bright and fresh. Always sanitize your pruning tools with rubbing alcohol before and after use to prevent transferring any pests or diseases.
As I like to say, “The secret isn’t doing more—it’s observing better.” Paying close attention to leaf color, firmness, and general plant posture can tell you exactly when to act, often preventing bigger issues.
7) Repotting — Only If Needed
Repotting spares your plant stress but keeps it thriving when done right. Don’t repot by habit; only do so if you notice tightly bound roots circling the pot, broken-down soil unable to retain airflow, or water pooling and draining poorly. Early signs might include sluggish growth or roots emerging from drainage holes.
When repotting, gently remove the plant from its pot, shaking off excess soil without damaging roots. Trim any blackened, mushy roots with sterilized shears. Place the plant into a pot just 2–5 cm wider in diameter than the previous one to prevent overwhelming the root ball. Fill with fresh, airy substrate and water lightly to settle the soil.
Return your spider plant to its usual spot, keeping it away from direct sunlight for a few days as it adjusts.
8) Propagation and Renewal (If Applicable)
Spider plants are famously easy to propagate, primarily through their spiderettes—those charming “babies” that dangle on long stems. When these small plants develop roots about 3–5 cm long, you can separate them gently from the mother plant and pot them individually in the same substrate mix.
Place newly potted spiderettes in a warm spot with indirect light and maintain humidity around 50–70% until well established. Keep temperatures between 18–24°C and water lightly, making sure the soil remains moist but not soggy. This form of propagation refreshes your plant collection without much effort.
Common Problems and How to Fix Them
- Yellow leaves: Often caused by overwatering or insufficient light. Increase your plant’s exposure to 6–8 hours of bright indirect light and ensure soil dries in the top 2–3 cm before watering again.
- Brown tips: Usually due to dry air or inconsistent watering. Raise humidity to 60–70% RH using trays, grouping, or a humidifier and maintain regular watering.
- No blooms: Caused by lack of light or nutrients. Move your plant closer to a bright window and switch to a bloom-boosting fertilizer with an N-P-K ratio of 10-30-20 during spring and summer.
- Root rot: Results from a soggy substrate that lacks drainage. Immediately unpot, trim off black or mushy roots, replace the soil with a fresh airy mix, and reduce watering frequency.
- Pests: Mealybugs and spider mites can appear on foliage. Treat weekly with neem oil or insecticidal soap, and improve airflow by avoiding overcrowded placements.
Seasonal Adjustments
Seasonal changes call for shifts in how you care for your spider plant. In summer, raise humidity by misting more often or adding humidity trays, and water more frequently since warmer temperatures speed up soil drying. During winter, reduce watering to approximately every 10–14 days, pause fertilization, and keep the plant away from cold drafts or heaters. These small tweaks reassure your spider plant through dormancy and prepare it to bounce back strongly each spring.
Quick Facts — Your Key Numbers
- Light: 6–8 hours bright indirect light (10,000–20,000 lux).
- Watering: Once weekly; soil’s top 2–3 cm dry before watering.
- Humidity: 50–70% relative humidity.
- Temperature: 18–24°C day, above 13°C at night.
- Fertilizer: 20-20-20 balanced liquid fertilizer, diluted at 1:10, every 3–4 weeks.
- Repotting: Every 12–24 months or when roots crowd and substrate breaks down.
Checklist for Success
- Place in bright but indirect light; rotate every week.
- Use pots with drainage holes; never allow water to pool underneath roots.
- Maintain steady humidity between 50–70%; ensure good air circulation.
- Fertilize lightly and regularly during active growth; flush soil monthly to avoid salt buildup.
- Observe roots during checks—healthy roots are firm and white-green, not mushy.
- Prune old flower stalks when they brown; keep leaves clean and dust-free.
- Repot only when substrate breaks down or roots overgrow, increasing pot size modestly (+2–5 cm).
Continue Reading: Caring for Snake Plants: Light and Water Balance
Final Words of Advice
With spider plants, success unfolds over time through your attentive, steady care rather than occasional bursts of attention. They respond generously to consistent watering, balanced light, and a soil mix that breathes just right beneath their roots. Every inch of observation strengthens your bond with your plant—decoding its subtle signals, adapting your care, and watching it flourish in your home or on your balcony. Remember, “Plants teach patience; they reward quiet observation.” Keep learning, stay curious, and you will enjoy the lush, lively presence of your spider plant for many seasons to come.

Hi there — I’m Kyla, the creator behind Kyla Garden Tips 🌿
I’ve always been passionate about plants, flowers, and the simple joy that comes from growing something beautiful. What started as a small balcony garden has turned into a love for helping others create their own green spaces — no matter how big or small.