
Why Grow Spinach in a Pot?
Spinach is one of those leafy greens that rewards you swiftly and consistently. Whether you have just a small balcony, a sunny windowsill, or a compact patio, you can proudly grow fresh, crisp spinach leaves year-round. It’s fast-growing, packed with nutrients, and so versatile in the kitchen—perfect for salads, sautés, or smoothies. Plus, when you grow it in pots, you can control the soil, moisture, and pests better than in the ground. I promise that with easy, clear steps and simple tweaks you’ll have fresh spinach on hand anytime you want. Trust me—you’ve got this.
Getting Ready — What You’ll Need
Before we get our hands dirty, let me walk you through what you’ll need. Having the right setup makes all the difference.
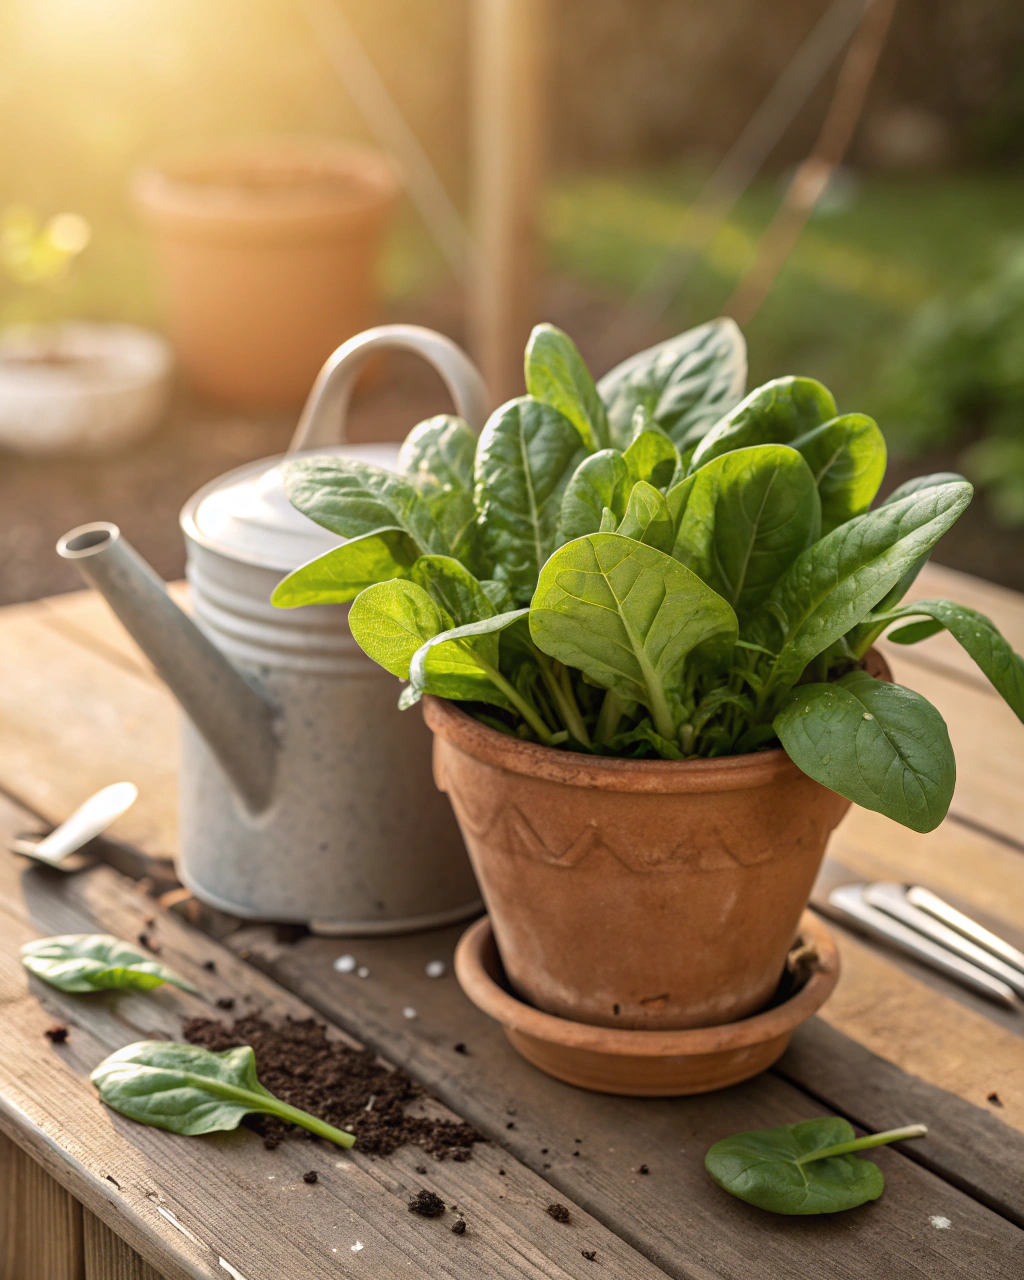
- Container: At least 30 cm (12 in) deep and 30 cm wide. This gives roots room to spread. Something with drainage holes is essential. Clay or terracotta pots are ideal for warmer climates since they breathe and keep roots cool, but plastic pots work fine and retain moisture better in dry zones.
- Soil mix: Your spinach roots want loose, fertile soil. Mix 70% loamy soil with 20% compost and 10% coarse sand or perlite for drainage. The result? Soil that holds moisture like a sponge but still drains well. (If you’re on a budget, use well-aged kitchen compost combined with garden soil and a handful of sand.)
- Fertilizer: Spinach is a leaf crop, so it prefers fertilizers low in nitrogen but balanced with phosphorus and potassium. An organic liquid seaweed or fish emulsion works well every 3–4 weeks. Slow-release pellet options also do the trick.
- Spinach Seeds: Choose varieties suited for container gardening like ‘Baby Leaf Savoy’ or ‘Space Spinach.’ These produce tender leaves and don’t bolt too quickly.
- Light: Spinach thrives in 6–8 hours of sunlight daily. If you can’t provide full sun, bright indirect light will do—though growth will slow a bit.
- Tools: A watering can with a fine rose, a small trowel or hand fork for soil prep, and a pair of scissors or garden shears for harvesting.
Step-by-Step — How to Grow in Pots
1. Preparing Your Pot
Start by washing your pot to remove algae or any disease spores from its previous occupant. Next, place a 2–3 cm (around 1 inch) layer of coarse gravel or broken pottery shards at the bottom to create a drainage layer. This prevents waterlogging, which spinach roots hate.
Fill the pot with your prepared soil mix—remember, a mix that feels like a well-wrung sponge is just right. If it’s too dry or dust-like, the soil won’t hold nutrients or moisture well. On the other hand, avoid compacting the soil too much; roots need to breathe and grow freely. Also, never forget to check for multiple drainage holes—without these, water will pool, and root rot becomes a real risk.
2. Sowing or Planting
Sow your spinach seeds about 0.5–1 cm deep. Planting too deep makes it hard for seedlings to break through. Space seeds roughly 5 cm apart to give each plant room to grow but still keep your pot dense enough for a bountiful harvest.
Spinach seeds prefer a soil temperature between 10–20°C (50–68°F) for strong germination. If seeds are dry or old, soak them in lukewarm water for about 4–6 hours before planting—this speeds up sprouting.
You’ll know the timing is right when the soil feels slightly warm to the touch, like a gentle handwarmer. The surface – gently pressed down but still soft – should hold moisture but not be soggy.
Pro tip: Cover the pot lightly with a thin layer of straw mulch right after sowing. This keeps moisture stable and deters soil crusting, helping tiny sprouts push through more easily.
3. Watering and Sunlight
Spinach roots crave consistent moisture. Water deeply so the soil is moist down to the drainage layer—usually about 2–3 times per week during warm weather. Feel the soil’s top 2–3 cm: it should feel damp but not wet or muddy.
In hot or windy conditions, pots dry out faster. Group pots together to create a mini microclimate that holds humidity. Adding mulch—like dried leaves or straw—not only reduces evaporation but cools the roots gently under midday sun.
Spinach grows best in full sun but tolerates partial shade, especially in the afternoon. About 6–8 hours of sunlight a day is ideal. If you’re gardening in a cloudier zone, extend watering slightly but don’t overdo it or you’ll risk soggy roots.
4. Feeding and Maintenance
Fertilize every 3–4 weeks with a balanced, low-nitrogen feed to keep leaves flavorful and tender. Too much nitrogen pushes rapid leaf growth but can reduce taste and invite pests. Always follow the package instructions; less is more here.
Thin seedlings once they have two sets of true leaves, selecting the healthiest plants and snipping weaker ones at soil level. This gives remaining plants necessary space and nutrients to flourish.
Occasionally break up the soil surface gently with your fingers or a small fork to improve aeration—compacted soil suffocates roots and invites fungal issues.
“The secret is not more work — it’s regular care and observation.” When you check your pots each day, you’ll spot problems while they’re small and fix them before they escalate.
5. Troubleshooting While They Grow
Spinach can show a range of issues, but most are simple to fix:
- Yellow leaves: Often caused by excess nitrogen—switch to a fertilizer higher in phosphorus, or add organic compost.
- Stunted growth: Usually low light or poor drainage—move the pot to a sunnier spot, check holes.
- Wilting: May mean underwatering or root rot—feel the soil; dry soil means water, soggy soil means improve drainage.
- Leaf holes or pests: Aphids, slugs, or caterpillars love spinach. Try handpicking or a gentle neem oil spray.
6. Harvesting
Your spinach will be ready to harvest between 70–90 days after sowing. Look for leaves that are a vibrant, deep green with a slightly crinkled texture (if you planted savoy types) or smooth and tender if you selected flat-leaf varieties. Leaves will feel firm, not floppy, and snap slightly when pinched or cut.
Reduce watering the week before harvest to concentrate flavors and firm up leaves. When picking, snip outer leaves close to their base, leaving inner leaves to continue growing. Your first handful should feel cool, fresh, and slightly earthy.
Store harvested leaves in a sealed plastic bag or container, at about 4–7°C (39–45°F). They’ll stay fresh for up to 2 weeks if kept moist but not wet. If you want to preserve longer, blanch quickly and freeze, or dry if you prefer dried greens.
Extra Tips for Perfect Results
- Plant companion herbs such as chives, parsley, or mint nearby to deter pests and improve spinach health.
- Rotate pots seasonally to prevent soil fatigue and reduce disease build-up.
- Mulch with straw or fallen leaves to retain soil moisture and maintain steady temperatures.
- Use collected rainwater for watering—tap water can build up salts that harden soil over time.
- For windy spots, cluster pots tightly for stability and to share humidity between plants.
- During very hot summer afternoons, add a light fabric shade to protect leaves from scorching.
Common Mistakes and How to Fix Them
- Overwatering: If leaves turn yellow and roots stay soft, allow the top 2 cm of soil to dry fully before watering again.
- Weak growth: Too little light? Move your pot to a spot with more direct sun or supplement with a grow light.
- Yellow leaves: Usually from excess nitrogen in fertilizer—switch to one with higher phosphorus content.
- Poor germination: If seeds don’t sprout well, they may have been planted too deep — keep depth to 0.5–1 cm.
- Misshapen roots or slow growth: Soil too compacted — mix in more coarse sand or perlite to keep it light and airy.
Harvest and Storage
Harvest leaves gently by cutting or pinching just above the soil so roots stay undisturbed. This way, spinach regrows several times from the same planting. Handle leaves carefully—they bruise easily.
Store spinach in a cool, dark place at about 4–7°C (39–45°F) with high humidity (90–95%) to retain freshness. Leafy greens kept this way typically last up to 2 weeks. For longer storage:
- Pickling: Spinach can be blanched and pickled for use in savory dishes.
- Drying: Dry leaves slowly to use as a tea or seasoning.
- Freezing: Blanch leaves briefly in boiling water (1–2 minutes), cool fast, and freeze in airtight bags.
Remember to save seeds once your plants flower and bolt, letting seed heads dry on the plant before harvesting. Clean and store seeds in a cool, dry place for next season’s planting.
What Success Looks Like
When you pull your first firm, fragrant spinach leaf from its pot, you’ll smell the fresh earthiness, feel the coolness of the leaf, and see the intense green vibrancy. Your yield from a 30 cm (12 in) pot can reach 1–2 kg (2–4 lb) per growing cycle if cared for well, enough to supply weekly salads or meals.
Growing spinach in pots teaches you patience, attentiveness, and respect for nature’s rhythms. You’ll find joy in each leaf’s unfolding, and satisfaction that you’re nourishing yourself with hands-on care.
Mini Recap — Your Success Checklist
- Pot depth: Minimum 30 cm (12 in)
- Soil mix: 70% loam, 20% compost, 10% sand
- Watering: 2–3 times per week, adjusted by touch
- Sunlight: 6–8 hours per day
- Fertilizer: Every 3–4 weeks, low nitrogen
- Harvest: After 70–90 days
Closing Reflection
Remember, gardening is less about perfection and more about consistent, compassionate attention. Every plant you grow teaches you something new. Don’t rush it—observe, adjust, and enjoy the process. That is what truly makes you a gardener.

Hi there — I’m Kyla, the creator behind Kyla Garden Tips 🌿
I’ve always been passionate about plants, flowers, and the simple joy that comes from growing something beautiful. What started as a small balcony garden has turned into a love for helping others create their own green spaces — no matter how big or small.