
Mustard Greens in Pots: Fast-Growing and Flavorful
Growing mustard greens in pots is one of the most rewarding ways to enjoy fresh, peppery greens right on your balcony or patio. You don’t need a sprawling garden to succeed. With just a few simple steps, you can harvest vibrant, tender leaves in less than three months. Mustard greens grow quickly, thrive in containers, and bring bold, zesty flavor to salads, stir-fries, or sandwiches. If you have limited space or want to try something new, mustard greens are a perfect choice. Follow this guide, and you’ll gain confidence, practical knowledge, and simple, reliable methods to grow healthy, productive mustard greens—even if you’re a beginner gardener.
Getting Ready — What You’ll Need
To grow mustard greens in pots successfully, gather these essentials:
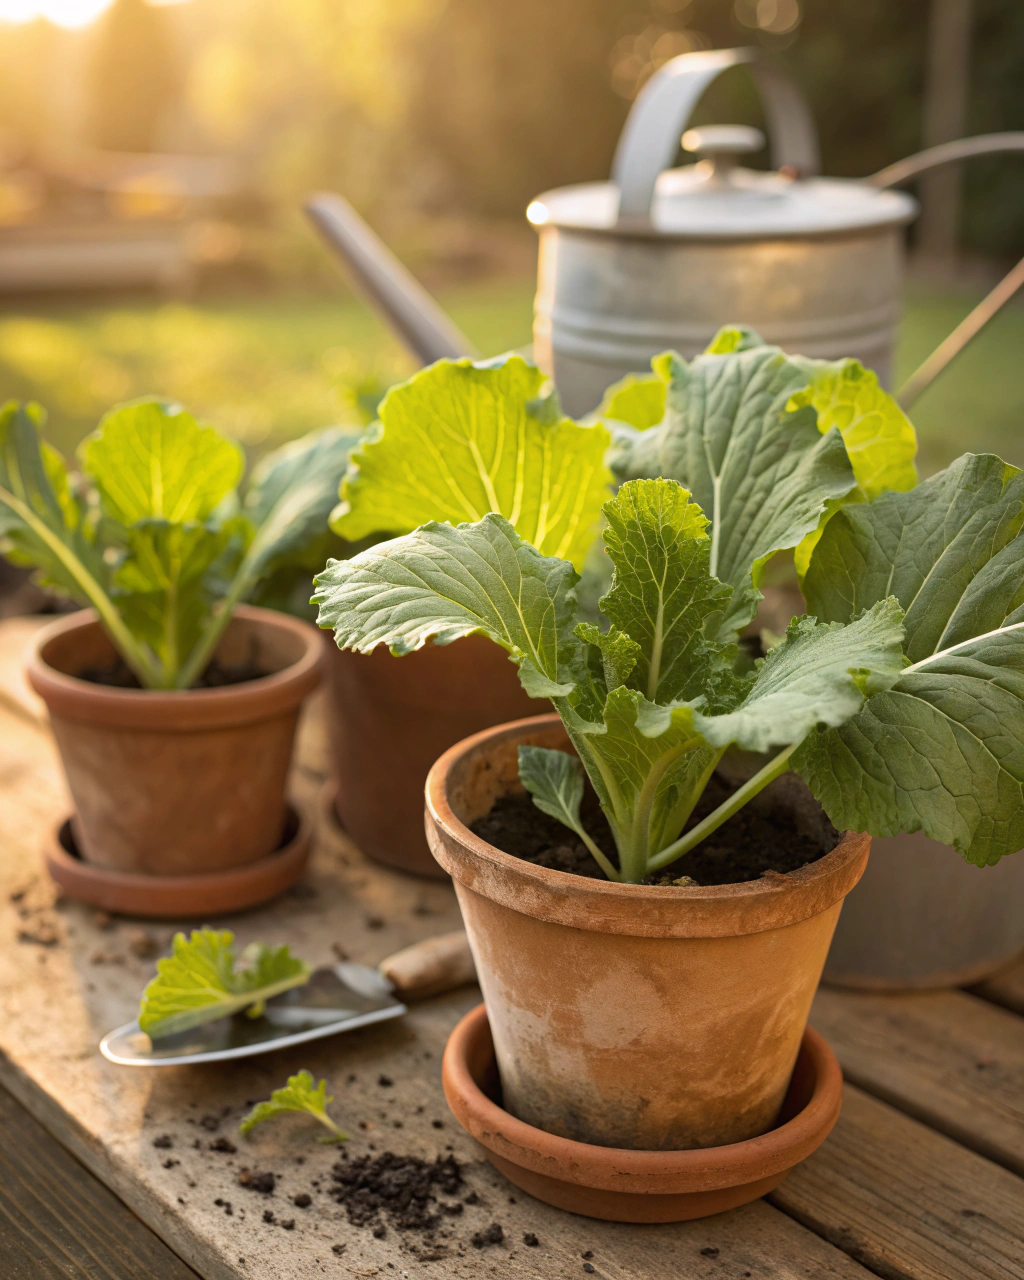
- Container: At least 30 cm (12 inches) deep and 25–30 cm (10–12 inches) wide to give roots enough room. (Clay pots are great if you live in a hot climate because they keep the roots cooler.)
- Drainage holes: Ensure your pot has at least 3–4 holes at the bottom for proper drainage to prevent root rot.
- Soil: Use a well-draining mix with 70% loam, 20% compost, and 10% coarse sand or perlite for good aeration. Compost supplies nutrients and retains moisture, while sand prevents compacting.
- Mustard greens seeds: Choose varieties suited for containers such as ‘Red Giant’, ‘Southern Giant Curled’, or ‘Golden Frills’. These mature fast and produce flavorful, crinkled leaves.
- Fertilizer: A balanced, low-nitrogen fertilizer like a 5-10-10 NPK formula supports healthy leaf growth. Organic options such as worm castings or liquid seaweed are excellent.
- Watering can or gentle hose spray: To keep soil moist without harsh disturbance.
- Light: A position that provides 6–8 hours of direct sunlight daily — essential for strong, healthy plants.
- Garden gloves: For comfort when handling soil.
- Small trowel or scoop: For mixing soil and planting seeds.
Eco-friendly tip: Save money and reduce waste by using recycled containers with sufficient drainage or making your own soil mix from garden compost, leaf mold, and coarse sand.
Step-by-Step — How to Grow in Pots
1. Preparing Your Pot
Start by thoroughly cleaning your container with warm water and a mild soap solution to remove any residues or harmful pathogens. This simple step prevents disease in young plants. Next, place a drainage layer of about 2–3 cm (1 inch) of small stones, broken pottery, or coarse gravel at the bottom. This layer helps prevent waterlogging by keeping drainage holes clear. Then, fill your pot with the prepared soil mix — that nutrient-balanced blend of 70% loam, 20% compost, and 10% sand or perlite.
The soil should be moist but not soaking wet — imagine a sponge wrung out so water just clings to it. Avoid pressing the soil too hard; compacted soil blocks air and restricts root growth. The ideal pH for mustard greens is slightly acidic to neutral, around 6.0–7.5. You can test this with inexpensive pH strips if you like, but generally good garden loam fits this range.
Common mistake: Using containers without drainage holes or packing the soil too tight leads to root rot and stunted growth.
2. Sowing or Planting
To sow your mustard seeds, make shallow furrows or holes about 0.5 to 1 cm (¼ inch to ⅓ inch) deep. Space seeds about 5 cm (2 inches) apart if you want to thin later, or sow more densely if you plan to harvest baby greens (“cut-and-come-again” method). Mustard germinates best between 10°C and 25°C (50°F to 77°F). If your area is colder, consider starting seeds indoors or wait for warmer weather.
Before planting, soak seeds in water for 6 hours to speed germination, especially if seeds are older. You’ll notice droplet-skinned seeds swell slightly and feel softer. Plant them into lightly moist soil, cover gently, and press down so contact is firm but not compacted.
Pro tip: Cover your pot with a light fabric or plastic wrap to retain moisture until seeds sprout — this usually takes 4 to 7 days. Remove the cover once seedlings emerge to prevent mold.
3. Watering and Sunlight
Mustard greens like consistently moist soil but hate soggy roots. Water your pot deeply after sowing until you see moisture dripping from drainage holes. Then, water again about 2–3 times per week during warm weather or when the top 2 cm (¾ inch) of soil feels dry. Use your finger to check moisture — the soil should feel cool and slightly damp, not dry or mushy.
If you live in a hot, dry, or windy location, group your pots close together to share humidity, or mulch the soil surface to reduce evaporation. Avoid harsh midday sun by providing a shade fabric from 12 pm to 3 pm during peak summer to prevent leaf scorch.
Place your container where it receives 6 to 8 hours of direct sunlight daily. Adequate light promotes robust, fast growth and strong flavor. In cloudy zones, supplement with a grow light or relocate pots to the brightest window available.
4. Feeding and Maintenance
About 3 to 4 weeks after germination, start feeding your mustard greens every month with a balanced, low-nitrogen fertilizer. High nitrogen encourages leaf growth but can lead to leggy plants and poor flavor, so favor fertilizers higher in phosphorus and potassium. Organic liquid seaweed or fish emulsion works well.
Thin seedlings to 10–15 cm (4–6 inches) apart when plants reach about 5 cm tall to give ample space and air circulation. This thinning also improves flavor and leaf texture. Pinch off any yellowing or damaged leaves promptly.
Check soil aeration by gently loosening the surface every few weeks. Compact soil suffocates roots and slows growth. Avoid overmulching—just a thin layer of organic material is enough.
Here’s a favorite quote from my experience: “The secret is not more work — it’s regular care and observation.” A few minutes inspecting your plants each day saves hours of trouble later.
5. Troubleshooting While They Grow
Keep an eye out for common problems to catch them early:
- Yellow leaves: Often caused by excess nitrogen or waterlogged soil. Switch to a fertilizer higher in phosphorus, and ensure drainage holes aren’t blocked.
- Stunted growth: Usually lack of light or nutrients. Move to a sunnier place and feed monthly.
- Aphids or flea beetles: Spray gently with diluted neem oil or use insecticidal soap. Introducing companion plants like marigolds can deter pests.
- Brittle leaves: May indicate underwatering or extreme heat. Increase watering and provide partial midday shade.
- Soil compacted at root zone: Causes misshapen roots. Add sand or perlite at next re-potting to improve texture.
6. Harvesting
Your mustard greens will be ready to pick in about 70 to 90 days, depending on variety and growing conditions. You’ll notice full-sized leaves with a rich green or deep reddish-purple color, firm texture, and that characteristic sharp, spicy aroma. Younger leaves harvested earlier (at 4–6 weeks) have a milder, fresh taste perfect for salads. For slightly stronger flavor and bigger yields, wait until leaves reach about 15–20 cm (6–8 inches) long.
To harvest, either snip outer leaves 2–3 cm above the base or pull entire plants gently by the stem if you have room for replacement. When pulling roots, the soil should feel loose, and you’ll hear a slight “pop” as the plant frees from the soil — that silence afterward feels like victory.
Reduce watering during the last week before harvest to intensify flavor.
Store your mustard greens wrapped in a damp cloth inside the fridge at 4–7°C (39–45°F). They last for up to 2 weeks. For longer preservation, blanch and freeze leaves or try pickling them. Drying the leaves also concentrates their flavor.
Extra Tips for Perfect Results
- Grow mustard greens alongside radishes, lettuce, or spinach to maximize space and discourage pests.
- Rotate your pots to a different spot or use fresh soil each season to prevent nutrient depletion and disease buildup.
- Apply a mulch of straw or shredded leaves around the base to retain moisture and moderate soil temperature.
- Where possible, water with collected rainwater; tap water can cause soil to harden over time due to minerals.
- If you face persistent strong winds, cluster pots closely to shield tender leaves and share humidity.
- Under very hot sun, provide a thin fabric shade from midday to protect the delicate foliage.
Common Mistakes and How to Fix Them
- Overwatering: If roots feel soft and smells sour, stop watering until the top 2 cm of soil dries. Improve drainage or add more holes.
- Weak growth: Often from insufficient light. Move your pot to a sunnier spot with 6–8 hours of sunlight.
- Yellow leaves: Caused by too much nitrogen fertilizer. Switch to one higher in phosphorus and potassium.
- Poor germination: Seeds planted too deep (> 1 cm) struggle to reach the surface—keep planting shallow.
- Misshapen or stunted roots: Soil too compacted. Add coarse sand or perlite for better airflow and texture.
Harvest and Storage
Harvest mustard greens by cutting the outer leaves 2–3 cm above soil level or pulling plants gently to retain root health if you plan to leave them in the pot for a second harvest cycle. Avoid bruising leaves during handling to maintain crisp texture and flavor.
Store harvested greens wrapped loosely in a damp cloth or paper towel, placed inside a perforated plastic bag to maintain humidity around 4–7°C (39–45°F). Properly stored, they keep fresh for up to 2 weeks. For longer storage, blanch leaves for 2 minutes, cool quickly, and freeze in airtight bags.
Preserve excess mustard greens by pickling in vinegar brine or drying them in a low-temperature dehydrator; this enhances their natural mustard pungency.
Don’t forget to save seeds for the next season: wait until flowers form seed pods, allow pods to dry on the plant, then harvest and gently crush pods to release seeds. Store seeds in a cool, dry place inside a sealed container.
What Success Looks Like
When you finally pull your first firm, fragrant bunch of mustard greens from your pot, you’ll notice the fresh, peppery aroma, the deep green or crisp red shimmer of the leaves, and feel their slight crunch between your fingers. Expect a yield of about 1–2 kg (2–4 lb) per 30 cm pot by full maturity—a remarkable return from such a small space.
Each harvest reminds you that success in gardening isn’t magic but a quiet accomplishment earned by consistent care and attention. Your mustard greens will add flavor, texture, and a healthy boost to your meals while reconnecting you with nature’s cycles.
Mini Recap — Your Success Checklist
- Pot depth: Minimum 30 cm (12 inches).
- Soil mix: 70% loam, 20% compost, 10% sand.
- Watering: 2–3 times per week, adjust by soil moisture.
- Sunlight: 6–8 hours daily.
- Fertilizer: Every 3–4 weeks, low nitrogen formula.
- Harvest: 70–90 days after sowing.
Closing Reflection
Remember, every gardener has their own rhythm. Success doesn’t come from perfection but from small, consistent acts—checking moisture, noticing leaf color, and adjusting care. Each pot of mustard greens you nurture teaches you about patience, observation, and connection with the earth. Take your time, enjoy the process, and savor the rich flavors and satisfaction that only comes from growing your own food. That’s the true reward of gardening.

Hi there — I’m Kyla, the creator behind Kyla Garden Tips 🌿
I’ve always been passionate about plants, flowers, and the simple joy that comes from growing something beautiful. What started as a small balcony garden has turned into a love for helping others create their own green spaces — no matter how big or small.