
Introduction
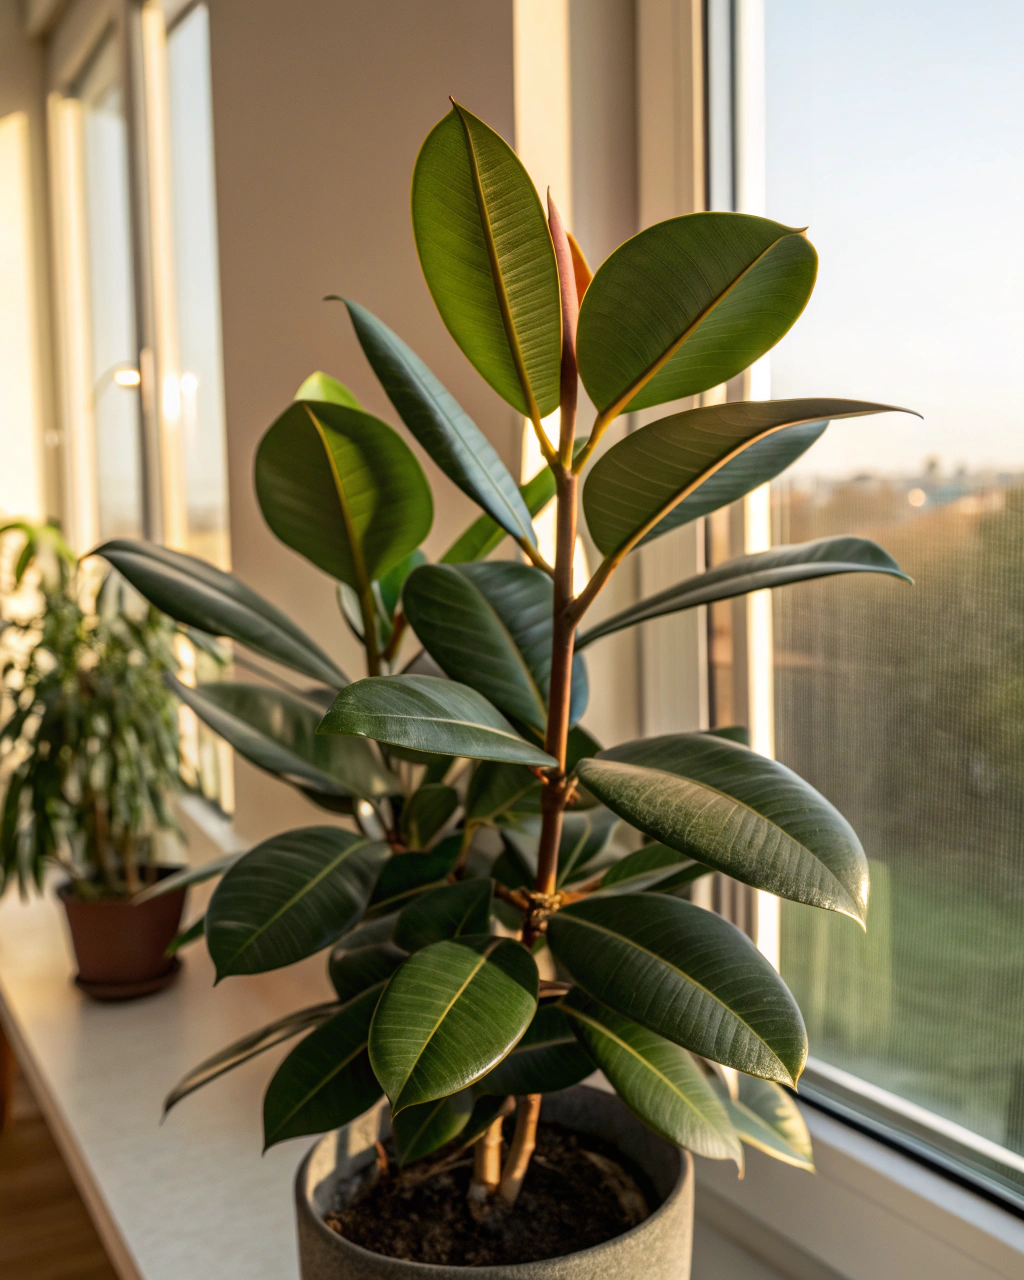
The rubber plant (Ficus elastica) is an elegant and resilient addition to any indoor garden. Its glossy, dark green leaves bring life to your space, and with the right care, it can grow into a striking focal point for your home or balcony. Pruning is an essential step to encourage new growth, improve shape, and maintain overall plant health. Don’t worry—this doesn’t require a greenhouse or specialized equipment. With regular attention, smart pruning, and careful observation, you’ll see a revitalized plant that responds beautifully to your care.
Preparing the Perfect Setup
Before grabbing your pruning shears, it’s important to set your rubber plant up for success. This starts with the right environment, tools, and materials. A well-chosen pot, carefully composed substrate, and balanced light and humidity conditions create the foundation for vigorous growth.
- Pot: Choose a container that fits your plant’s current root system comfortably, usually around 2–5 cm larger in diameter than the existing pot. Ensure it has adequate drainage holes—this prevents water from pooling and causing root rot. Avoid plastic pots that retain too much heat; if your home gets warm, consider clay or terracotta pots which help keep roots cool and aerated.
- Substrate: Rubber plants thrive in a well-draining, airy mix. A popular blend is 50% high-quality potting soil, 25% perlite or pumice for drainage, and 25% orchid bark or coarse peat moss to maintain a loose structure. The ideal pH range falls between 5.5 and 6.5, mildly acidic to neutral, ensuring nutrient availability without stress.
- Light: Place your plant where it receives bright, indirect light for about 6–8 hours daily, equaling roughly 10,000–20,000 lux. Direct sun can scorch the leaves, so a sheer curtain or slight shading is beneficial during peak daylight hours.
- Humidity: Rubber plants favor moderate humidity levels around 50–70%. Use pebble trays with water, group plants together, or run a humidifier to maintain this range, especially in heated indoor environments which tend to dry the air.
- Temperature: Keep daytime temperatures between 18–24°C (65–75°F) for optimal growth, with nighttime lows not dipping below 13°C (55°F). Avoid cold drafts or sudden temperature drops, as these can shock your plant.
- Fertilizer: Feeding your rubber plant with a balanced liquid fertilizer with a ratio of 20-20-20, diluted 1:10 in water, every 3–4 weeks during the growing season will promote healthy foliage and new shoots. For an eco-friendly option, compost tea or diluted fish emulsion can be effective alternatives.
Having these elements dialed in before pruning ensures your rubber plant has the best possible chance to bounce back with fresh, vigorous growth.
Read More: The Right Temperature for Thriving Orchids
Step-by-Step Care Routine
1) Understanding the Plant’s Cycle
Your rubber plant follows a natural rhythm of growth and rest, generally speeding up during the warmer months and slowing down as daylight shortens in fall and winter. During active growth, it produces new leaves, stems, and increases its overall size. In contrast, the rest phase prioritizes energy conservation with minimal outward growth. Recognizing these phases is crucial; you don’t want to prune aggressively during rest, as it can stress the plant.
Early on in my experience with rubber plants, I once pruned heavily in late autumn, hoping to encourage fresh growth before winter. Instead, the plant slowed dramatically, leaving me with bare branches for months. From then on, I learned to align pruning with the plant’s active season—spring to early summer—a window when the plant can recover quickly and push new shoots.
2) The Right Pot and Substrate
Before pruning, assess whether your plant’s pot and soil are suitable. Carefully remove the plant to inspect the roots. Healthy roots will appear thick, firm, and white or pale green. If you notice roots circling the pot densely or pushing out of drainage holes, it’s time to consider repotting during the upcoming growth cycle.
The substrate should feel light and fluffy, allowing air and water to filter without becoming compacted. Avoid dense potting soils or heavy garden earth—which can suffocate roots and encourage rot. Sometimes the mix breaks down over time, smelling sour or feeling soggy; these are clear signs to refresh your substrate.
Remember, rubber plants don’t appreciate frequent repotting. Sticking to a routine of every 12 to 24 months or only when necessary sets your plant up for long-term health.
3) Watering the Smart Way
Overwatering is one of the most common pitfalls. Water your rubber plant deeply but infrequently, aiming for roughly once a week or when the top 2–3 cm of soil dries out. Before watering, feel the soil’s surface—if it still feels moist, hold off. Using lukewarm, soft water is preferable since cold water shocks the roots, and hard water can accumulate salts.
Water thoroughly so that excess streams freely from drainage holes, but never allow the pot to sit in standing water. This practice prevents root rot and encourages healthy root systems. In winter or during cool, less active periods, stretch watering intervals to every 10–14 days.
One helpful trick to gauge watering needs is the “weight test”: lift your potted plant before and after watering several times to familiarize yourself with how heavy a well-watered pot feels versus a dry one. This sensory approach helps keep watering precise and consistent.
4) Light, Temperature, and Humidity Balance
Light is your plant’s energy source, but balance is key. Aim for 6–8 hours of bright indirect light, ideally near an east-facing window where morning sun gently energizes leaves without scorching them. If natural light is limited, supplement with a full-spectrum grow light delivering between 10,000 and 20,000 lux.
Maintaining consistent room temperatures between 18 and 24°C supports steady metabolic function. Avoid placing your rubber plant near drafts, heating vents, or cold windows that can cause temperature fluctuations and leaf stress.
Humidity should hover around 60%. Dry indoor air can cause leaf edges to brown and crisp. Observe your plant’s leaves regularly—brown tips often signal that humidity is insufficient. To counter this, mist the leaves lightly or use humidity trays under the pot filled with pebbles and water, ensuring the pot doesn’t sit directly in water.
Rotate your rubber plant weekly to promote even growth. You’ll notice one side stretching toward the light if the rotation stops, leading to an unbalanced form. Regular rotation keeps your plant compact and symmetrical.
5) Feeding and Fertilization
Nutrition fuels growth, especially after pruning. Apply a balanced liquid fertilizer—commonly 20-20-20 N-P-K—diluted at a 1:10 ratio with water every 3–4 weeks during the growing season (spring through early autumn). This supports lush leaf development and encourages bushy, robust stems.
Withhold feeding during winter rest to prevent unused salts from accumulating. Signs of underfeeding include pale, yellowish leaves, while excess fertilization may manifest as a white crust on the soil surface and tip burn. To keep nutrient buildup in check, flush the substrate monthly by watering deeply with plain water, allowing excess to drain out thoroughly.
6) Pruning, Cleaning, and Post-Bloom Maintenance
Pruning your rubber plant is about encouraging fresh growth and improving airflow. Use sharp, clean pruning shears—sanitize blades with rubbing alcohol before cutting to prevent infection. When you prune, aim to cut just above a leaf node or branch junction; this is where new shoots will emerge.
Trim off any old, leggy stems or yellowing leaves. For thicker branches, cut about 1 cm above a healthy node. Yellow or brown stems that show no signs of life should be cut at the base to keep the plant vibrant. Remember, pruning stimulates lateral growth, thickening your plant’s shape and improving overall vigor.
Cleaning leaves every other week with a soft, damp cloth will remove dust that blocks sunlight and clogs pores. Run your hand over the surface—it should feel smooth and slightly waxy. Keeping leaves clean not only enhances appearance but ensures effective photosynthesis and respiration.
As I’ve often said, “The secret isn’t doing more — it’s observing better.” Watch your plant’s reactions after pruning—will you see new buds? Has the plant perked up after cleaning? This mindfulness helps make your care tailored and precise.
7) Repotting — Only If Needed
Repotting is a common source of stress for indoor plants and should be done only when necessary. Signs include roots tightly circling the pot, substrate breakdown (waterlogging or foul smell), or when your rubber plant’s growth has slowed unexpectedly. When you do repot, gently loosen the root ball to encourage outward growth, prune any dead roots, and plant into a slightly larger pot—always increasing the diameter by no more than 2–5 cm.
Choose a fresh substrate mix similar to your original blend to avoid shocking the roots. After repotting, water moderately and keep the plant out of direct sun for a few days to acclimate. Repotting during early spring, just before the growth phase, gives your rubber plant the best chance to recover swiftly.
8) Propagation and Renewal (If Applicable)
Propagating rubber plants is straightforward and rewarding. The simplest method is stem cuttings, done during the growing season to ensure faster rooting. Select a healthy, mature stem with at least two leaves. Cut just below a node, remove lower leaves, and place the cutting in water or moist soil with a rooting hormone optional. Keep the environment at a stable 18–24°C with 60% humidity until roots develop.
Another option is air layering, which involves wounding a stem, wrapping it with moist sphagnum moss, and waiting for roots to form before severing it to plant separately. This technique produces larger, more robust cuttings but requires patience.
Propagation isn’t necessary every year; it’s purely an option for renewing or expanding your collection. When your plant shows signs of slow growth or legginess, pruning combined with propagation can bring fresh life to your indoor landscape.
Common Problems and How to Fix Them
- Yellow leaves: Often caused by overwatering or insufficient light. Increase exposure to 6–8 hours of bright, indirect light. Allow the top soil to dry before watering again.
- Brown tips: Typically a sign of dry air. Raise humidity to around 60–70% with misting, humidifiers, or pebble trays.
- No blooms or new growth: Your plant may need more light or nutrients. Move it closer to a window if possible and consider switching to a bloom-promoting fertilizer with a ratio like 10-30-20 to encourage flowers and shoots.
- Root rot: Usually results from soggy substrate. Unpot the plant, trim away damaged roots, replace with fresh, well-draining substrate, and reduce watering frequency.
- Pests: Watch for common offenders such as spider mites, mealybugs, and scale. Treat weekly with neem oil or insecticidal soap. Enhance airflow around your plant to prevent infestations.
Seasonal Adjustments
Rubber plants thrive when their care aligns with seasonal shifts. During summer, increase watering frequency slightly and boost humidity to prevent leaf drying. The warmer temperatures and increased light encourage vigorous growth during this time.
Conversely, in winter, reduce watering intervals to approximately every 10–14 days, halt fertilizer applications, and protect your plant from chilly drafts or heating vents. These adjustments respect your rubber plant’s natural resting phase while preventing stress from overcare.
Consistent observation will teach you subtle cues your plant gives as it adjusts through the seasons. This awareness is your best tool to keep it thriving year-round.
Quick Facts — Your Key Numbers
- Light: 6–8 hours bright indirect light (roughly 10,000–20,000 lux).
- Watering: Thoroughly once weekly; watering when top 2–3 cm of soil is dry.
- Humidity: Maintain around 50–70% relative humidity.
- Temperature: Daytime between 18–24°C (65–75°F), never below 13°C (55°F) at night.
- Fertilizer: Balanced liquid 20-20-20, diluted 1:10, every 3–4 weeks in growing season.
- Repotting: As needed, typically every 12–24 months or when roots overflow.
Checklist for Success
- Provide bright but indirect light, rotating your plant weekly to promote even growth.
- Use pots with good drainage; never allow standing water under or inside the pot.
- Maintain stable humidity around 60% with proper air circulation.
- Feed lightly and consistently during spring to fall; flush soil monthly to prevent buildup.
- Observe roots regularly—healthy roots are firm, white, and spread without crowding.
- Prune selectively, cutting above nodes and removing dead or unhealthy stems.
- Only repot when absolutely necessary to reduce stress and preserve rooting balance.
Further Reading: Keeping Your ZZ Plant Healthy in Low Light
Final Words of Advice
Caring for your rubber plant is a practice in consistency and attentiveness, not perfection. Every plant has its own personality and pace—what your rubber plant needs today might evolve tomorrow. By simply watching how it responds to your pruning, watering, and feeding, you become a partner in its growth journey. Remember, “Every plant teaches patience—it rewards quiet observation with stunning new life and resilience.” With this mindset, your rubber plant will not only thrive but inspire you season after season. Keep nurturing, and enjoy the rich rewards your efforts will bring.

Hi there — I’m Kyla, the creator behind Kyla Garden Tips 🌿
I’ve always been passionate about plants, flowers, and the simple joy that comes from growing something beautiful. What started as a small balcony garden has turned into a love for helping others create their own green spaces — no matter how big or small.