
Why Grow Peas in Pots? Fresh, Sweet Pods at Your Fingertips
Growing peas in pots is one of the most rewarding experiences you can have, even if you only have a balcony or a small patch of sunny soil. You don’t need acres of garden space to enjoy the crisp, sweet crunch of freshly picked pods that burst with flavor. Peas are fast-growing, forgiving, and bring a fresh green vibrancy to your space. Plus, tending them is simple: you sow, water, and watch them flourish while learning a little patience and care. In this guide, I’ll walk you through every step — no guesswork — so you can enjoy a bountiful harvest of fresh peas, right where you live.
Getting Ready — What You’ll Need
Before we begin, gather these essentials to set yourself up for success. Having the right materials ensures your peas thrive and you avoid common frustrations.
- Container: A pot at least 30 cm (12 in) deep with drainage holes is essential. Peas like room for roots and don’t tolerate sitting in water. (If you’re in a hot climate, consider clay pots; they help keep the roots cool.)
- Soil: Use a well-draining mix of 70% loam or quality potting soil, 20% compost, and 10% coarse sand or perlite for aeration. This balance holds moisture but allows air in—perfect for pea roots.
- Seeds: Choose pea varieties suited for containers such as ‘Little Marvel,’ ‘Bush Sugar Snap,’ or ‘Tom Thumb.’ These are compact, productive, and flavorful.
- Fertilizer: Low nitrogen fertilizer (balanced or organic with phosphorus emphasis) to encourage flowering and pod production rather than lush leaf growth.
- Sunlight: Plan to place your pots where they can receive 6–8 hours of sunlight daily. Peas love cool mornings and full light.
- Watering tools: A watering can with a fine rose or a drip system to water evenly without disturbing soil.
- Garden tools: Small hand trowel, gloves, and a support frame or trellis if growing climbing types.
(On a budget? Use recycled buckets or milk crates lined with garden fabric for drainage. Compost can come from kitchen scraps or community gardens. Store-bought fertilizer can be replaced with well-aged manure or homemade compost tea.)
Step-by-Step — How to Grow Peas in Pots
1. Preparing Your Pot
Start clean. Wash your container with soapy water, rinse thoroughly to avoid pathogens lingering from previous uses. Drainage is vital. Add a 3–5 cm (1–2 in) layer of gravel or broken pottery at the bottom. This prevents waterlogging and root rot. Next, fill your pot with the prepared soil mix, stopping about 3 cm (1 in) below the rim. Avoid compacting — the soil should feel loose and crumbly, not hard packed. Aim for moisture that feels like a sponge squeezed of all excess water — damp but not soggy. Too dense or poorly drained soil will suffocate roots and invite disease.
One common mistake: skipping drainage holes or filling containers without a drain layer causes water to pool and kills your peas early.
2. Sowing or Planting
Before sowing, soak your pea seeds in warm water for 6–8 hours. This softens their hard coats and promotes faster germination. If you prefer, nick the seed coat gently with sandpaper (scarifying) to speed this up, but soaking is easier and effective.
Plant each seed at a precise depth of 2.5 cm (1 in) — not deeper. Space seeds 5 cm (2 in) apart if planting more than one per pot. The soil temperature should be around 10–18°C (50–65°F) for best germination. When right, you’ll notice the soil feels cool but welcoming, moist without being muddy. Sow firmly but avoid packing the soil down.
Pro tip: Mark sowing spots with small sticks or stones so you don’t overplant or crowd peas later.
3. Watering and Sunlight
Water gently immediately after sowing, enough to moisten the soil fully to the base (about 500 ml per pot, depending on size). For ongoing care, soak deeply 2–3 times per week, adjusting in very hot or windy conditions. You want moist soil that’s cool to the touch in the top few centimeters but not saturated. If you see soil cracking or pulling away from the sides, increase frequency.
Peas thrive with 6 to 8 hours of sunlight daily. If growing in a cooler, cloudier region, consider placing pots near reflective surfaces or under grow lights. In hot, dry climates, group pots together and mulch around the surface with straw or leaves to reduce evaporation. During midday sun, some light shade with a thin fabric can prevent leaf scorch.
4. Feeding and Maintenance
Once seedlings have their first few leaves, feed with a balanced, low-nitrogen fertilizer every 3–4 weeks. Choose a formula higher in phosphorus and potassium to encourage flowers and pods, not just leafy growth. If organic, use seaweed extract diluted in water or compost tea.
Thin seedlings if they are crowded to maintain about 5 cm (2 in) spacing. Keep soil aerated by lightly fluffing the surface with a fork once a week, especially after watering. Remove any yellow or damaged leaves to prevent disease spread and improve airflow. Pruning isn’t generally needed but trimming excessive tendrils on climbers can focus the plant’s energy on pods.
In my experience, “The secret is not more work — it’s regular care and observation.” Noticing subtle changes early prevents big problems later.
5. Troubleshooting While They Grow
Peas are hardy but keep an eye out for issues. Yellow leaves often mean excess nitrogen; switch to a fertilizer higher in phosphorus or use compost instead. Pale, stunted plants may be light-starved — move to a sunnier spot.
Sticky or chewed leaves are usually aphids or pea weevils. Spray with insecticidal soap or use a strong water jet to knock pests off daily. If soil stays soggy, check your drainage holes and add more coarse sand to improve airflow. Wilting during midday often signals underwatering or heat stress — water deeply and consider shade during the hottest hours.
6. Harvesting
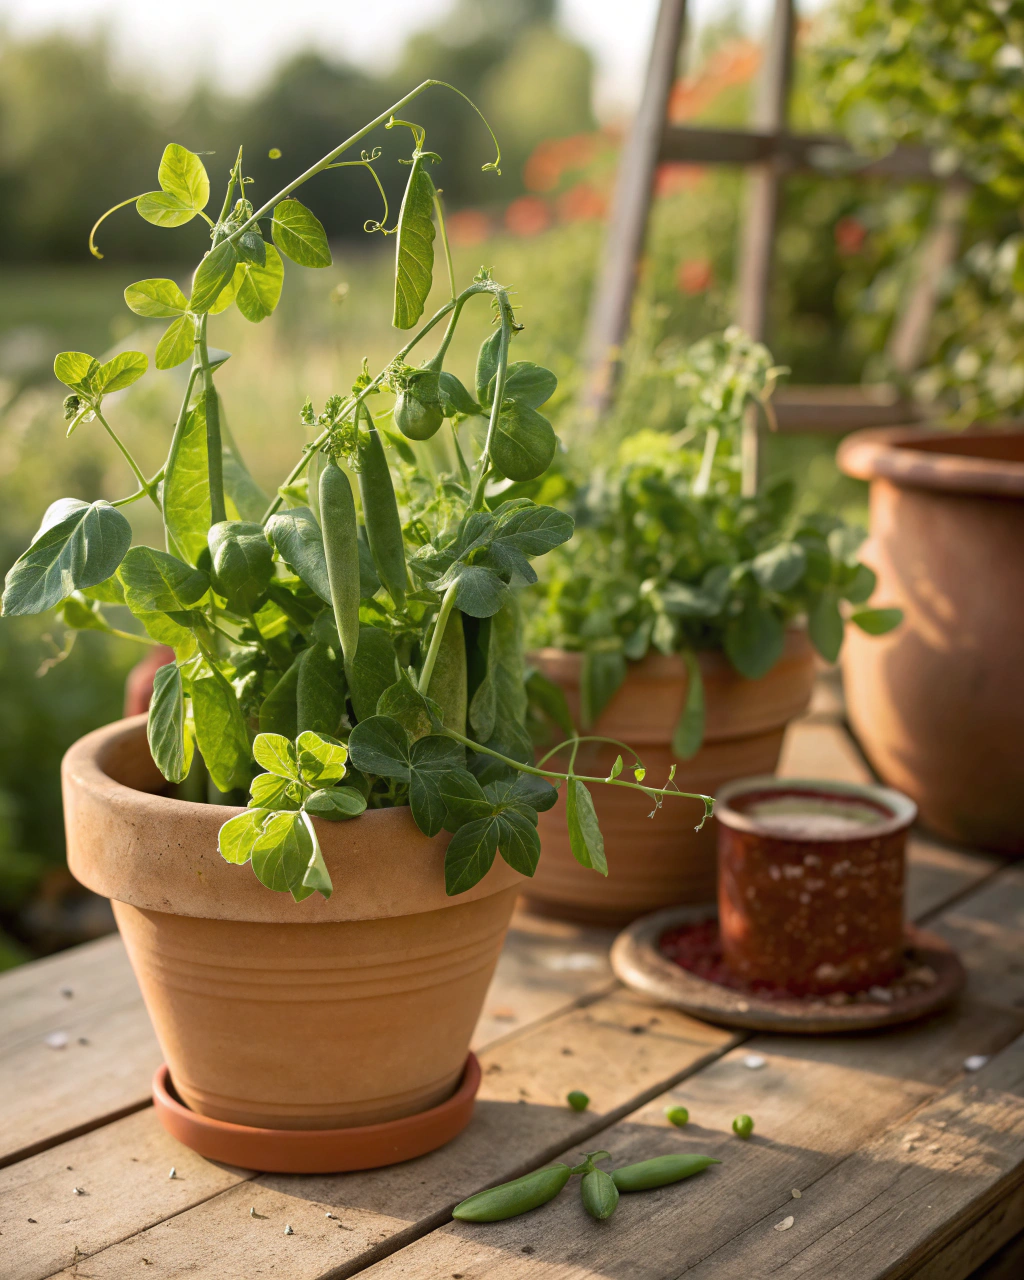
Peas are ready when pods look plump but still tender — generally between 70–90 days after sowing, depending on the variety. Pods should feel firm with a slight velvet texture and snap crisp when bent. The color ranges from bright green to a deeper jade, depending on the pea type. The peas inside should be sweet and juicy, easy to bite.
A simple test: gently squeeze a pod; if the seeds inside feel full but not bulging, it’s perfect. Harvest by pinching or snapping the pod from the stem carefully to avoid damaging the plant. Reducing watering in the final week can concentrate sugars and improve sweetness.
Store pods in a cool, humid place around 4–7°C (39–45°F) in perforated plastic bags for up to 2 weeks. For longer storage, blanch and freeze or dry the seeds. Pickling fresh pods is a fantastic way to preserve their crunch and flavor.
Extra Tips for Perfect Results
- Companion plants: Grow peas alongside radishes, carrots, lettuce, or spinach. Radishes deter some pests, carrots and lettuce don’t compete for root space, and spinach benefits from the nitrogen peas fix in the soil.
- Rotate your pots: Change their position or use fresh soil each season to prevent disease build-up and nutrient depletion.
- Mulch with straw or dried leaves to keep soil moisture stable and suppress weeds.
- Use rainwater: If possible, watering with rainwater prevents soil from hardening due to chlorine and minerals found in tap water.
- Wind protection: Group your pea pots close together in windy spots to reduce stress and moisture loss.
- Shade nets during peak heat: A thin fabric draped during the hottest hours keeps leaves fresh without blocking too much light.
Common Mistakes and How to Fix Them
- Overwatering: If roots feel soft and smell foul, stop watering and let the soil dry to the top 2 cm before resuming.
- Weak growth: Usually caused by insufficient light — relocate pots to brighter places.
- Yellow leaves: Too much nitrogen causes lush foliage but poor pods. Switch to fertilizer with higher phosphorus content.
- Poor germination: Check seed depth hasn’t exceeded 1 cm. Planting too deep delays or stops sprouting.
- Misshapen roots: A sign of compacted soil. Mix coarse sand or perlite into your soil to improve aeration.
Harvest and Storage
Harvest gently to avoid tearing stems or damaging roots, especially if you plan to keep plants growing for a second flush. Use your fingers to pinch pods off cleanly or small scissors for more control. Avoid harvesting wet plants; dry pods store better.
Store fresh pods in a cool dark spot at around 4–7°C (39–45°F), ideally with 90% humidity, to maintain crispness and flavor for up to 2 weeks. For preservation, blanch pods for 1–2 minutes in boiling water, then freeze in airtight bags. Alternatively, dry shelled peas for soups or pickle whole pods in vinegar brine for a crunchy treat.
Save seeds by leaving a few pods on the plant to mature fully — they’ll dry and harden by late season. Store seeds in a cool, dry place for sowing next year.
What Success Looks Like
When you pull your first firm, fragrant pea pod from the pot, you’ll notice the crisp snap and sweet aroma that only home-grown peas offer. The bright green color, cool texture in your hand, and the fresh taste are rewards for your attention. Expect a yield of roughly 1–2 kg (2–4 lb) per 30 cm (12 in) pot during a growing season. This may not sound like acres, but for your balcony or kitchen garden, it’s more than enough to enjoy fresh peas daily.
Consistent observation, light adjustments, and faith in your growing conditions are what transform small efforts into lush harvests. The connection you build with nature by tending peas in pots is just as valuable as the pods themselves.
Mini Recap — Your Success Checklist
- Pot depth: minimum 30 cm (12 in).
- Soil mix: 70% loam, 20% compost, 10% sand.
- Watering: deep and thorough, 2–3 times per week, adjust by touch.
- Sunlight: at least 6–8 hours daily.
- Fertilizer: every 3–4 weeks, low nitrogen.
- Sowing depth: 2.5 cm (1 in); spacing 5 cm (2 in).
- Harvest: 70–90 days after sowing.
- Storage: cool (4–7°C / 39–45°F), humid (90%), up to 2 weeks.
Closing Reflection
Growing peas in pots isn’t about perfection — it’s about learning to observe, adjust, and nurture steadily. Each small step you take teaches you more about the rhythms of nature and your connection to it. So don’t rush. Watch the shoots unfurl, listen to the snap of fresh pods, enjoy the changing colors and textures. These moments mark you as a gardener. Your care, patience, and willingness to learn make the difference. And soon, you’ll be harvesting sweet pods right from your own space — a simple pleasure worth every moment.

Hi there — I’m Kyla, the creator behind Kyla Garden Tips 🌿
I’ve always been passionate about plants, flowers, and the simple joy that comes from growing something beautiful. What started as a small balcony garden has turned into a love for helping others create their own green spaces — no matter how big or small.