
Why Grow Mint in Containers? A Quick Introduction
Mint is one of the most rewarding herbs you can grow, especially if you’re short on space. Its bright, aromatic leaves add fresh flavor to drinks, salads, and desserts. But mint’s vigorous growth habit means it quickly takes over beds and garden paths if unchecked. Growing mint in containers solves this problem — it keeps you in control and makes harvesting easy.
You don’t need a sprawling garden, a green thumb, or expensive equipment to succeed. Whether you have a small balcony, a sunny windowsill, or a patio corner, you can grow thriving mint plants. Follow the clear steps here, and you’ll enjoy fresh, fragrant leaves all season long — no invasions, no mess, just mint at your fingertips.
Getting Ready — What You’ll Need
Before you start, gather everything to create the right environment for your mint. Each item plays a key role in keeping your plant healthy and contained.
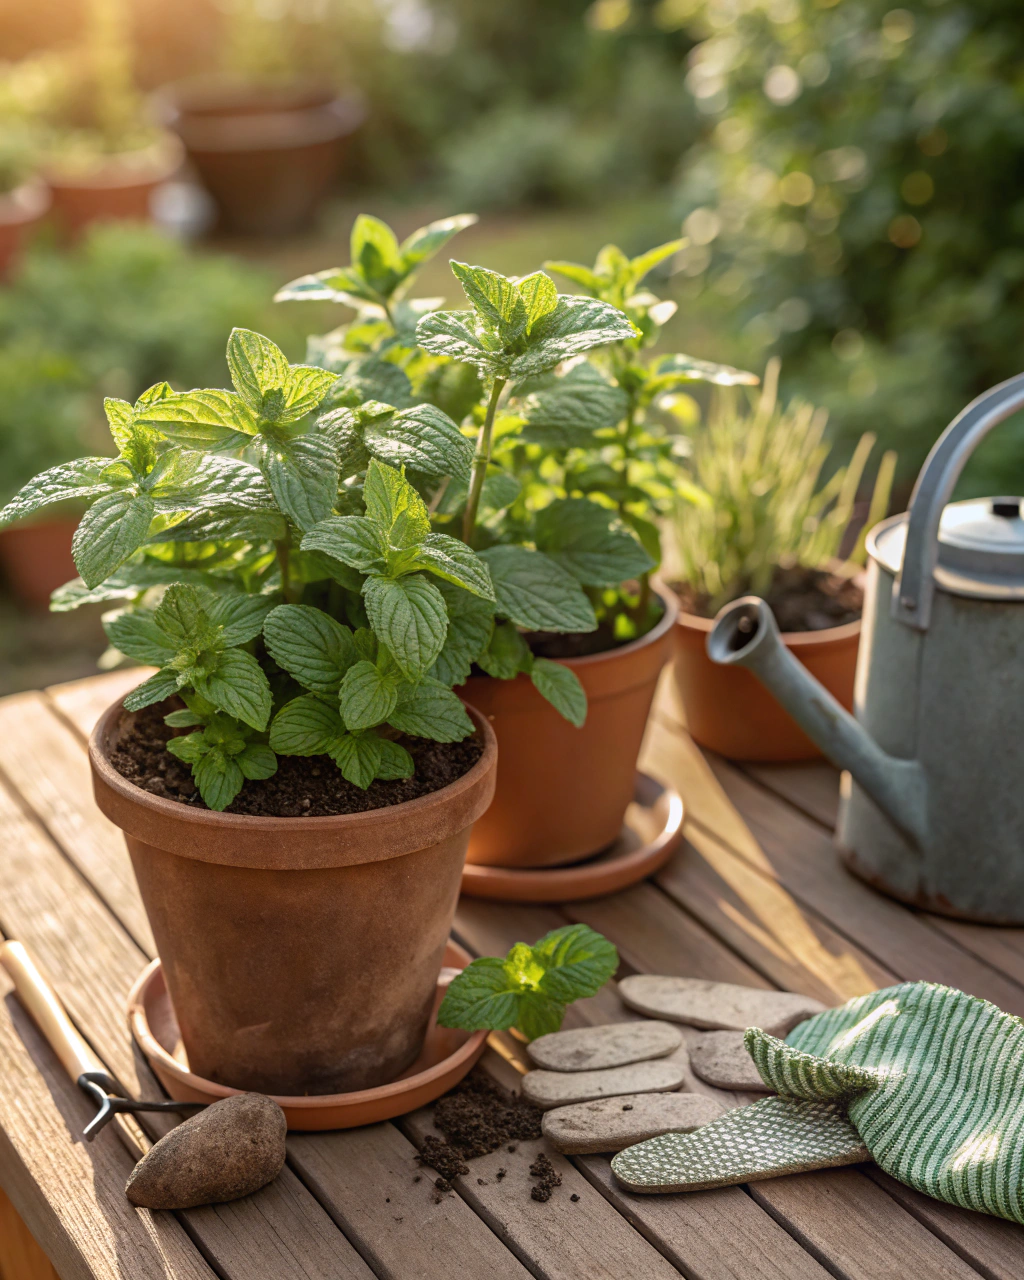
- Container: Minimum 30 cm (12 in) deep with drainage holes. Mint roots grow fast and need room to spread. Choose pots made of terracotta, plastic, or glazed ceramic depending on your climate (clay pots help keep roots cool in hot areas).
- Soil: A rich, well-draining potting mix. Aim for 70% loam or topsoil, 20% compost, and 10% coarse sand or perlite. This balance offers nutrients, aeration, and moisture retention.
- Fertilizer: Use a balanced, low-nitrogen liquid feed or organic alternatives like fish emulsion or seaweed extract to avoid leggy growth. Apply every 3–4 weeks.
- Mint varieties: Choose between classic options like spearmint (Mentha spicata), peppermint (Mentha × piperita), or culinary favorites such as apple mint and chocolate mint. Each has unique aroma and flavor profiles.
- Location: Bright spot with 6–8 hours of sunlight daily. Partial afternoon shade can help in very hot climates.
- Watering tools: A watering can or gentle hose attachment to water at the base without damaging leaves.
- Tools: Small hand trowel for planting, pruning shears for regular trimming, gloves if you prefer — mint’s stems can be slightly prickly.
- Optional: Mulch like straw or dried leaves to conserve moisture and regulate soil temperature.
Step-by-Step — How to Grow Mint in Pots
1. Preparing Your Pot
Start with a clean pot to avoid pathogens lingering from previous plants. Wash with warm, soapy water and rinse thoroughly. Ensure your container has at least 3–4 drainage holes at the base — poor drainage is the easiest way to stress mint.
Add a drainage layer at the bottom, around 3–5 cm (1.2–2 in) thick, using pebbles or broken terracotta shards. This prevents waterlogging by allowing excess moisture to escape quickly.
Next, fill the pot with your soil mix, leaving a gap of about 2 cm (0.8 in) from the rim to avoid spillover during watering. Lightly firm the soil — think of the texture like a sponge wrung out, moist but not soggy. Avoid compacted soil, which suffocates roots and invites rot.
Remember, mint prefers slightly acidic to neutral soil, ideally with a pH between 6.0 and 7.0. If you’re unsure, a simple home soil test kit can help.
2. Sowing or Planting
Growing mint from seed is possible but slow; many prefer cuttings or starter plants for quicker results. If you do start with seeds, sow them thinly on the surface and cover lightly with 0.5–1 cm (0.2–0.4 in) of fine soil. Keep soil moist and warm, ideally around 21–24°C (70–75°F) for germination.
If planting cuttings or seedlings, dig holes about 5 cm (2 in) deep, spacing plants at least 20 cm (8 in) apart within the pot. This spacing allows air circulation to prevent fungal diseases and room for growth.
Pro tip: Pre-soak seedling roots or cuttings in water for about 30 minutes before planting to reduce transplant shock and encourage root establishment.
3. Watering and Sunlight
Water your mint deeply until moisture trickles from the drainage holes — usually about 2–3 times per week during warm weather. Check the soil’s top 2 cm (0.8 in); it should feel dry before watering again. Mint dislikes sitting in soggy soil but thrives with consistent moisture.
If your area experiences heatwaves, group your pots together and add a layer of mulch to retain moisture. During midday in very hot spots, move pots to partial shade or shield with light fabric for a few hours.
Mint loves sunlight, needing a solid 6–8 hours of direct sun daily to develop its best flavor and color. In cloudy or shaded environments, place the pot near south or west-facing windows or use supplemental grow lights.
4. Feeding and Maintenance
Fertilize every 3–4 weeks with diluted liquid feed to avoid pushing your mint into leggy, weak growth. Organic seaweed or fish emulsion encourages healthy leaves without excess nitrogen, which can dull flavor.
Thin your mint when it gets crowded, snipping weaker stems at the base to encourage bushier growth. Regular pruning keeps the plant tidy, prevents flowering (which dulls leaf taste), and stimulates fresh shoots.
Turn the pot occasionally to ensure even sunlight exposure. Aerate the soil weekly by gently loosening the surface with a fork or chopstick, promoting healthy root respiration.
“The secret is not more work — it’s regular care and observation.” Slowly, you’ll learn each plant’s subtle signals, just like a friend.
5. Troubleshooting While They Grow
Keep an eye out for yellowing leaves; this often means excess nitrogen or poor drainage. Counter by switching to a fertilizer with higher phosphorus.
If leaves look pale or growth is stunted, your mint might not be receiving enough sun — move it to brighter location. For limp stems or soggy soil, check drainage holes and reduce watering.
Mint can attract pests like spider mites or aphids. A quick spray of water or a mild neem oil solution will control these. Avoid insecticides if possible — mint’s delicate aroma can be affected.
Also, be mindful of compacted soil causing misshapen roots. Mix in some coarse sand or perlite when you pot or repot.
6. Harvesting
Your mint is ready to harvest after about 70–90 days from sowing or once the plant reaches at least 15 cm (6 in) tall with firm stems.
Look for vibrant green leaves with a slight shine and a cool, refreshing aroma when rubbed between your fingers. The leaves should feel tender but resilient, not brittle or limp.
Harvest by pinching or cutting stems just above a leaf node; this encourages bushier growth. For best flavor, snip in the morning after dew dries but before the heat of the day diminishes oils.
Pro tip: Reduce watering during the final week before harvest — this concentrates the leaf oils for more intense flavor.
Store harvested mint in a cool, humid environment between 4–7°C (39–45°F), wrapped loosely in damp paper towel inside a plastic bag. Use within 2 weeks for optimal freshness. Alternatively, dry mint by hanging in a dark, airy place or freeze chopped leaves in ice cube trays with water.
Extra Tips for Perfect Results
- Companion plants: Basil helps repel pests; chives deter aphids; marigolds improve soil health; and lettuce benefits from shade created by mint pots.
- Rotate your mint pots every season to prevent soil fatigue and maintain nutrient balance.
- Mulch with straw or dried leaves to keep soil moist and cool during hot weather.
- Use rainwater when possible — tap water often causes soil to harden and salts to build up.
- In windy locations, group pots together for stability and shared humidity, protecting delicate stems.
- If sunlight is intense, provide a thin fabric shade during midday to prevent leaf scorch.
Common Mistakes and How to Fix Them
- Overwatering: leads to soft, rotting roots—allow the top 2 cm (0.8 in) of soil to dry before watering again.
- Weak growth: often caused by insufficient light—move mint to a sunnier spot with at least 6 hours of sun.
- Yellow leaves: can indicate excess nitrogen—switch to fertilizer with higher phosphorus or add compost.
- Poor germination: from sowing seeds too deep—limit planting depth to 0.5–1 cm (0.2–0.4 in).
- Misshapen roots: caused by dense, compacted soil—always mix in coarse sand or perlite for proper airflow and drainage.
Harvest and Storage
When harvesting, gently grasp a stem and cut just above the node. Avoid pulling, which can damage roots and slow growth. The stem should snap with a slight crispness, releasing strong mint aroma.
Store fresh mint wrapped in damp paper towel, kept inside a sealed plastic bag at temperatures between 4–7°C (39–45°F). This method preserves freshness for up to 2 weeks.
For longer storage, dry mint by hanging small bundles upside down in a cool, dark, well-ventilated place. Once dry (usually 7–10 days), crumble leaves into airtight containers. Alternatively, freeze chopped leaves in ice cube trays filled with water or olive oil for quick use in recipes.
Save seeds at the end of the growing season by allowing flower spikes to dry completely on the plant, then shaking out the tiny black seeds into a paper envelope. Store in a cool, dry place to plant next year.
What Success Looks Like
When you pull your first firm stem, rich with vibrant green leaves releasing that unmistakable fresh, herbal scent, you’ll feel something quietly satisfying. It’s proof that your care, patience, and observation transformed a simple seed or cutting into a thriving herb.
A healthy container can yield about 1–2 kg (2–4 lb) of fresh leaves per growing season, enough for countless teas, cocktails, sauces, and garnishes.
The real reward isn’t just the harvest—it’s the connection you build with the soil and the seasons, watching your mint grow from start to finish.
Mini Recap — Your Success Checklist
- Pot depth: at least 30 cm (12 in).
- Soil mix: 70% loam, 20% compost, 10% sand or perlite.
- Watering: 2–3 times per week, adjusted by feel.
- Sunlight: minimum 6–8 hours daily.
- Fertilize: every 3–4 weeks, low nitrogen.
- Harvest: between 70–90 days post-sowing.
Closing Reflection
Every plant you grow teaches you something new. Success with mint doesn’t come from perfection, but from small, consistent acts of care. Watch, listen, and adjust. Enjoy the feel of the soil, the smell of fresh leaves in your hands, and the glow of sunlight warming your pot. This is what makes you a gardener — not the harvest alone, but the quiet, joyful process of growth.

Hi there — I’m Kyla, the creator behind Kyla Garden Tips 🌿
I’ve always been passionate about plants, flowers, and the simple joy that comes from growing something beautiful. What started as a small balcony garden has turned into a love for helping others create their own green spaces — no matter how big or small.