
Why Grow Potatoes in Containers?
Potatoes are among the most satisfying crops to grow—even when space is tight. You don’t need a sprawling garden plot; a small balcony, patio, or even a sunny windowsill can produce a rewarding harvest. Potatoes thrive in containers because their roots develop underground, making it easy to control growing conditions. Plus, the fresh, earthy scent of soil and the thrill of digging up your own tubers is simply unmatched. In just 70 to 90 days, you’ll have flavorful, nutritious potatoes that beat store-bought varieties in taste and freshness. I’ll guide you step-by-step with practical tips to overcome challenges like limited space, soil quality, and pests. You can do this—let’s get your container potato patch growing beautifully.
Getting Ready — What You’ll Need
Before you start, gather everything that ensures your potatoes thrive in containers. Having the right supplies is key to success.
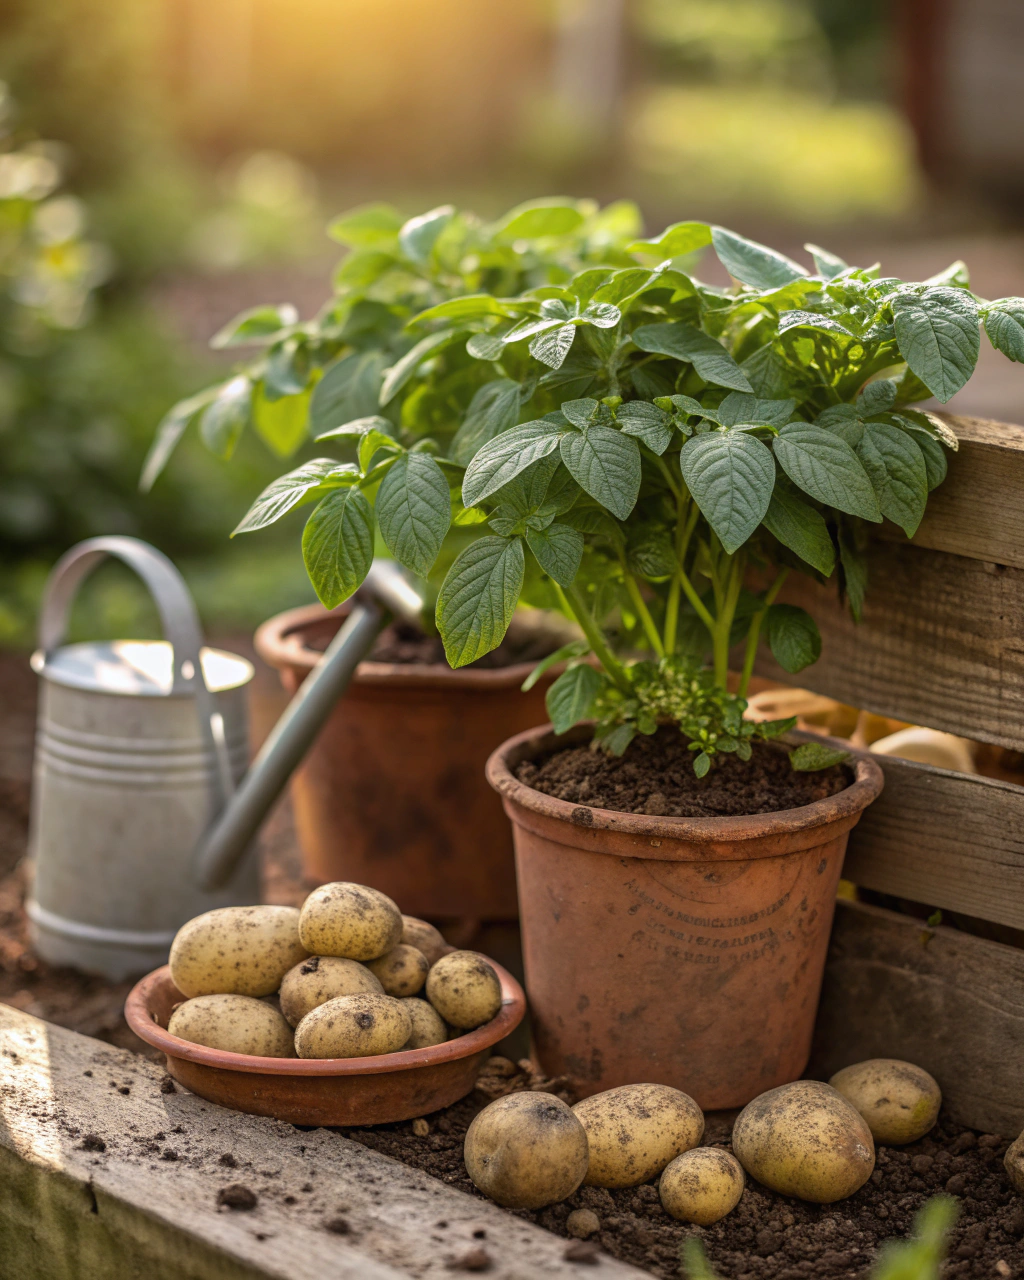
- Containers: Choose pots or grow bags at least 30 cm (12 in) deep and with drainage holes. Size matters—a 10–15 litre container holds enough soil for healthy tuber growth. Plastic pots, fabric grow bags, or even repurposed buckets work well. (If your area gets very hot, use clay pots to prevent overheating roots.)
- Soil: Use loose, well-draining soil with a balanced pH around 5.5 to 6.5. An ideal mix is 70% loam, 20% compost, and 10% coarse sand or perlite for aeration.
- Seed potatoes: Choose certified disease-free seed potatoes suited to your climate. Early varieties like ‘Red Pontiac’ or ‘Yukon Gold’ do well in containers.
- Fertilizer: A balanced granular fertilizer with low nitrogen but high phosphorus and potassium (look for an N-P-K ratio like 5-10-10) ensures tubers develop well without excessive leaf growth.
- Watering tools: A watering can with a fine rose or a gentle spray nozzle helps you water without compacting soil.
- Light: Aim for a spot receiving 6–8 hours of direct sunlight daily for optimal growth.
- Tools: Small trowel or hand fork for loosening soil, gloves, and a soft brush for cleaning tubers at harvest.
- Optional: Mulch materials like straw or leaves to keep soil moist and temperature stable.
Step-by-Step — How to Grow Potatoes in Pots
1. Preparing Your Pot
Start by thoroughly cleaning your container with hot water and mild soap to remove residual salts or pathogens—this avoids disease early on. Ensure drainage holes are clear; stagnant water causes root rot. Place a 3–5 cm (1–2 in) drainage layer at the bottom using gravel, broken terracotta, or coarse sand. This layer prevents waterlogging but does not replace good soil drainage.
Fill your container with a soil mix that is light and fluffy—think of texture like a wrung-out sponge. It should hold some moisture but crumble gently when you touch it. Avoid compacted or heavy garden soil, which stifles tuber growth and invites pests. Test soil moisture by squeezing a handful; if water drips out, it’s too wet. Dry and crumbly? Water a little more before planting. Your goal is soil that stays moist but well-aerated throughout the growing season.
Avoid two common mistakes here: (1) no holes or blocked drainage, and (2) soil that’s too acid or alkaline—both stunt growth. If unsure, a simple garden pH test kit costs less than $10 and saves headaches later.
2. Sowing or Planting
Potatoes aren’t grown from seed but from “seed potatoes” — small tubers or cut pieces with at least one “eye.” Before planting, cut larger seed potatoes into 5 cm (2 in) sections. Allow the cut pieces to dry and “heal” for 2-3 days in a cool, dark place—this reduces rotting once planted.
Plant each piece with the eye facing upward, placing it about 10–15 cm (4–6 in) deep in the soil, spacing the pieces at least 20 cm (8 in) apart if your container is large enough (you might plant 2-3 seed potatoes per large pot). The soil temperature should be around 10–18°C (50–65°F) for sprouting. If your area is still chilly, start indoors or in a warm greenhouse.
You’ll first see chunky green shoots breaking through the soil surface in about 2–4 weeks. Feel the soil gently to ensure it remains moist but not soggy—potato sprouts are delicate at this stage. If it feels dry to touch, water immediately but gently.
Pro tip: Add a handful of well-rotted compost or aged manure beneath the seed tubers to provide a nutrient boost without burning shoots.
3. Watering and Sunlight
Water is crucial, but too much spells disaster. Aim to water your pots deeply about 2–3 times per week during warm weather. You want to saturate the entire soil volume until moisture appears at the bottom drainage holes. Check moisture by sticking a finger into the soil; the top 2 cm should dry out slightly between waterings.
If you live in a hot, dry, or windy area, pots lose moisture quickly. Group your containers close together to create a microclimate that preserves humidity. Mulch with straw to retain moisture and regulate temperature—this also prevents soil crusting that blocks air.
Potatoes demand 6–8 hours of direct sunlight daily. In cloudier zones, supplement with south-facing windows or reflective surfaces. During extreme heat, a thin shade cloth during midday prevents sunscald on leaves and helps maintain soil moisture.
4. Feeding and Maintenance
Your potatoes will benefit from regular feeding—apply a low-nitrogen fertilizer every 3–4 weeks throughout the growing season. Nitrogen encourages leafy growth but too much reduces tuber size. Phosphorus and potassium support healthy roots and starch development.
Thin plants if they get crowded by carefully removing weaker sprouts—not the strongest shoots. This redirects energy to tuber growth. Use a hand fork to gently loosen soil surface every few weeks. This improves aeration and prevents compacted soil, which hinders tuber expansion.
Watch for signs of stress: pale leaves indicate nutrient shortage, while drooping, glossy leaves suggest overwatering. Keep an eye on soil moisture and leaf color. As one experienced gardener says, “The secret is not more work — it’s regular care and observation.”
5. Troubleshooting While They Grow
Pay attention to your potatoes daily. Common issues include:
- Yellow leaves: Often too much nitrogen fertilizer. Switch to one with higher phosphorus or stop feeding for a few weeks.
- Stunted growth: Likely too little sunlight or poor drainage. Move your pot to a sunnier spot and check holes are clear.
- Pests: Keep an eye out for aphids or potato beetles. Remove them by hand or rinse leaves with water. Neem oil spray works well if infestation worsens.
- Soggy soil: Drainage may be blocked. Remove some soil, check holes, and add sand or perlite next time.
- Mold or rot: Caused by excess moisture and poor air circulation. Reduce watering and increase ventilation around your pots.
6. Harvesting
Potatoes are ready to harvest when the plant foliage yellows and dies back, typically about 70–90 days after planting, though early varieties can be harvested sooner for “new potatoes.” You can gently dig around the base with your hands or a trowel. The tubers should feel firm, not soft or shriveled, and have smooth skin. New potatoes have thin skins and a slightly waxy feel; mature ones are more robust and dry to touch.
A useful tip: stop watering the final 7–10 days before harvest to encourage skin hardening and better flavor. When you pull your first potato from moist earth, you’ll feel a satisfying slight resistance followed by a clean, earthy scent filling the air.
Store harvested potatoes in a cool, dark place around 4–7°C (39–45°F) with moderate humidity to prevent shriveling, ideally for up to 2 weeks. Avoid refrigeration below 4°C to prevent starch turning into sugar. For longer storage, consider pickling or freezing cooked potatoes.
Extra Tips for Perfect Results
- Grow companion plants like marigolds (to repel nematodes), nasturtiums (deter aphids), and beans (fix nitrogen).
- Rotate pots each season to stop soil fatigue and disease buildup.
- Apply a 2–3 cm layer of straw mulch to reduce evaporation and regulate soil temperature.
- Collect and use rainwater when possible—it’s softer and kinder to soil biology than hard tap water.
- In windy spots, cluster pots closely for stability and shared moisture retention.
- Under intense sun, shield plants midday with light fabric shade to keep leaves from wilting.
Common Mistakes and How to Fix Them
- Overwatering: Roots stay soft and rot. Let the top 2 cm dry out before watering again.
- Weak growth: Too little light. Move the pot to a brighter spot or use reflective surfaces.
- Yellow leaves: Excess nitrogen fertilization. Switch fertilizer to one richer in phosphorus and potassium.
- Poor germination: Seeds planted too deep. Limit depth to 0.5–1 cm under the soil surface for sprouting eyes.
- Misshapen roots: Compacted soil. Always mix in coarse sand or perlite to improve airflow.
Harvest and Storage
Harvest gently to protect tubers—avoid stabbing with tools. Use your fingers to carefully feel around the roots. After harvesting, leave potatoes in a cool, shaded place to “cure” for a couple of days; this toughens skins. Store at 4–7°C (39–45°F), dark and ventilated, and avoid piling too high to prevent bruising. Use within 2 weeks for best quality.
If you want to preserve for longer, try pickling sliced cooked potatoes or freezing them after blanching. Drying potatoes into chips or flakes is another option. Lastly, save some of your healthiest seed potatoes for next season by storing them in a cool, frost-free place where they develop new eyes.
What Success Looks Like
When you finally pull up those firm, earthy potatoes from your pot, the sense of accomplishment is tangible. The soil’s rich aroma, the cool smoothness of the tuber in your hand, and the vibrant green leaves you nurtured—all tell a story of care and patience. Expect yields of about 1–2 kg (2–4 lb) per container under good conditions. This might not rival large field crops, but the flavor far surpasses—and the joy is priceless.
Remember, success is less about perfection and more about consistent care and learning. Every sprout you watch unfurl teaches you about nature, patience, and reward.
Mini Recap — Your Success Checklist
- Pot depth: 30 cm (12 in) minimum.
- Soil mix: 70% loam, 20% compost, 10% sand or perlite.
- Watering: 2–3 times per week; soil moist but not soggy.
- Sunlight: 6–8 hours per day.
- Fertilizer: Every 3–4 weeks, with low nitrogen formula.
- Plant depth: 10–15 cm (4–6 in), spaced 20 cm (8 in) apart.
- Harvest: 70–90 days after planting.
- Storage temperature: 4–7°C (39–45°F), dark and ventilated.
Closing Reflection
Growing potatoes in containers teaches more than gardening—it fosters patience, observation, and a gentle rhythm with nature. Every plant you nurture offers lessons; not every day will be perfect, but with consistent care and small adjustments, you’re building a thriving garden space. Don’t rush growth—watch, feel the soil, and enjoy the process. That’s what truly makes you a gardener.

Hi there — I’m Kyla, the creator behind Kyla Garden Tips 🌿
I’ve always been passionate about plants, flowers, and the simple joy that comes from growing something beautiful. What started as a small balcony garden has turned into a love for helping others create their own green spaces — no matter how big or small.