
Why Grow Rosemary in Containers?
If you love the aroma of fresh herbs and want a fragrant touch to your cooking and home, growing rosemary in containers is the perfect solution. You don’t need a large garden—just a sunny balcony, patio, or even a windowsill will do. Rosemary thrives in pots, giving you fresh, pine-scented leaves year-round. It’s tough, drought-resistant, and striking, with its silvery-green foliage and delicate purple flowers. Plus, it adds instant charm and beauty to your outdoor space. I’ll guide you step-by-step, with practical advice and simple fixes to common problems like space, soil quality, and pests. You’ll feel confident and inspired to grow this aromatic wonder right where you are.
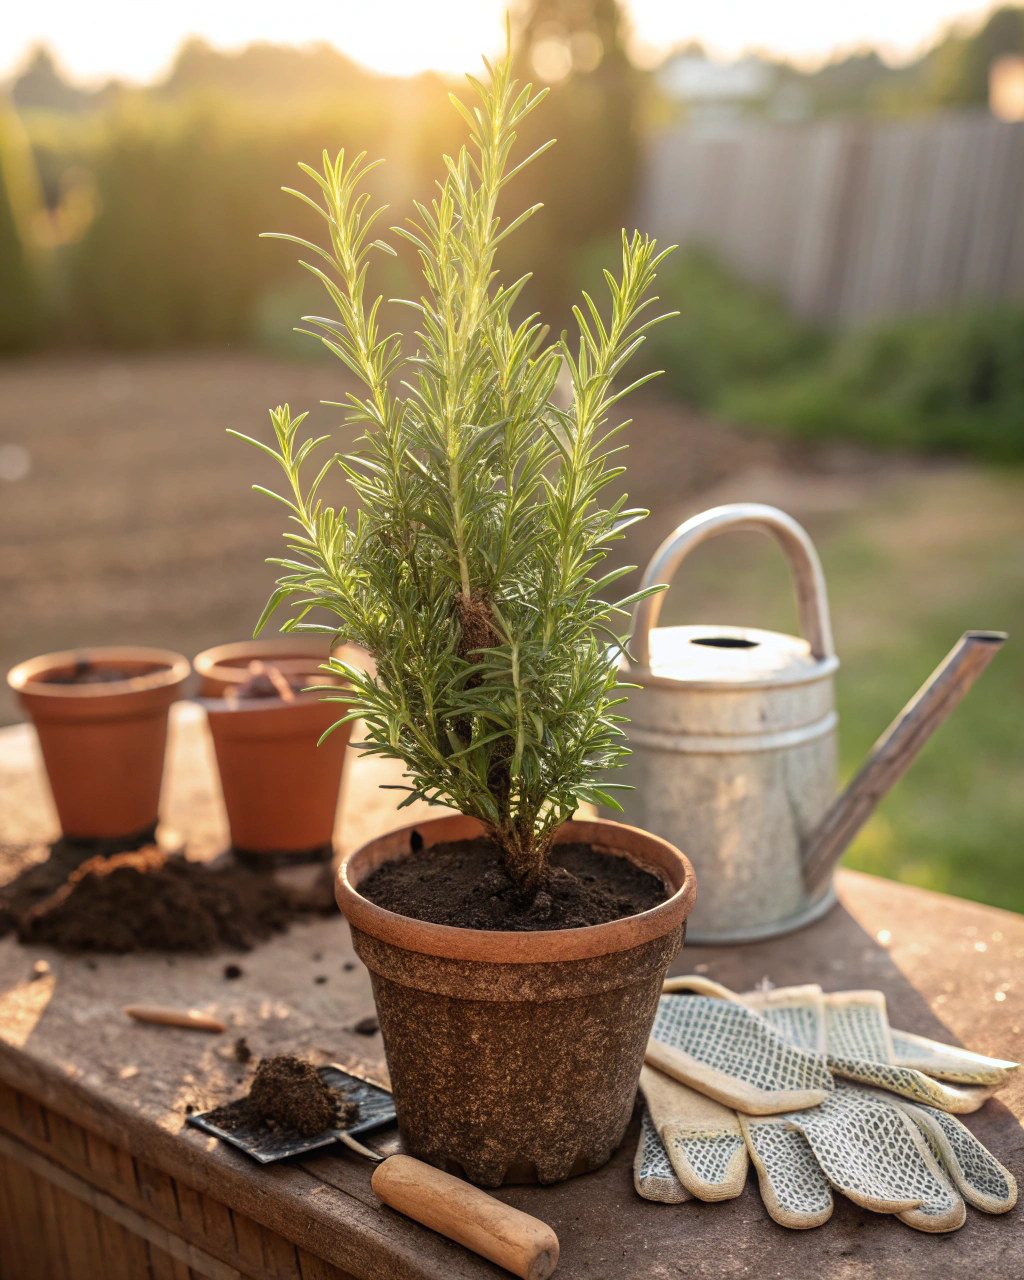
Getting Ready — What You’ll Need
Before planting, gather these essentials:
- A container at least 30 cm (12 in) deep with drainage holes — rosemary’s roots need space and airflow. (If you’re in a hot environment, consider clay pots to keep roots cool.)
- Well-draining soil mix composed of 70% loam, 20% compost, and 10% coarse sand or perlite — this balance provides nutrients while avoiding soggy roots.
- Organic fertilizer with low nitrogen, balanced phosphorus, and potassium (look for ratios like 5-10-10) to encourage strong stems and flavorful leaves.
- Rosemary seeds, cuttings, or young plants — varieties like “Tuscan Blue,” “Arp,” or “Tuscan Blue” are hardy and aromatic.
- A watering can with a rose head for gentle, even watering.
- Pruning shears or scissors for regular trimming.
- A sunny spot with at least 6–8 hours of direct sunlight daily.
Substitutes: For budget options, recycle old clay pots or plastic containers, ensuring good drainage by drilling extra holes. Use homemade compost or leaf mold for nutrients and add coarse sand from a local garden center or beach. If you lack organic fertilizer, a diluted fish emulsion or liquid seaweed solution works well.
Recommended to Read: Grow Oregano in Containers for Mediterranean Flavor Indoors
Step-by-Step — How to Grow Rosemary in Pots
1. Preparing Your Pot
Start by thoroughly washing your pot to remove any salt or chemical buildup—that prevents root damage and fungus growth. Place a 2–3 cm (1 in) layer of gravel or broken pottery shards at the bottom to create a drainage layer. This encourages excess water to flow away quickly.
Next, fill the pot with your soil mix — remember, the ideal texture feels like a well-wrung sponge: moist but not soggy. Avoid compacting the soil too tightly; roots need air spaces to breathe. Be cautious to maintain a slightly acidic to neutral pH between 6.0 and 7.0. If you suspect extreme pH in your soil, add a handful of garden lime or sulfur accordingly.
One common mistake is filling pots without holes or compacting soil too much, which traps water leading to root rot. Take your time — good preparation sets the foundation for success.
2. Sowing or Planting
Rosemary seeds can be slow to germinate, so many gardeners prefer starting with cuttings or small plants. However, if you do sow seeds, plant them at a shallow depth of 0.5–1 cm (0.2–0.4 in), spaced about 5 cm (2 in) apart in a seed tray or directly in your pot if large enough.
The ideal temperature for germination is around 20–24°C (68–75°F). You can speed this by covering seeds lightly with a clear plastic dome or plastic wrap to retain humidity.
Before planting, soak seeds in warm water for 12 hours to soften the outer coat—this encourages quicker sprouting.
When it’s just right, you’ll notice tiny green shoots pushing through the moist soil, and the soil surface should feel cool and crumbly, not dry or waterlogged.
Pro tip: For cuttings, snip a healthy 10 cm (4 in) stem from a mature plant, strip the lower leaves, and place it in water or moist sand. Roots usually develop in 2–3 weeks. This method saves time and boosts your success rate.
3. Watering and Sunlight
Water rosemary deeply but infrequently. Aim for about 2–3 times per week in warm weather.
Water until you see moisture draining from the bottom of the pot—this confirms the root zone is thoroughly hydrated. Allow the top 2 cm (¾ in) of soil to dry before watering again to prevent overwatering.
If your climate is hot, dry, or windy, group pots together to create a mini microclimate. Mulching the soil surface with straw or fine pebbles helps retain moisture and cool the roots.
Rosemary needs full sun — ideally 6–8 hours of direct sunlight every day. In cloudier regions, place your pot near the brightest window or under grow lights. In extreme heat, protect the plant with a thin fabric shade between 12 pm and 3 pm to prevent leaf scorch.
4. Feeding and Maintenance
Feed rosemary with a balanced, low-nitrogen fertilizer every 3–4 weeks during the growing season (spring through late summer). Overfeeding with nitrogen promotes lush foliage but reduces the aromatic oils responsible for its fragrance.
Prune regularly to maintain shape and encourage bushy growth — pinch or cut stems back by about 5 cm (2 in) every month or when flowers fade. Thin out crowded growth to improve air circulation.
Keep an eye on soil aeration. The surface should stay loose; if it compacts, gently poke holes with a chopstick or small trowel.
“The secret is not more work — it’s regular care and observation.” I’ve found this keeps plants vibrant with minimal fuss.
5. Troubleshooting While They Grow
- If leaves turn yellow or pale, it often means too much nitrogen or poor drainage. Add some compost or liquid seaweed fertilizer and check that drainage holes aren’t blocked.
- Stunted growth usually points to insufficient light. Move your pot to a sunnier location or supplement with a grow light.
- Rosemary is prone to spider mites and aphids. Spot pests early by inspecting the undersides of leaves weekly. Rinse off pests with a gentle spray of water or use insecticidal soap.
- If the soil is consistently soggy, roots will rot fast. Ensure drainage holes are clear and reduce watering.
- Misshapen or crowded roots often come from compact, heavy soil. Re-pot using a well-aerated soil mix including coarse sand or perlite every 1–2 years.
6. Harvesting
Rosemary is ready to harvest once your plant is established, usually 70–90 days after sowing or once cuttings have rooted and grown 20–30 cm (8–12 in). Leaves will be a rich green with a sturdy, fragrant feel. The aroma should be strong and fresh when crushed between your fingers, with a piney, slightly lemony scent.
Harvest by cutting stems about 5 cm (2 in) above a leaf node—this encourages fuller regrowth. Avoid cutting more than one-third at a time to keep the plant healthy.
Pro tip: Reduce watering the final week before harvest; this concentrates essential oils, making the leaves more flavorful.
For storage, wrap the stems in a damp paper towel, place them in a plastic bag, and keep in a dark area around 4–7°C (39–45°F). Fresh rosemary can last up to 2 weeks. Alternatively, dry sprigs in a dark, airy place for 1–2 weeks or freeze chopped leaves in ice cube trays with a little water or oil.
Extra Tips for Perfect Results
- Use companion plants: Lavender and thyme thrive with rosemary, sharing similar light and water needs and helping to deter pests. Marigolds also repel common garden pests naturally.
- Rotate pots each season to prevent soil fatigue and disease buildup. Fresh soil reduces nutrient depletion and root stress.
- Mulch with straw or fallen leaves to lock in moisture and moderate soil temperature.
- Use rainwater for irrigation whenever possible. Tap water can contain salts and minerals that accumulate and harden soil over time.
- In windy areas, cluster pots to boost humidity and stability—this prevents drying out and pot tipping.
- In the height of summer, a thin, breathable fabric shade during midday helps prevent leaf scorch without sacrificing sunlight.
Common Mistakes and How to Fix Them
- Overwatering: Causes soft, soggy roots and yellowing. Let the top 2 cm (¾ in) of soil dry before watering again.
- Weak growth: Too little sunlight. Move your pot outdoors or to a sunnier window where it can get 6–8 hours of light daily.
- Yellow leaves: High nitrogen fertilizer causes lush but dull leaves. Switch to a fertilizer higher in phosphorus, such as a 5-10-10 ratio.
- Poor germination: Planting seeds too deep (deeper than 1 cm) prevents sprouting. Keep seeds shallow and moist.
- Misshapen roots: Soil too compacted or heavy clay. Always mix in coarse sand or perlite (minimum 10%) for air flow.
Harvest and Storage
Harvest rosemary gently by snapping or cutting stems with clean scissors, always above a leaf node. This encourages a bushier plant for more harvests.
Store cut rosemary bundled with a damp paper towel inside a breathable plastic bag at 4–7°C (39–45°F)—this keeps aroma and flavor fresh for up to 2 weeks.
If you want longer preservation, dry sprigs by hanging in a shaded, airy space for 1–2 weeks, then crumble the leaves into airtight jars. Alternatively, freeze chopped leaves in ice cube trays with water or olive oil for cooking.
Save seeds in a dry, cool place for next season by harvesting from mature seed pods after flowering. Store in a labeled paper envelope in a dark cupboard.
What Success Looks Like
Growing your own rosemary means more than a pretty plant. When the scent of fresh leaves fills your hands and kitchen, it’s proof of patient care and nurturing. You’ll harvest about 1–2 kg (2–4 lb) of fresh rosemary per large container each year with consistent care.
The leaves will feel firm and slightly waxy, cool to touch, and release a wonderful pine-wood fragrance when rubbed between fingers. Watching your plant bloom with tiny blue or purple flowers is a quiet celebration of connection with nature.
Stay observant, consistent, and patient—these are the true rewards that turn any container gardener into a confident grower.
Mini Recap — Your Success Checklist
- Pot depth: Minimum 30 cm (12 in).
- Soil mix: 70% loam, 20% compost, 10% sand/perlite.
- Watering: Deep watering 2–3 times per week, keep soil moist but not wet.
- Sunlight: At least 6–8 hours direct light each day.
- Fertilizer: Use low nitrogen fertilizer, feed every 3–4 weeks.
- Harvest: Begin at 70–90 days; cut stems beside leaf nodes.
Further Reading: How to Grow Mint in Containers Without Taking Over Your Space
Closing Reflection
Every rosemary plant you nurture shows you something new—about patience, nature, and your own hands. Success won’t come from perfection, but from small, consistent acts: watering carefully, watching closely, trimming thoughtfully. Don’t rush it. Grow slowly, adjust as you learn, and savor each step. That’s what makes you a gardener.

Hi there — I’m Kyla, the creator behind Kyla Garden Tips 🌿
I’ve always been passionate about plants, flowers, and the simple joy that comes from growing something beautiful. What started as a small balcony garden has turned into a love for helping others create their own green spaces — no matter how big or small.