
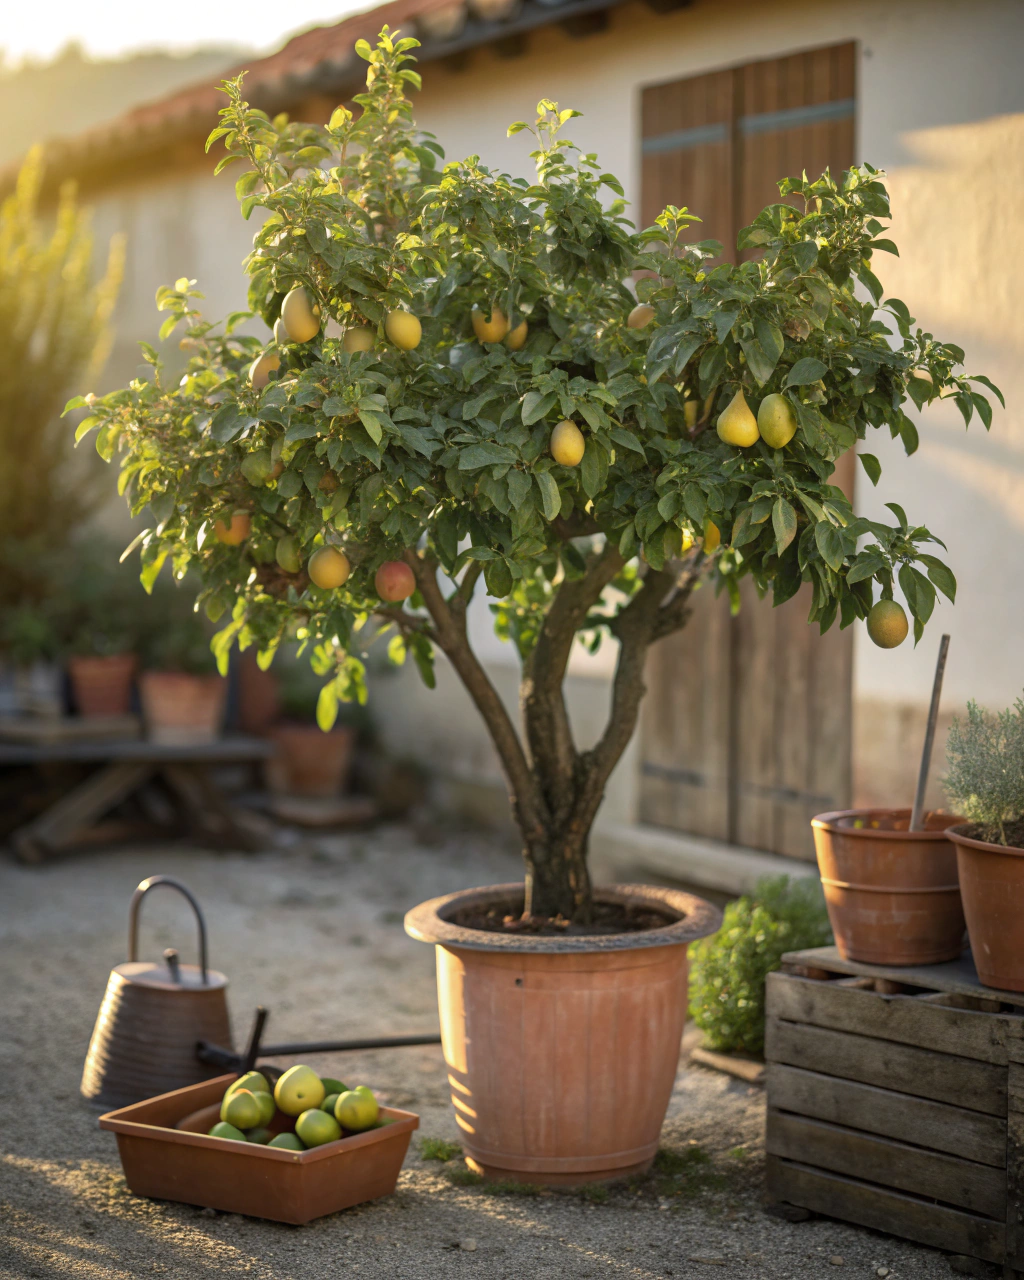
Why Grow Pears in Pots?
Pears are a classic fruit, prized for their delicate sweetness and lush aroma. Imagine harvesting your own crisp, juicy pears right from a balcony or small patio. You don’t need acres of land—growing pears in pots offers a wonderful way to enjoy fresh fruit even with limited space. You can do this, even if you only have a sunny corner or a balcony. With clear steps, practical advice, and a little patience, you will nurture healthy pear trees that reward you season after season. No bulky orchard needed—just good soil, the right pot, and your curiosity.
Getting Ready — What You’ll Need
Before you start, gather these essentials to set yourself up for success:
- Containers: At least 40–50 cm (16–20 inches) deep and 40 cm wide. Pear trees have vigorous roots that need space. Clay or terracotta pots are great for airflow and moisture control (if your area is very hot, use these to keep roots cool).
- Drainage Materials: 5 cm of gravel or broken pottery shards at the pot’s base to prevent waterlogging.
- Soil: A well-draining mix of 70% loam, 20% compost, and 10% coarse sand or perlite. Pears prefer slightly acidic to neutral soil with a pH of 6.0 to 7.0.
- Fertilizer: Balanced, low nitrogen fertilizer such as a type with an N-P-K ratio around 5-10-10, encouraging fruit production over leafy growth.
- Tools: Hand trowel, pruning shears, watering can with a narrow spout, and gloves.
- Varieties: Choose dwarf or semi-dwarf cultivars suited to container growth like ‘Conference Dwarf,’ ‘Garden Pearl,’ or ‘Pyrus communis ‘Doyenne du Comice’ (they are naturally smaller and fruit earlier).
- Pollination: Some pears are self-pollinating, but most require nearby pear trees or compatible varieties for cross-pollination — if space is tight, choose self-fertile types like ‘Williams’ or use grafted branches.
Eco-friendly tip: Use homemade compost or worm castings to enrich your soil naturally, reducing the need for synthetic fertilizers.
Step-by-Step — How to Grow Pears in Pots
1. Preparing Your Pot
Start by scrubbing your pot clean to remove salts or old soil residues. Good hygiene prevents diseases. Add a 5 cm drainage layer of gravel or small stones at the bottom—this stops water from pooling around roots and causing rot.
Next, fill the pot with your soil mix: 70% loam, 20% compost, and 10% coarse sand or perlite. This blend retains moisture yet drains well, keeping roots healthy. The soil should feel like a wrung-out sponge: moist but not soggy. Avoid compacting the soil too much — shaking the pot gently after filling encourages the soil to settle without suffocating air pockets.
Common mistake: Using soil that’s too dense, or pots without drainage holes. This stifles roots and invites rot.
2. Sowing or Planting
If planting a young pear tree or sapling, gently remove it from its nursery pot and check the roots. Soak roots in water for 10–15 minutes before planting to rehydrate them. Dig a hole in the soil about 30 cm (12 in) deep, wide enough so the roots spread comfortably without crowding.
Position the tree so that the graft union (a small swell near the soil line) is 5 cm above the soil surface to prevent rot. Backfill gently and firm the soil with your hands, avoiding compacting.
If starting from seed (less common), soak seeds for 24 hours before sowing. Scarify hard seed coats by lightly sanding or nicking to encourage germination. Sow seeds just 0.5–1 cm deep in moist soil, keeping the temperature steady around 18–21°C (65–70°F). You should see seedlings emerge within 2–3 weeks.
Pro tip: When planting more than one pear variety for cross-pollination, space them so their leaves barely touch; this ensures good airflow and root room, ideal for container growing.
3. Watering and Sunlight
Water your pear pot deeply but infrequently. Aim to soak the soil until water seeps from the drainage holes—about 2–3 times per week in warm weather, less often in cooler months. Let the top 2 cm of soil dry out before watering again.
In hot, dry, or windy spots, group pots together to share humidity and provide mutual wind protection. Mulching with straw or leaf mold helps keep the soil cool. If the heat peaks over midday, add a sheer fabric shade for 1–2 hours to protect tender roots.
Pears need 6–8 hours of sunlight daily for rich flavor and robust growth. In cloudier regions, position pots on south-facing balconies or near bright windows. Rotate pots every few weeks to ensure even light exposure and balanced growth.
4. Feeding and Maintenance
Feed your tree every 3–4 weeks during the growing season (spring to early autumn) using a balanced fertilizer higher in phosphorus and potassium. Avoid excess nitrogen which promotes leafy growth but reduces fruiting.
Thin small fruits when they reach the size of a marble—leave one fruit every 10–15 cm along branches to improve size and flavor of remaining pears. Prune dead or overcrowded branches in late winter or early spring, keeping tree height manageable within your pot.
Check soil aeration by gently loosening the top 3–4 cm of soil once a month; compacted soil blocks oxygen.
As I’ve often said, “The secret is not more work—it’s regular care and observation.” Pay attention to your tree’s responses and adjust water and feeding accordingly.
5. Troubleshooting While They Grow
Watch for yellow leaves—this can mean too much nitrogen or poor drainage. Add compost or liquid seaweed to rebalance nutrients.
If your pear struggles to grow, it might lack sufficient light—move the pot to a sunnier place. Stunted growth often signals root crowding; consider repotting if roots peek from drainage holes.
Pests like aphids or pear psylla appear as sticky sap or curled leaves. Spray with insecticidal soap or introduce beneficial insects such as ladybugs.
If soil remains soggy, check that drainage holes aren’t blocked. Poor drainage leads to root rot—a common mistake in container growing.
6. Harvesting
Pears don’t always ripen fully on the tree, so harvest fruit when skin color changes from green to a subtle yellow tint and fruit feels slightly firm but not rock hard. This usually occurs about 70–90 days after fruit set, depending on variety.
To enhance sweetness, reduce watering during the last week before harvest. Gently twist or cut fruit from branches when it yields slightly to pressure without bruising. Handle pears carefully—their skin is thin and bruises easily.
After harvest, store pears in a dark place at 4–7°C (39–45°F), ideally with about 85% humidity. They keep fresh for up to 2 weeks. For longer preservation, consider drying thin slices or preparing homemade pear preserves.
Extra Tips for Perfect Results
- Companion plants: Lavender and marigolds deter pests; chives improve soil health and reduce fungal diseases; nasturtiums attract beneficial insects and aphids away from your pear.
- Rotate your pots every season to prevent soil fatigue and evenly expose roots to sunlight.
- Use mulch such as straws or fallen leaves to retain soil humidity and reduce temperature swings.
- Collect and use rainwater if possible—tap water can accumulate salts and harden container soil over time.
- In windy areas, cluster pots together for stability and shared moisture retention.
- Under intense midday sun, cover pots with a thin fabric shade for 1–2 hours to prevent root burn.
Common Mistakes and How to Fix Them
- Overwatering: Roots turn soft and rot. Let the top 2 cm of soil dry before watering again.
- Weak growth: Insufficient light. Move your pot to a location with more sun exposure.
- Yellow leaves: Too much nitrogen. Switch to a fertilizer richer in phosphorus and potassium.
- Poor germination: Seeds planted too deep. Limit sowing depth to 0.5–1 cm.
- Misshapen roots: Soil too compacted. Add coarse sand or perlite for better airflow.
Harvest and Storage
When harvesting, grasp pears gently and twist or cut stems to avoid damage. Avoid pulling sharply—that can break delicate branches.
Store fruits at a steady temperature of 4–7°C (39–45°F) in a humid, dark place for up to 2 weeks. Avoid stacking pears tightly to prevent bruising. Keep an eye on softness and smell to catch overripening early.
Alternative preservation methods include drying thin pear slices in a dehydrator, pickling with spices, or freezing peeled and sliced fruit for smoothies or baking.
Save seeds from fully ripe fruit by cleaning and drying them for germination next season. Remember to stratify the seeds—keep them in moist sand at about 4°C (39°F) for 60–90 days before sowing.
What Success Looks Like
When you harvest your first firm, fragrant pear, the subtle crunch and sweet aroma will remind you that your consistent care made it possible. A well-grown pear tree in a pot can yield about 1–2 kg (2–4 lb) of fruit per season, satisfying your taste buds and your green thumbs alike. This accomplishment is not about perfection, but your patience, attention, and growing connection with nature.
Mini Recap — Your Success Checklist
- Pot depth: At least 30 cm (12 in).
- Soil mix: 70% loam, 20% compost, 10% sand/perlite.
- Watering: Deep watering 2–3 times per week, letting the surface dry.
- Sunlight: Provide 6–8 hours of direct sun daily.
- Fertilizer: Feed every 3–4 weeks, low nitrogen, higher phosphorus.
- Harvest: Typically 70–90 days after flowering.
Closing Reflection
Remember, every pear tree you raise teaches you something new. Success isn’t about perfect technique or rushing growth — it comes from consistent attentiveness and kindness to your plant. Watch how it changes with the seasons, adjust your care, and enjoy the simple joy of nurturing life. That’s what makes you not just a gardener, but a steward of your own little orchard.

Hi there — I’m Kyla, the creator behind Kyla Garden Tips 🌿
I’ve always been passionate about plants, flowers, and the simple joy that comes from growing something beautiful. What started as a small balcony garden has turned into a love for helping others create their own green spaces — no matter how big or small.