
Why Grow Oregano in Containers Indoors?
Oregano is more than just a flavorful herb; it’s a gateway to authentic Mediterranean cuisine and a delightful companion for your indoor garden. You don’t need a large backyard to enjoy fresh, fragrant leaves bursting with the warm, herbal aroma that transforms everyday dishes. Whether you have a sunny kitchen windowsill, a small balcony, or just a bright corner, you can grow oregano in pots and reap culinary rewards year-round.
This guide will walk you through every practical step—from choosing the right container to harvesting perfectly scented leaves. You’ll learn how to tackle common challenges like limited space, soil moisture, and pests, so your oregano thrives inside your home. Trust me: with simple, clear guidance, you’ll soon have a steady supply of fresh Mediterranean flavor ready to elevate your cooking.
Getting Ready — What You’ll Need
Before you dig in, let’s gather everything essential for success. Each item plays a specific role in creating the ideal environment for your oregano plant.
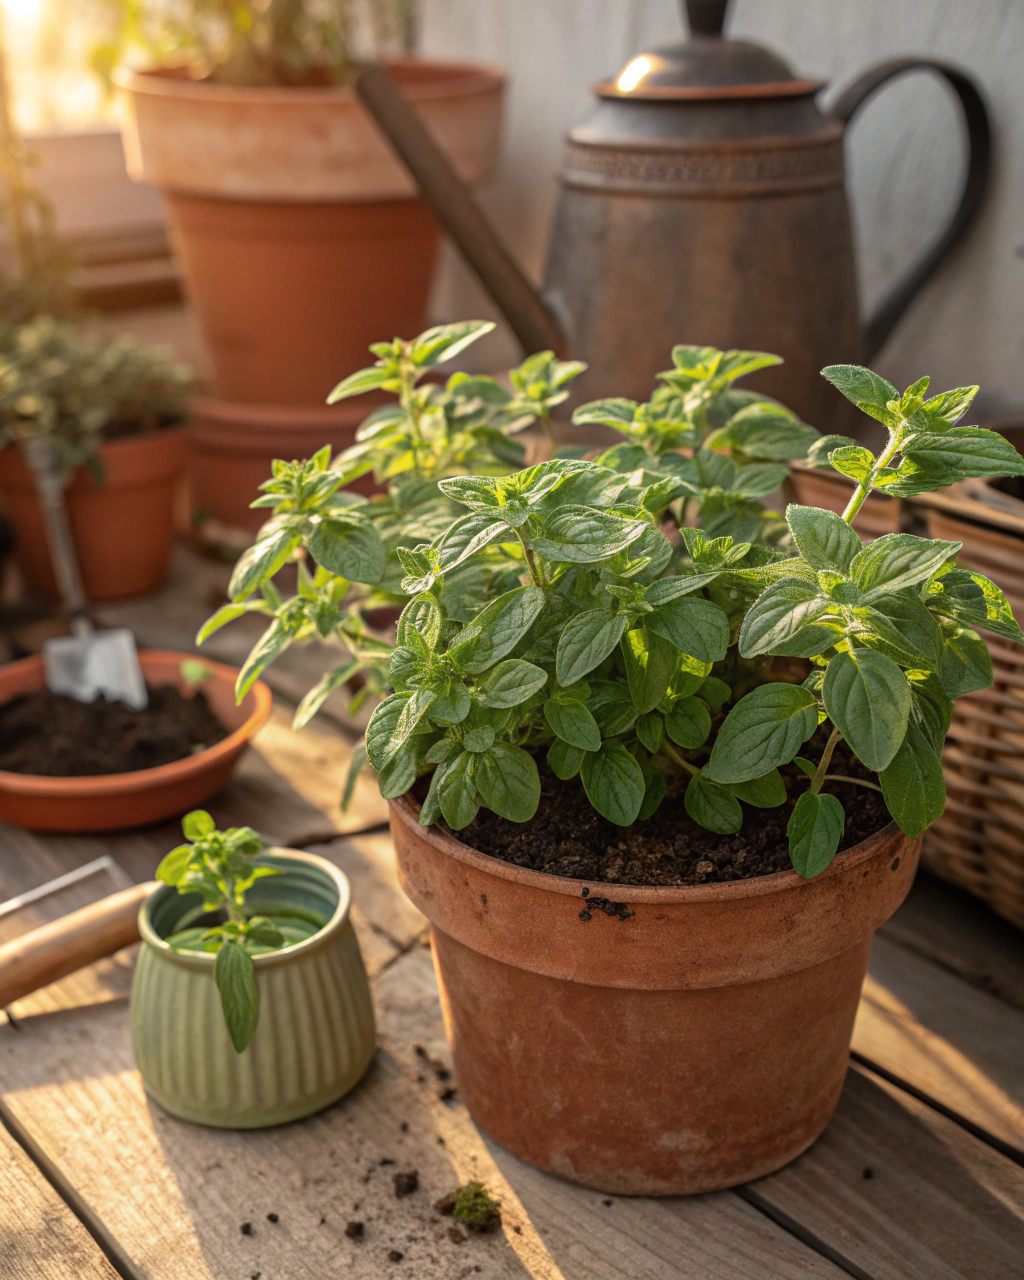
- Container: Choose a pot at least 20–30 cm (8–12 in) deep with drainage holes. Clay or terracotta pots are ideal for indoor growth because they allow air exchange and help regulate temperature. (If you’re on a budget, use recycled plastic pots but add extra drainage materials.)
- Soil: Use a well-draining, loose potting mix. The ideal mix consists of 70% loam, 20% compost, and 10% coarse sand or perlite. This balance provides aeration, nutrients, and moisture retention. (Adding a handful of worm castings improves fertility.)
- Seeds or seedlings: Obtain high-quality oregano seeds or small plants from a trusted garden center. Popular Mediterranean varieties include ‘Greek Oregano’ and ‘Italian Oregano’. Seedlings offer faster results, but sowing from seed maximizes variety options.
- Light source: Oregano demands 6–8 hours of bright sunlight daily. A south-facing window is best. Use a grow light (LED or fluorescent) if natural light is insufficient, especially during winter months.
- Watering tools: A watering can with a narrow spout or a spray bottle helps control moisture without drowning the plant.
- Fertilizer: Choose a balanced, low-nitrogen liquid fertilizer (10-10-10 or similar) to feed every 3–4 weeks. Organic options like fish emulsion or seaweed extract work wonderfully.
- Garden tools: Small pruning scissors, a hand trowel, and gloves ensure gentle handling and precision.
- Thermometer and humidity monitor: Optional but useful for maintaining optimal growing conditions—oregano thrives between 18°C and 24°C (65°F and 75°F) with moderate humidity.
Read Next: Cilantro in Containers: Grow Fresh Coriander Indoors
Step-by-Step — How to Grow Oregano in Pots
1. Preparing Your Pot
Start by scrubbing your pot thoroughly to remove dust or chemical residues—this ensures no harmful pathogens harm young roots. Make sure the drainage holes are clear; clogged holes cause water buildup, leading to root rot. Now, place a drainage layer of about 3 cm (1 inch) of small gravel or broken pottery pieces at the bottom. This creates space for excess water and prevents soggy soil.
Next, fill the pot with your soil mix: blend 70% loamy soil with 20% mature compost and 10% coarse sand or perlite. The soil should feel like a sponge wrung out—not dripping wet but moist enough that it holds shape when pressed lightly. Overly compacted soil restricts air and root growth; avoid packing the soil tightly.
Common Mistake: Using soil without good drainage or no holes results in waterlogged roots. Roots need oxygen, and soggy conditions will kill your oregano faster than drought.
2. Sowing or Planting
If you’re starting from seeds, sow them at a depth of only 0.5 to 1 cm (about ¼ inch). Space seeds about 2–3 cm (1 inch) apart to allow airflow and light. Warmth is crucial—keep the soil temperature steady between 20–22°C (68–72°F) for germination, which should occur in 7–14 days.
Before sowing, consider soaking the seeds in warm water for 12 hours to soften their tough coats; this quickens germination.
After planting, lightly moisten the soil, cover with a thin layer of vermiculite or sand (to retain moisture and prevent crusting), and place your pot in a warm, bright spot. The soil surface should feel damp but not wet—like a soft velvet touch.
Pro Tip: Use a small spray bottle to mist the soil daily until seedlings emerge. This avoids disturbing seeds with strong watering.
3. Watering and Sunlight
Water deeply about 2–3 times per week during warmer months. Check moisture by inserting your finger about 2 cm into the soil—when it feels dry there, it’s time to water again. Avoid shallow or frequent watering; this encourages weak roots and disease.
In hot, dry, or windy indoor environments, group pots together to create a microclimate retaining humidity. Mulching the soil with straw or finely shredded leaves also minimizes evaporation and temperature fluctuations around the roots.
Sunlight is non-negotiable for robust growth: aim for bright, direct light for 6–8 hours daily. When natural sunlight is low, supplement with a grow light hung about 15–20 cm (6–8 in) above the plant. Adjust duration on cloudy days to maintain photosynthesis.
If your home is very hot or sunny, clay pots will help keep roots cool, and consider a sheer fabric shade during the afternoon for 2–3 hours to prevent leaf bleaching.
4. Feeding and Maintenance
Feed oregano every 3–4 weeks during the growing season with a low-nitrogen fertilizer, such as a balanced organic liquid feed. Too much nitrogen causes leafy growth with less flavor, so stick to moderate amounts—dilute liquid fertilizer to half strength for safety.
Regularly thin out crowded seedlings by snipping weaker stems at soil level, allowing air to circulate and stronger plants to flourish. Prune actively by pinching the tops once plants reach 15–20 cm (6–8 in) in height to encourage bushiness and more leaves.
Keep the soil aerated by lightly loosening the surface with a hand fork, avoiding damaging roots. This reduces soil compaction and helps water penetrate evenly.
“The secret is not more work — it’s regular care and observation.” Many experienced gardeners will tell you this. Watch and respond to your plant’s needs as they change day by day.
5. Troubleshooting While They Grow
Yellow or pale leaves? This often signals too much nitrogen or insufficient phosphorus. Stop high-nitrogen fertilizer and add compost or liquid seaweed to rebalance nutrients.
Stunted or weak plants may lack sunlight—try moving your pot to a sunnier spot or provide supplemental light for at least 6 hours daily.
If soil remains soggy, check drainage holes for blockage and reduce watering frequency. If leaves show small holes or webbing, look for pests such as spider mites or aphids and wipe them off with a damp cloth or apply insecticidal soap.
6. Harvesting
Oregano is ready to harvest when plants reach approximately 15–20 cm (6–8 in) tall and stems are firm. Typically, this takes about 70–90 days after sowing. The leaves should appear deep green, glossy, and exhibit a strong, spicy aroma when rubbed between your fingers.
To maximize flavor, reduce watering one week before harvest. This concentrates the essential oils, intensifying the herb’s signature taste.
Harvest by gently pinching or cutting stems about 2–3 cm above a leaf node. You’ll feel a crisp snap that signals freshness. Avoid pulling the whole plant; oregano regenerates better with partial harvests.
Store fresh leaves in a breathable container or loosely wrapped in a damp paper towel inside the fridge at 4–7°C (39–45°F) for up to 2 weeks. For longer storage, dry them slowly in a warm, dark spot before crumbling and storing in airtight jars. Freezing chopped leaves in ice cube trays also preserves flavor for future dishes.
Extra Tips for Perfect Results
- Plant companion herbs such as basil, thyme, rosemary, or chives. They share similar care needs and repel certain pests.
- Rotate your pots each season—moving plants prevents soil exhaustion and keeps pests from building up.
- Keep soil moist with a thin mulch layer of straw or dried leaves, especially indoors during dry heating seasons.
- Whenever possible, use rainwater for irrigation. Tap water often contains minerals that harden soil over time.
- In windy interior spots, cluster your pots to reduce evaporation and provide stability.
- Under intense midday heat, apply a sheer fabric shade for 2–3 hours to protect your oregano from leaf scorch.
Common Mistakes and How to Fix Them
- Overwatering: Leaves turn yellow and roots become mushy. Remedy: Stop watering, let the top 2 cm dry out before resuming watering.
- Weak growth: Caused by insufficient light. Move pots to a sunnier window or install grow lights providing at least 6 hours of direct light.
- Yellow leaves: Too much nitrogen fertilizer. Switch to a balanced or phosphorus-rich fertilizer.
- Poor seed germination: Seeds planted too deep—limit depth to 0.5–1 cm to ensure sprouting.
- Misshapen roots: Soil too compact. Always mix in coarse sand or perlite for aeration and avoid heavy watering.
Harvest and Storage
Harvest gently by snipping stems above leaf nodes to avoid stressing the plant. Use sharp scissors or pruning shears for clean cuts. Avoid stripping more than one-third of the plant at a time to encourage regrowth.
Store fresh oregano leaves at a temperature of 4–7°C (39–45°F) with moderate humidity. In these conditions, leaves will stay fresh for up to 2 weeks. For long-term storage, drying is best: hang small bunches in a cool, dark, well-ventilated area for about 7–10 days.
Alternatively, freeze chopped oregano in ice cube trays with water or olive oil to preserve flavor for months.
Don’t forget to save seeds for your next planting season. Allow flower heads to dry completely on the plant, then shake seeds into paper bags and store in a cool, dry place.
What Success Looks Like
When you harvest your first batch of robust, deeply green oregano stems, you’ll notice a fragrant hit of warm, resinous spice the moment leaves are crushed between your fingers. Expect about 1–2 kg (2–4 lb) of useable leaves from a 30 cm (12 in) pot over a full growing season. The texture should be firm, with slightly fuzzy leaves that feel soft to the touch yet resilient.
Growing oregano indoors demands patience and attention, but the reward is a living bowl of Mediterranean warmth you can draw on anytime. You’ll develop an instinct for the plant’s subtle signals—slightly curled tips mean mild drought, glossy leaves express happiness, and a healthy stem snaps crisply with a satisfying sound.
Consistency and close observation are the true secrets—it’s not just growing herbs, it’s living with them.
Mini Recap — Your Success Checklist
- Pot depth: Minimum 30 cm (12 in).
- Soil mix: 70% loam, 20% compost, 10% sand/perlite.
- Watering: 2–3 times per week, adjusted by soil moisture.
- Sunlight: At least 6–8 hours daily.
- Fertilizer: Every 3–4 weeks, low nitrogen.
- Harvest: Between 70–90 days after sowing.
You may also like: Grow Rosemary in Containers for Year-Round Aroma
Closing Reflection
Remember, every green leaf you grow teaches you a little more about patience and care. Success with oregano doesn’t come from perfection but from attentive, consistent nurturing. Don’t rush the growth—watch your plant, note its changes, and adjust care as needed. That mindful connection is at the heart of becoming a true gardener. Holding fresh, fragrant oregano leaves in your hand is more than just a harvest—it’s proof you’ve grown something alive, vibrant, and deeply rewarding.

Hi there — I’m Kyla, the creator behind Kyla Garden Tips 🌿
I’ve always been passionate about plants, flowers, and the simple joy that comes from growing something beautiful. What started as a small balcony garden has turned into a love for helping others create their own green spaces — no matter how big or small.