
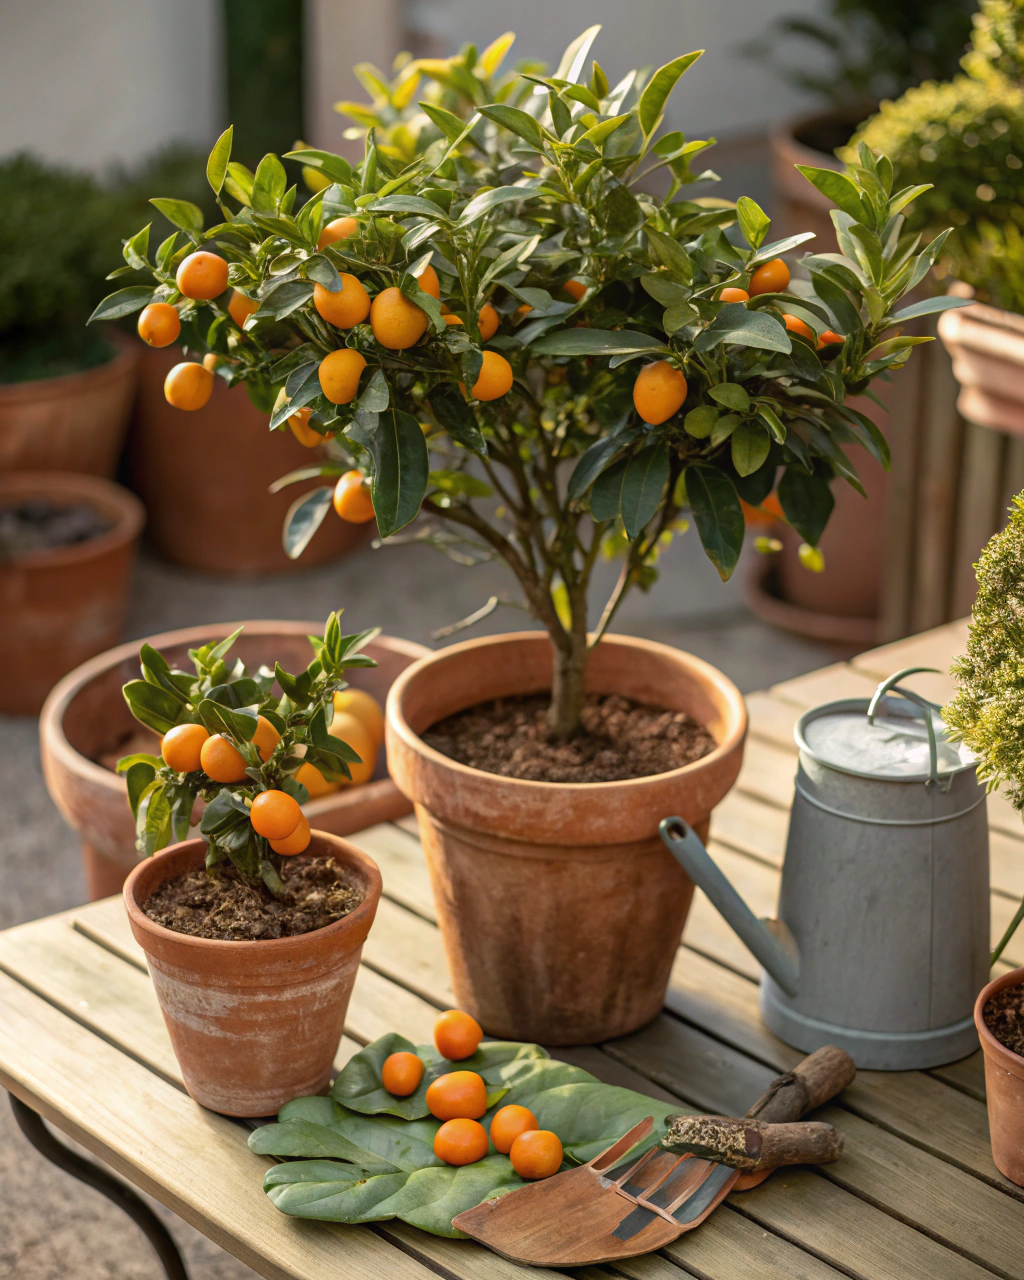
Why Grow Kumquats in Containers?
You might think kumquats are only for sunny groves or large gardens — but here’s the good news: you can grow these bite-sized citrus wonders in containers, even on a small balcony or patio. Kumquats offer a unique delight: edible skin that’s sweet and tart, perfect for snacking or cooking. Their manageable size fits comfortably in pots, making them ideal for limited spaces. Plus, the bright orange fruit and glossy green leaves bring a burst of color and fragrance to any spot you choose. With clear, step-by-step guidance, I’ll show you how to overcome challenges like soil choice, watering, and pests, so you feel confident enjoying fresh kumquats grown by your own hand.
Getting Ready — What You’ll Need
Before planting, gather these essentials to set your kumquat up for success:
- Container: At least 30 cm (12 in) deep and wide, with good drainage holes. (If your area is very hot, consider unglazed clay pots to keep roots cool.)
- Soil mix: A blend of 70% loamy soil, 20% well-rotted compost, and 10% coarse sand or perlite for optimal drainage and aeration.
- Certified kumquat sapling or seeds: Choose varieties like ‘Nagami’ or ‘Meiwa’ for container growing — they’re compact and prolific.
- Fertilizer: Balanced citrus fertilizer, low in nitrogen (NPK ratio around 5-10-10) for every 3–4 weeks, or organic alternatives like seaweed extract.
- Watering tools: A watering can or hose with a gentle spray to avoid soil washout.
- Palettes or pot feet: Elevate pots to ensure drainage and avoid waterlogging.
- Optional tools: Pruning shears, mulch material (straw or dry leaves), and shade cloth for hot climates.
- Location: A spot with 6–8 hours of direct sun, or a bright, sheltered area if you’re in a cloudier zone.
If you’re on a budget, repurpose containers like sturdy wooden boxes or large buckets (just drill holes in the base for drainage). Homemade compost or leaf mold also works well in place of commercial compost.
Further Reading: Grow Persimmons in Containers: A Unique Urban Fruit Tree
Step-by-Step — How to Grow Kumquats in Pots
1. Preparing Your Pot
Start by cleaning your container thoroughly with warm soapy water and rinsing well. This removes any pathogens or residue that could harm young roots. Place a drainage layer of coarse gravel or small stones to a depth of about 3–5 cm (1–2 in) at the bottom. This prevents water from pooling and suffocating the roots. Next, fill the pot with your soil mix, leaving about 3 cm (1 in) from the rim to allow room for watering. The soil should feel light and fluffy — think of a sponge wrung out but still moist. Avoid packing the soil down hard; overly compacted soil restricts root growth and airflow, while a pot without drainage holes will cause root rot within days.
2. Sowing or Planting
If you’re starting with seeds, soak them overnight in lukewarm water — around 25°C (77°F) is ideal — to soften the tough outer seed coat. Plant seeds at a shallow depth of 0.5–1 cm (¼ in–½ in), spaced a few centimeters apart (if planting multiple). For saplings, dig a hole wide and deep enough to accommodate the root ball without bending or crowding roots. Set the plant so the graft union (a slight bulge near the stem base) is just above the soil line. When done correctly, the soil around the seedling should be gently firm but not compressed, and the plant should stand upright with its leaves reaching toward the light. A pro tip: soak sapling roots in a diluted seaweed tonic for an hour before planting to strengthen root growth.
3. Watering and Sunlight
Your kumquat pot wants consistent moisture but never soggy soil. Water deeply until you see moisture trickling from the drainage holes, usually about 2–3 times per week during warm months. Feel the top 2–3 cm (¾ in–1¼ in) of soil; if it’s dry to touch, it’s time to water. In especially hot or windy conditions, you may need daily watering or grouping pots to share humidity. Mulching can greatly reduce evaporation. Luminosity is equally critical — kumquats need 6–8 hours of direct sunlight for good fruit development and healthy foliage. In cloudier zones, place pots facing south or use reflective surfaces nearby to maximize light. Partial afternoon shade can help in extremely hot climates, protecting leaves from scorching.
4. Feeding and Maintenance
Feed your kumquat every 3–4 weeks with a citrus-specific fertilizer, preferably one with higher phosphorus and potassium and lower nitrogen to promote flowering and fruiting rather than excessive leafy growth. When applying, water in thoroughly to avoid root burn. Regular pruning keeps the plant manageable and improves air circulation — remove dead or crossing branches and trim back crowded stems by about one-third each winter. Watch the soil texture; if it becomes compacted, carefully aerate by loosening the top 5 cm (2 in) with a hand fork. The secret is not more work — it’s regular care and observation. This steady attention will help spot early nutrient deficiencies or moisture issues, both of which can stunt growth or reduce fruit quality.
5. Troubleshooting While They Grow
Keep an eye out for common problems:
- Yellow leaves: This often indicates too much nitrogen or poor drainage. Adjust fertilizer to one higher in phosphorus and potassium, and check the pot’s drainage.
- Stunted growth: Could be insufficient light or compacted roots. Try moving your pot to sunnier spots, and gently loosen soil.
- Leaf drop: Overwatering or sudden temperature shifts are usually to blame. Stick to a watering routine, and protect your plant from cold drafts under 10°C (50°F).
- Pests: Watch for scale insects or aphids. Remove by hand or spray with insecticidal soap diluted at 5 mL per liter of water.
If you notice soil staying soggy, inspect drainage holes for blockage. Acting swiftly prevents rot and saves your plant’s roots.
6. Harvesting
Kumquats are usually ready to harvest around 70–90 days after flowering — typically in late winter to early spring depending on your climate. The fruits turn a vibrant, deep orange color and feel firm with a slight give when gently squeezed. The aroma is unmistakably fresh and citrusy. You’ll hear a faint snap or feel a little resistance when you carefully twist or clip from the stem — that’s the sign of ripe fruit. To enhance sweetness, cut back watering during the final week before harvest. Store harvested kumquats in a cool, dark place at around 4–7°C (39–45°F) with moderate humidity, where they keep fresh for up to 2 weeks. Alternatively, preserve excess fruit by pickling in brine, zesting for dried peel, or freezing slices.
Extra Tips for Perfect Results
- Plant companion herbs like basil, marigold, or chives near your kumquat pot to deter pests and boost pollination.
- Rotate your pot’s position every season to prevent soil fatigue and ensure balanced light exposure.
- Apply a mulch layer of straw, dry leaves, or bark chips to retain soil moisture and regulate temperature.
- Use rainwater for irrigation whenever possible — tap water’s hardness can build up salts and degrade the soil structure over time.
- In windy or exposed spots, cluster multiple pots together. This shares humidity and improves pot stability.
- If your summers get very hot, place a sheer fabric shade over your kumquat for the hottest part of the day to prevent leaf burn.
Common Mistakes and How to Fix Them
- Overwatering: Roots become soft and may rot. Fix by allowing the top 2 cm (¾ in) of soil to dry out fully before watering again.
- Weak growth: Lack of sunlight. Move your pot to a location with more than 6 hours of direct sunlight daily.
- Yellow leaves: Too much nitrogen fertilizer. Switch to a low-nitrogen, higher-phosphorus fertilizer to encourage fruiting.
- Poor germination: Seeds planted too deep (exceeding 1 cm / ½ in). Plant seeds shallowly to aid sprouting.
- Misshapen roots: Soil too compacted or no aeration. Always include coarse sand or perlite in your mix to improve airflow.
Harvest and Storage
Gently twist or snip kumquats from the branches using pruning shears to avoid damaging stems or bark. Handle fruit carefully; bruised kumquats spoil faster. Store them in a well-ventilated container or paper bag in a cool, dark area maintained between 4–7°C (39–45°F) for up to 2 weeks. If you have a bumper harvest, try preserving your fruits by slicing and freezing in airtight containers, or pickling them in brine or syrup for a unique condiment. Save some seeds by rinsing pulp away, drying on paper, and storing in a cool, dry place for next season’s planting.
What Success Looks Like
When you pull your first handful of firm, glossy kumquats from a healthy container, you’ll be rewarded not only with delicious fruit but also with a rich, sensory experience — the citrus fragrance mixing with the warm sun on your skin, the slightly rough peel under your fingers, and the sharp, sweet-tart pop as you bite into it. Expect an average yield of 1–2 kg (2–4 lb) of fruit per medium container in a good season. This is the quiet proof that your patience, observation, and consistent care have paid off. More than that, it becomes a ritual, a connection — a gardener’s reward.
Mini Recap — Your Success Checklist
- Pot depth: At least 30 cm (12 in).
- Soil mix: 70% loam, 20% compost, 10% sand or perlite.
- Watering: Deep watering 2–3 times per week, adjusted by soil moisture.
- Sunlight: Minimum 6–8 hours direct sun daily.
- Fertilizer: Low nitrogen citrus feed every 3–4 weeks.
- Harvest: Around 70–90 days after flowering.
You may also like: Grow Vanilla Orchids Indoors: The Ultimate Apartment Challenge
Closing Reflection
Growing kumquats in containers might seem daunting at first, but it’s a journey worth taking. Remember, success in gardening doesn’t stem from perfection, but from small, consistent efforts—each watering, each observation, each gentle pruning. Every plant you nurture shows you a little more about nature’s rhythms and your own patience. Take your time, enjoy the process, and know that each fragrant fruit you harvest is an achievement earned. That sense of quiet satisfaction? That’s what makes you a gardener.

Hi there — I’m Kyla, the creator behind Kyla Garden Tips 🌿
I’ve always been passionate about plants, flowers, and the simple joy that comes from growing something beautiful. What started as a small balcony garden has turned into a love for helping others create their own green spaces — no matter how big or small.