
Grow Coffee Plants in Pots: A Mini Cafe at Home
If you’ve ever dreamed of sipping fresh coffee made from beans you grew yourself, growing coffee plants in pots brings that dream within reach. This is a rewarding venture, even if you only have a balcony, patio, or a handful of sunny windowsills. Coffee plants are elegant, evergreen, and surprisingly adaptable to container growing. Plus, you get to nurture a living connection to your morning cup—a subtle, rich satisfaction that no store-bought beans can match. You can do this. In this guide, I’ll walk you through clear, practical steps and solutions to common pot-growing challenges, so you’re confident from seed to harvest.
Getting Ready — What You’ll Need
Growing coffee successfully starts with the right tools and growing environment. Here’s your essential shopping list and why each item matters:
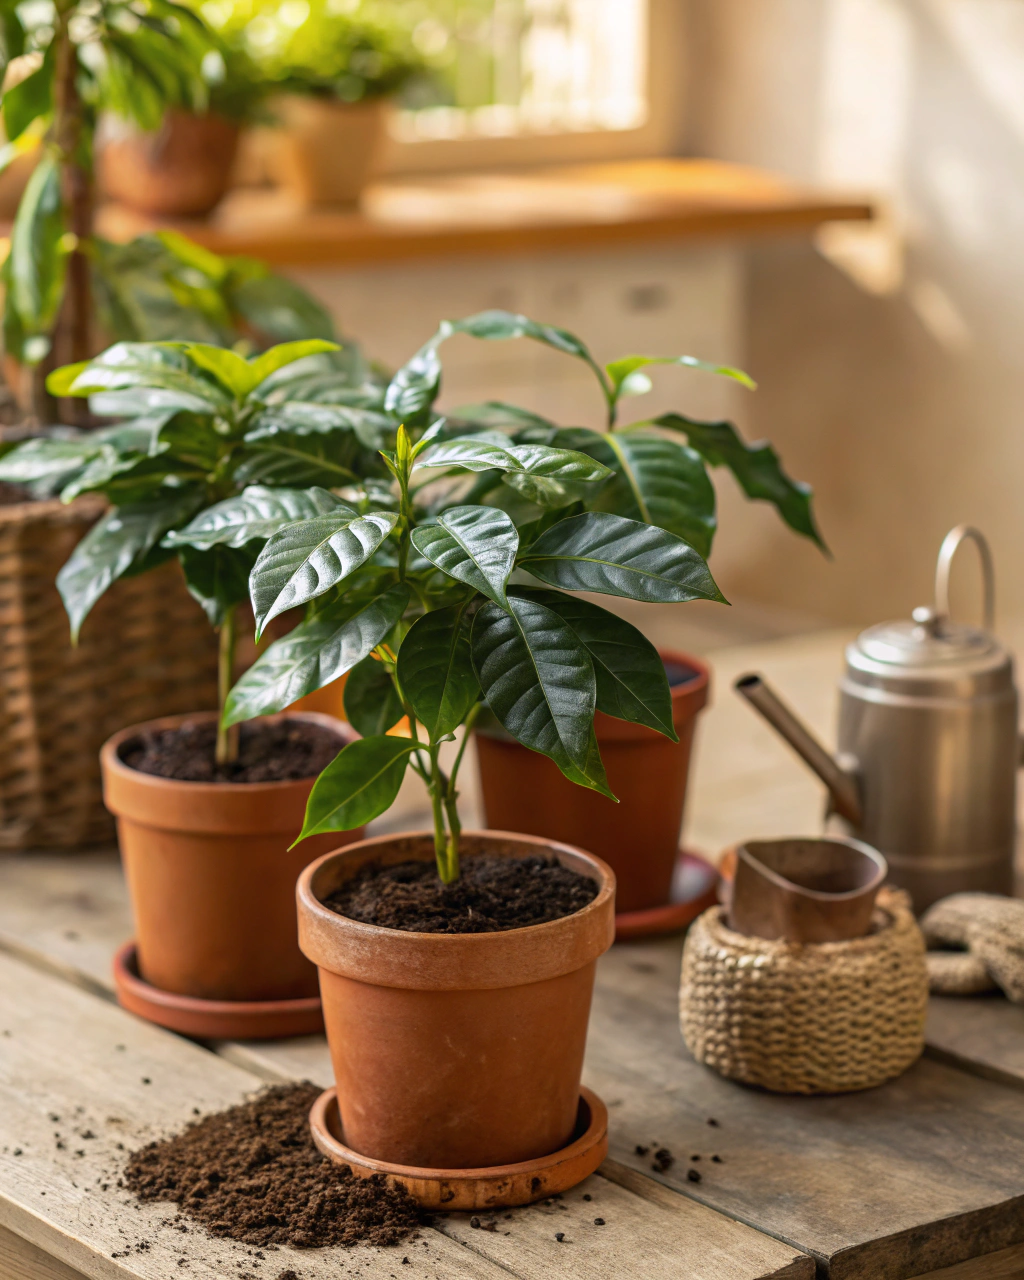
- Container pot: At least 30 cm (12 in) deep and wide. Coffee plants need space for roots to spread comfortably. Use plastic, ceramic, or terracotta pots (if your area is hot, clay pots help keep roots cooler).
- Drainage holes: Absolute must-have to avoid waterlogging and root rot.
- Soil mix: Rich, well-draining and slightly acidic, with a pH of 6.0–6.5. Use a mix of 70% loam soil, 20% compost, and 10% coarse sand or perlite for aeration.
- Organic fertilizer: Low nitrogen, higher phosphorus and potassium balance—look for a formula like 5-10-10 NPK or use composted coffee grounds.
- Coffee seeds or young seedlings: Arabica (Coffea arabica) is the most common and flavorsome variety. Choose fresh, plump seeds or healthy plants from a nursery.
- Water source: Ideally rainwater or filtered water; tap water may contain minerals that build up and harm soil structure over time.
- Location: A spot with 6–8 hours of bright, indirect sunlight, preferably East or West facing. Direct midday sun can scorch leaves, so some afternoon shade might be necessary.
- Garden tools: Small trowel, watering can with a fine rose, pruning shears for shaping, and a moisture meter (optional, but helpful).
Low-budget tip: Use reclaimed pots from old plants or community garden swaps. For soil, mix your own compost if you have the space, or supplement store-bought dirt with shredded leaves and coffee grounds.
Continue Reading: Grow Vanilla Orchids Indoors: The Ultimate Apartment Challenge
Step-by-Step — How to Grow Coffee Plants in Pots
1. Preparing Your Pot
Start by thoroughly washing your pot if it’s reused to remove salts or pathogens. Check that drainage holes are clear and add a layer of 3–5 cm (1–2 in) of coarse gravel or broken pottery at the bottom to aid drainage. This prevents water from pooling and causing root rot.
Next, fill your pot with the prepared soil mix: 70% rich loamy soil, 20% mature compost, 10% coarse sand or perlite. The soil should feel moist but well-aerated—imagine a sponge wrung out with just enough moisture to hold together without dripping.
Important: Avoid compacting the soil too much. Overly dense soil suffocates roots and impedes water flow. Coffee plants prefer slightly acidic soil; if your soil is alkaline, add a handful of coffee grounds or peat moss.
2. Sowing or Planting
If you’re starting with seeds, soak them in warm water for 24 hours to soften the hard outer shell and encourage germination. Plant seeds about 1 cm (0.4 in) deep in the soil. Keep seeds spaced at least 5 cm (2 in) apart if planting multiple to prevent overcrowding.
The ideal germination temperature is between 20–25°C (68–77°F). The soil surface will feel warm and slightly humid—not soggy but not dry—for best sprouting results. Seedlings often emerge within 4–6 weeks.
Pro tip: Cover the pot loosely with clear plastic wrap or a humidity dome to retain warmth and moisture while seeds germinate—remove it as soon as they sprout to prevent fungal problems.
If you’re planting nursery seedlings instead, dig a hole deep enough so the root ball sits just below the soil surface. Firm surrounding soil gently.
3. Watering and Sunlight
Watering coffee must be balanced—too little stresses the plant, too much drowns roots. In warm weather, you’ll water deeply about 2–3 times per week. Pour water slowly until you see moisture draining from the bottom holes.
Check soil moisture by sticking your finger about 2 cm (0.8 in) into the soil. If it feels dry, it’s time to water. If it’s still moist, hold off. Coffee plants like consistent moisture but hate soggy roots.
Hot, dry, or windy locations accelerate water loss. In these cases, group your coffee pots together to create a microclimate or mulch the surface with straw or leaf mold to retain humidity and stabilize temperature.
Light is crucial. Give your coffee plants 6–8 hours of bright, indirect sunlight daily. In cloudy climates, supplement with grow lights or move pots south-facing during winter months. Direct, harsh midday sun can burn the glossy, dark green leaves; provide dappled shade when temperatures climb above 30°C (86°F).
4. Feeding and Maintenance
Feed your coffee plants every 3–4 weeks during the growing season using a low-nitrogen fertilizer to promote healthy root and berry development without producing excessive leafy growth. Organic options include fish emulsion or compost teas.
Regularly check soil aeration—if the soil surface hardens, gently loosen with a fork to improve oxygenation. Prune any weak, leggy shoots to encourage strong branching and better air circulation.
Watch for nutrient imbalances: pale leaves or slow growth often mean deficiencies; dark green leaves with poor growth suggest too much nitrogen. Adjust fertilizing accordingly.
“The secret is not more work — it’s regular care and observation.” Over the years, I’ve found steady, gentle attention outperforms occasional heavy-handed treatments.
5. Troubleshooting While They Grow
You’ll likely meet a few challenges along the way, but they’re easy to manage once you understand the signs:
- Yellow leaves: Could indicate overwatering or too much nitrogen. Remedy: reduce watering frequency and switch to a fertilizer higher in phosphorus.
- Stunted growth: Insufficient light. Move your pot to a sunnier spot or provide supplemental light.
- Wilting or drooping leaves: Underwatering or root damage. Water deeply, check roots carefully, and ensure drainage holes are clear.
- Pests: Coffee plants can attract aphids and spider mites. Spray with insecticidal soap or neem oil early, and wipe leaves regularly.
- Brown edges on leaves: Low humidity or salt build-up from tap water. Increase humidity by misting daily or use collected rainwater.
6. Harvesting
Your patience pays off when bright, shiny coffee cherries appear, usually after 3–4 years in pots, with full fruiting after about 70–90 days post-flowering for each fruit batch. Cherries turn a deep red or bright yellow (variety dependent) when ripe, with a firm but slightly soft texture under gentle pressure.
To harvest, gently pull ripe cherries; they should detach easily without damaging the small branches. You’ll feel a subtle “pop” as the stem releases. To enhance flavor, reduce watering the final week before harvest to concentrate sugars within the fruit.
After harvesting, store cherries in a cool, dark place at about 10–15°C (50–59°F) and 60–70% humidity if you plan to process them soon. For longer storage, drying or freezing the beans is recommended.
Extra Tips for Perfect Results
- Companion plants: Grow herbs like basil, mint, or marigolds nearby to deter pests naturally and boost soil health.
- Rotate your pots each season to prevent soil fatigue and uneven sun exposure.
- Mulch with straw or shredded leaves to keep soil moist and cool.
- Use rainwater if possible — tap water can contain chlorine and calcium that harden soil.
- In windy locations, group pots together to shield plants and maintain humidity.
- In hot sunnier climates, shade coffee plants with a lightweight fabric during peak midday hours to prevent leaf scorch.
Common Mistakes and How to Fix Them
- Overwatering: Roots become soft and rot. Let the top 2 cm (0.8 in) dry before watering again; ensure drainage holes stay clear.
- Weak growth: Often due to lack of light. Move your pot to a brighter spot offering 6–8 hours of sunlight.
- Yellow leaves: Caused by excess nitrogen fertilizer. Switch to a low-nitrogen, higher phosphorus formulation to balance leaf and root growth.
- Poor germination: Seeds planted too deep—limit seed depth to 0.5–1 cm (0.2–0.4 in) to allow sprouting.
- Misshapen roots: Soil too compacted. Always mix in coarse sand or perlite for better airflow and healthy root development.
Harvest and Storage
When harvesting, be gentle to avoid damaged stems or bruised cherries—bruising affects flavor and storage life. Pull or pinch ripe cherries off individually rather than shaking branches to minimize harm.
Store harvested beans or cherries in a cool, dry place. Ideal storage temperature is between 4–7°C (39–45°F), and the beans can last up to 2 weeks if kept away from moisture and light.
For longer preservation, dry coffee cherries in the sun until shells crack and store in an airtight container. You can also pickle some beans traditionally or freeze green beans if you have freezer space.
Save fresh seeds from ripe cherries for next season by fermenting, washing, and drying thoroughly before storing in a paper bag in a dark cupboard.
What Success Looks Like
When you pull your first cluster of glossy, dark green leaves close and hold a perfectly ripened cherry in your palm, you’ll feel a quiet satisfaction that is wholly yours. The rich aroma of coffee plants is subtle but unmistakable—earthy, fresh, and green, a gentle reminder of the journey the beans took from soil to cup.
In a 30 cm (12 in) pot, you can expect a yield of about 1–2 kg (2–4 lb) of beans annually once mature—enough for many home-brewed cups and to share the joy with friends.
Consistent observation, gentle care, and a bit of patience are your real rewards. Growing coffee at home is as much about connection to the plant as it is about the harvest.
Mini Recap — Your Success Checklist
- Pot depth: Minimum 30 cm (12 in) deep and wide
- Soil mix: 70% loam, 20% compost, 10% sand or perlite
- Watering: Deeply, 2–3 times per week in warm weather, adjusted by soil moisture
- Sunlight: 6–8 hours of bright, indirect sunlight per day
- Fertilizer: Every 3–4 weeks, with low nitrogen and higher phosphorus
- Harvest: Cherries ripe 70–90 days after flowering
Read More: Grow Dragon Fruit in Pots: A Stunning Balcony Plant
Closing Reflection
Remember, every plant you grow teaches you something new. Growing coffee in pots is not about perfection but about steady, caring attention. Watch your plant closely, adjust when needed, and don’t rush the process. This mindful rhythm — observation, care, and patience — is what truly makes you a gardener. Soon enough, your mini cafe will be a reality.

Hi there — I’m Kyla, the creator behind Kyla Garden Tips 🌿
I’ve always been passionate about plants, flowers, and the simple joy that comes from growing something beautiful. What started as a small balcony garden has turned into a love for helping others create their own green spaces — no matter how big or small.