
Why Grow Basil in Pots?
You might think fresh basil is just something you buy at the supermarket, but growing it yourself unlocks a completely different experience. The aroma alone—a sweet, refreshing burst of clove and mint—is worth the effort. Plus, basil is surprisingly easy to grow, even if you only have a tiny balcony, windowsill, or patio. Imagine snipping fragrant leaves just when you need them for pesto, salad, or a caprese salad. It’s rewarding, economical, and elevates your meals in a way store-bought herbs rarely do. You can do this with minimal space and simple tools. Follow these clear, practical steps and you’ll have a lush, vibrant herb garden in pots before you know it. Let’s start growing.
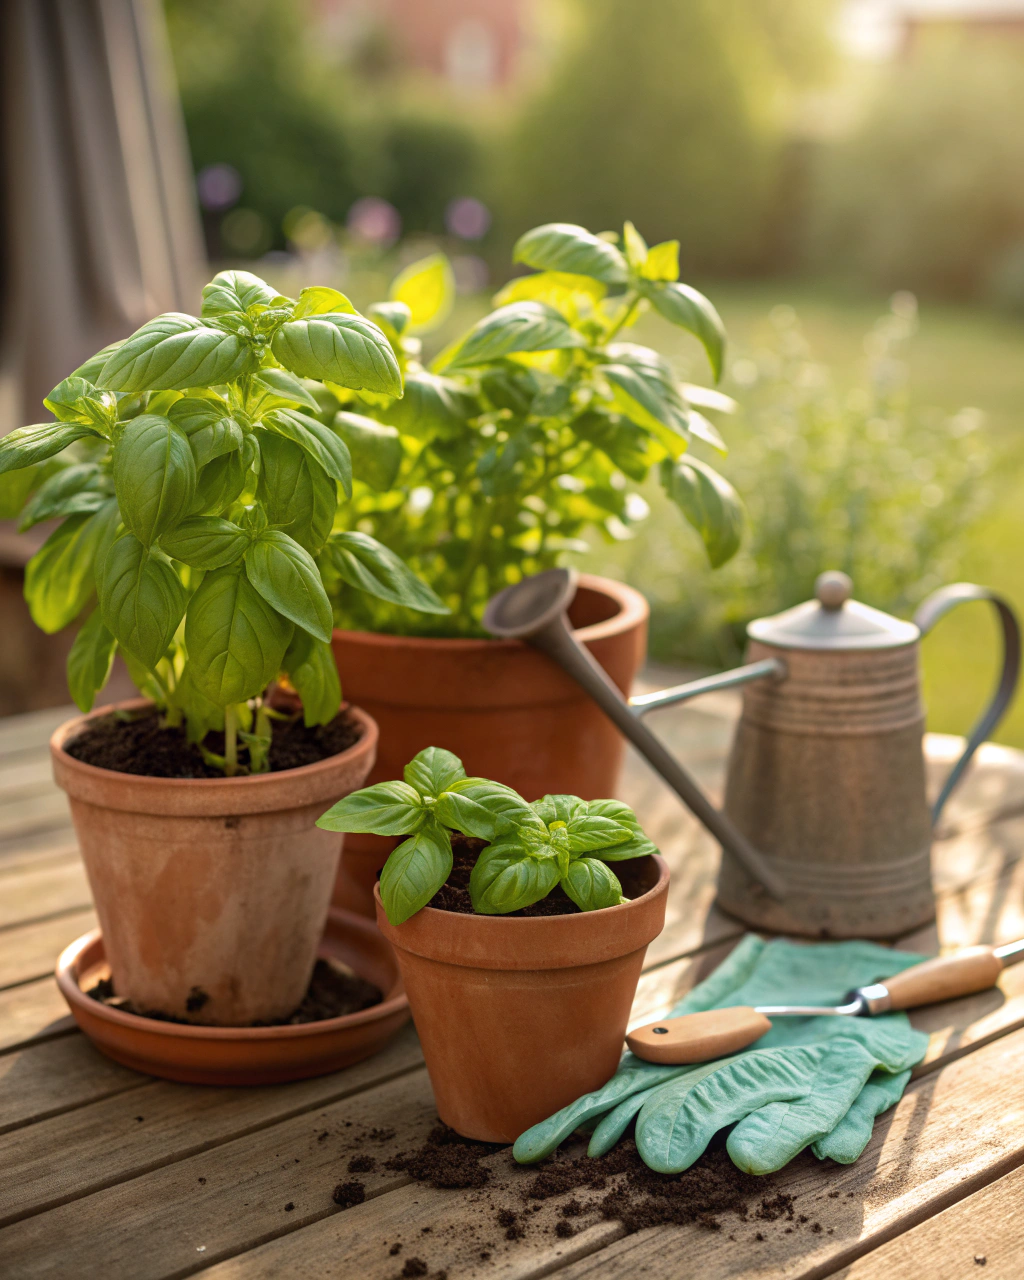
Getting Ready — What You’ll Need
Here’s your essential checklist to cultivate basil successfully in pots:
- Pot with a minimum depth of 30 cm (12 inches): Basil roots spread and need space to grow. Clay or terracotta pots work well (use clay if your area gets very hot to keep roots cool).
- Drainage holes: Vital to prevent waterlogging. No holes? Drill some or use a plastic pot with holes inside a decorative cover pot.
- Soil mix: Use a combination of 70% loam-based potting soil, 20% well-rotted compost, and 10% coarse sand or perlite for aeration and drainage.
- Fertilizer: Choose a balanced organic fertilizer with lower nitrogen (N-P-K ratio around 5-10-5) to encourage leaf growth without becoming too leggy.
- Seeds or starter plants: Italian Genovese, Sweet Basil, or Lemon Basil are excellent choices for pots.
- Watering can with a fine rose: Allows gentle watering without disturbing young seedlings.
- Labels and markers: To track different basil varieties or planting dates.
- Sunlight: Access to a spot that gets 6–8 hours of direct sunlight daily (south-facing window, balcony, or patio).
- Optional tools: Small hand trowel, pruning scissors, and mulch material like straw or shredded leaves to keep moisture.
If your budget is tight, use recycled containers like yogurt pots or old kitchenware—just ensure enough drainage and space for root growth. For soil, homemade compost mixed with native garden soil and sand works well. You don’t need fancy equipment to grow healthy, thriving basil.
Step-by-Step — How to Grow Basil in Pots
1. Preparing Your Pot
First, clean your pot thoroughly to avoid any disease or pests lingering from previous use. Rinse with warm soapy water and let it dry completely. Check that it has adequate drainage holes—good drainage is critical to prevent root rot.
Begin by placing a drainage layer of about 2–3 cm (1 inch) of small stones or broken pottery shards at the bottom. This layer allows excess water to escape and prevents waterlogging near the roots.
Fill the pot with your soil mix, leaving about 2–3 cm (1 inch) from the rim to prevent overflow during watering. The soil should feel like a wrung-out sponge—moist but not soggy. Avoid compacting the soil too much; roots need air to breathe. You want a light, crumbly texture so water can infiltrate evenly.
Common mistake: heavy, compacted soil or pots without drainage holes often cause root diseases. Always check for these before planting.
2. Sowing or Planting
If you’re starting from seed, sprinkle seeds at a depth of about 0.5–1 cm (¼–½ inch) into slightly moist soil. Space seeds around 2.5 cm (1 inch) apart if sowing multiple per pot—you’ll thin them to one or two per spot later.
Ideal soil temperature for germination is between 21–27°C (70–80°F). You can encourage faster sprouting by pre-soaking seeds in warm water for 4–6 hours to soften the seed coat.
Cover seeds lightly with soil, then mist gently to settle it without washing seeds away. You want the soil damp but not waterlogged.
Pro tip: Covering your pot lightly with clear plastic wrap or a humidity dome keeps moisture consistent and speeds germination—just remember to remove it once seedlings appear to prevent mold.
If you’ve bought starter plants, plant them directly, spacing at least 20 cm (8 inches) apart for optimal air circulation as they grow.
3. Watering and Sunlight
Water your basil when the top 2 cm (¾ inch) of soil feels dry to the touch. In warm weather, this often means watering 2–3 times per week, sometimes daily during heatwaves if pots dry quickly.
When watering, soak the soil deeply until moisture seeps out the drainage holes—you want roots to develop downward and strong.
If you’re in a very hot, dry, or windy location, group pots together to create a mini microclimate, reducing evaporation. Mulch the soil surface with straw or shredded leaves to retain humidity. For extreme heat, moving pots to a spot with afternoon shade or placing a light fabric shade over midday sun helps prevent leaf scorch.
Basil loves sunlight—aim for 6–8 hours of direct sun daily. If you’re in a cloudier zone, use supplemental grow lights or rotate your pots regularly to maximize exposure. Otherwise, basil becomes leggy, weak, and less flavorful.
4. Feeding and Maintenance
Feed your basil every 3–4 weeks with a liquid organic fertilizer or slow-release pellets tailored for edible plants. Choosing a fertilizer with a lower nitrogen content—but higher phosphorus—ensures steady leaf growth without excessive foliage that’s weak or overly lush.
Thin seedlings or young plants as they grow by snipping the weakest-looking ones at soil level, leaving 15–20 cm (6–8 inches) apart. This spacing allows each plant enough room to develop full leaves and strong stems.
Prune your basil regularly by pinching back the tips once plants reach 10–15 cm (4–6 inches) tall. This encourages bushier growth and delays flowering, keeping the leaves tender and flavorful.
Check soil aeration occasionally by gently loosening the surface—compact soil blocks oxygen to roots and slows growth.
Watch for symptoms like yellowing leaves or wilting, which can indicate nutrient imbalance or water stress. You might see:
- Pale leaves: add organic compost or liquid seaweed.
- Soft, soggy leaves: reduce watering and check drainage.
“The secret is not more work — it’s regular care and observation,” a key lesson from years growing basil on my balcony. This steady attention pays off in lush plants and excellent flavor.
5. Troubleshooting While They Grow
Problems happen, but they’re usually fixable:
- Yellow leaves: Often from overwatering or too much nitrogen fertilizer. Cut back watering and switch to a balanced feed with more phosphorus.
- Stunted growth: Lack of light or poor drainage. Move the pot to a sunnier spot and verify the soil isn’t soggy.
- Pests: Watch for aphids and whiteflies. Spray affected plants gently with soapy water or neem oil early in the morning.
- Poor germination: Seeds planted too deep (should be ≤1 cm). Sow shallow or start indoors with warmth and light.
- Brown or dry leaf edges: Might be wind burn or underwatering. Increase humidity, mulch soil, and shelter pots from strong winds.
6. Harvesting
Basil is ready to harvest once plants reach about 20–25 cm (8–10 inches) tall, usually 70–90 days after sowing. The leaves should be deep green, firm, and fragrant, not yellow or spotted.
Use clean scissors or pinch the top leaves just above a pair of leaves or stem node to encourage further branching and growth. Freshly cut basil has a distinct crackle and a burst of aroma—its unmistakable “freshness” you’ll learn to recognize.
To enhance flavor, stop watering for the last week before harvest (don’t let plants wilt completely) — this concentrates essential oils in the leaves.
For storage, keep basil in a dark place, wrapped loosely in a damp paper towel or stored in a container with a slightly open lid at 4–7°C (39–45°F). Use within 1–2 weeks for best taste.
Alternatively, freeze basil leaves whole or chopped in ice cube trays with olive oil, dry leaves for tea blends, or preserve in vinegars for longer enjoyment.
Extra Tips for Perfect Results
- Companion plants: Plant basil near tomatoes (repels pests), peppers, oregano, or marigolds to improve growth and reduce insect issues.
- Rotate pots: Change the spot or soil each season to prevent soil fatigue and disease buildup.
- Mulch: Use straw, shredded leaves, or coconut coir atop soil to keep moisture and temperature stable.
- Use rainwater: Tap water often contains minerals that can harden soil over time; rainwater is gentler and better for herbs.
- Wind protection: In breezy spots, cluster your pots to create shared humidity and reduce stress on plants.
- Heat management: In hot climates, add a lightweight shade cloth during midday to prevent leaf scorch.
Common Mistakes and How to Fix Them
- Overwatering: Roots stay soft and rot. Let the top 2 cm (¾ inch) of soil dry before next watering.
- Weak growth: Too little light. Move your pot to a sunnier location with 6–8 hours of direct sun.
- Yellow leaves: Excess nitrogen in fertilizer. Switch to a balanced feed with higher phosphorus.
- Poor germination: Seeds planted too deep. Limit seed depth to 0.5–1 cm (¼–½ inch).
- Misshapen roots: Compacted soil limits growth. Mix 10% coarse sand or perlite into soil for airflow and drainage.
Harvest and Storage
Harvest basil by gently pinching or snipping whole stems near the base without damaging roots or other stems. This encourages new growth and prolongs the life of your plant. Aim to harvest in the morning after dew evaporates but before the full heat of the day to preserve essential oils.
Keep harvested basil at around 4–7°C (39–45°F) with moderate humidity, ideally wrapped in a slightly damp cloth or paper towel and placed in an airtight container. Basil lasts up to 2 weeks when stored correctly.
For longer preservation, drying basil is simple—hang small bunches upside down in a dark, ventilated space until crisp. Alternatively, freeze leaves in olive oil or water ice cube trays for easy cooking additions.
Saving seeds for next season is easy: allow some flowers to bloom and dry, collect the tiny black seeds, and store them in a cool, dry place. This way, the cycle continues, and you’ll have your own seed stock year after year.
What Success Looks Like
When your basil pot brims with lush, vibrant green leaves and fills the air with fresh herbal scent, you’ll feel a quiet pride. Each snip of leaf offers a firm, aromatic reward—a testament to your patient care. From a single 30 cm (12-inch) pot, expect about 1–2 kg (2–4 lb) of fresh basil through the season, enough to flavor dozens of meals.
Success is more than yield; it’s the connection you build, the observation of subtle changes in leaf color or plant posture, and the intimacy of working with life in your hands. Your seasoning is fresher, your dishes more vibrant, and your garden a place of ongoing discovery.
Mini Recap — Your Success Checklist
- Pot depth: Minimum 30 cm (12 inches).
- Soil mix: 70% loam, 20% compost, 10% sand/perlite.
- Watering: 2–3 times per week, adjusted by soil moisture (top 2 cm dry).
- Sunlight: 6–8 hours direct sun daily.
- Fertilizer: Every 3–4 weeks, prefer lower nitrogen.
- Harvest: 70–90 days after sowing, pinch before flowering.
Closing Reflection
Growing basil in pots isn’t about perfection but about building a regular rhythm with your plants. Every seed you sow, every leaf you pinch, teaches you to notice details you never saw before—whether the soil is too dry or a leaf is wilting. Don’t rush growth. Watch, learn, adjust, and soon you’ll be harvesting fresh, fragrant basil that enriches your kitchen and your spirit. That’s what makes you not just a gardener, but a cultivator of life and flavor.

Hi there — I’m Kyla, the creator behind Kyla Garden Tips 🌿
I’ve always been passionate about plants, flowers, and the simple joy that comes from growing something beautiful. What started as a small balcony garden has turned into a love for helping others create their own green spaces — no matter how big or small.