
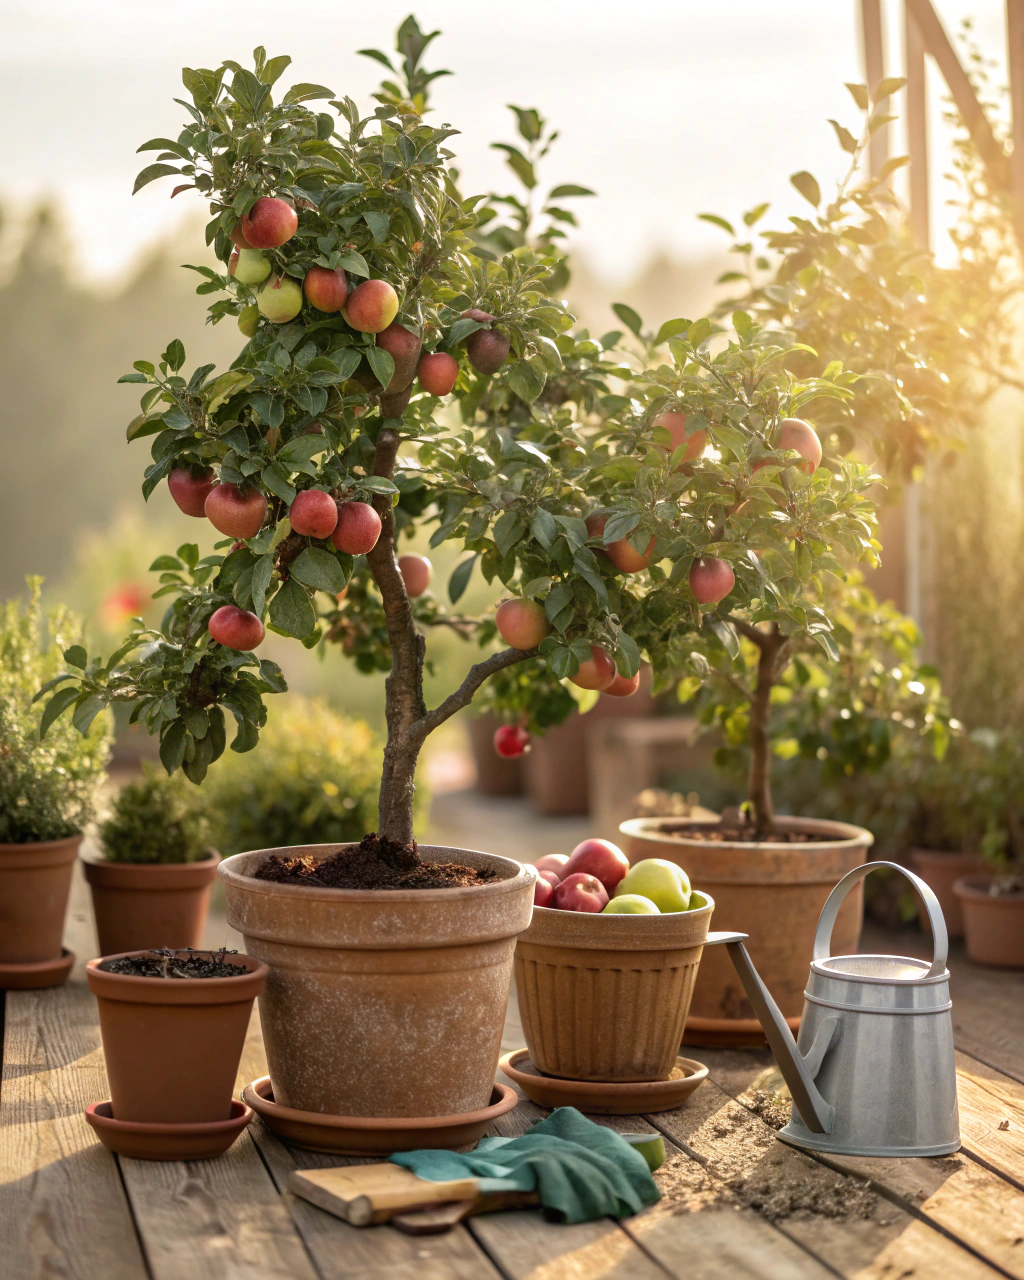
Why Grow Apples in Containers?
Growing apples in containers is a rewarding way to connect with nature—even if you only have a small balcony, patio, or rooftop garden. You don’t need a sprawling orchard to enjoy harvesting your own crisp, fragrant apples. By container-growing, you control the soil, moisture, and sunlight, giving your tree a better chance to thrive despite urban challenges like limited space and poorer soil. Plus, biting into an apple you’ve nurtured yourself, with the subtle crunch and sweet-tart aroma filling the air, is deeply satisfying. You’ll find clear, simple steps here for container selection, planting, watering, feeding, and troubleshooting—everything you need to produce delicious fruit right at home. Trust me, you can do this.
Getting Ready — What You’ll Need
Before you dig in, gather these essentials to give your apple the best start:
- Container: Choose a pot at least 40-50 cm (16-20 inches) deep and with a diameter of 40-50 cm. This space lets roots spread and keeps your tree stable. (For hotter climates, clay pots help cool roots.)
- Drainage: Ensure the pot has at least 4 drainage holes to prevent waterlogging.
- Soil mix: Use a rich, well-draining potting mix made from 70% loam soil, 20% compost (for nutrients), and 10% coarse sand or perlite to aerate the roots. Avoid heavy or compacted soils.
- Apple variety: Choose dwarf or semi-standard varieties bred for containers like ‘Honeycrisp Dwarf,’ ‘Pixie Crunch,’ or ‘Topaz.’ These need less space and fruit earlier.
- Fertilizer: A balanced, slow-release organic fertilizer with a low nitrogen ratio, such as 5-10-10 N-P-K, to promote fruiting over leafy growth.
- Watering tools: A watering can with a narrow spout or drip irrigation setup.
- Pruning shears: Sharp and clean to maintain shape and health.
- Sunlight: Location with at least 6–8 hours of direct sunlight daily.
- Mulch: Organic straw or shredded leaves to retain moisture.
- Optional: Hand lens to inspect for pests, rainwater collection system to avoid hard tap water.
Step-by-Step — How to Grow Apples in Pots
1. Preparing Your Pot
Start by cleaning your container thoroughly to remove any residues or pathogens. Place a 3–5 cm (1.2–2 inch) layer of coarse gravel or broken pottery shards at the bottom for drainage. This prevents water from pooling and roots from rotting. Next, fill about 2/3 of the pot with your soil mix—remember the composition: 70% loam, 20% compost, and 10% sand or perlite. The soil should feel like a damp sponge, springy but not dripping. Avoid compacting it too much—that stifles root growth and air flow. Never skip drainage holes; waterlogged roots lead to root rot, one of the most common container-cultivation mistakes.
2. Planting Your Apple Tree
Container apple trees usually come as saplings or bare-root plants rather than seeds, which take years to fruit and require cold stratification. If you’re planting a sapling, dig a hole slightly bigger than the root ball, about 30 cm (12 inches) deep, in your pot. Position the tree so the graft union (a noticeable bulge near the base) is just above the soil line to avoid rot. Backfill gently with soil, removing air pockets by lightly pressing around the roots with your fingers. Water immediately until moisture runs out of the bottom. When planting bare-root, soak roots in water for 4–6 hours before planting to hydrate them. Pro tip: add a handful of bone meal or rock phosphate to the planting hole to support root development.
3. Watering and Sunlight
Water deeply, so that moisture reaches the entire root zone. In warm weather, that means 2–3 times per week, letting the top 2 cm (0.8 inch) of soil dry out before rewatering to prevent rot. If you’re in a hot, windy spot, check daily because soil can dry quickly. Mulching helps retain moisture and keeps roots cool. Place your pot where it receives 6–8 hours of full sun daily—apple trees thrive with generous light for flowering and fruiting. In cloudy regions, supplement with a grow light or rotate pots to catch brief sun windows. If your space is very sunny and hot, offer afternoon shade using a shade cloth to avoid leaf scorch.
4. Feeding and Maintenance
Feed your apple tree every 3–4 weeks during the growing season (spring to early fall) with a balanced fertilizer low in nitrogen, such as an organic 5-10-10 formula. Nitrogen encourages leaves but too much delays fruiting. To keep your tree manageable and productive, prune annually in late winter or early spring when the tree is dormant. Thin out crossing branches to allow light and air in. Check soil aeration by lightly probing with a fork—if the soil feels heavy or crusty, mix in extra coarse sand or perlite next season. Regular observation saves trouble: “The secret is not more work — it’s regular care and observation.”
5. Troubleshooting While They Grow
If your leaves yellow, it could mean excess nitrogen or iron deficiency—correct by applying a fertilizer higher in phosphorus or a foliar iron spray. Stunted growth? Likely too little light or compacted soil—move your pot or loosen soil with a fork. Watch for pests like aphids or spider mites; wash leaves with a gentle spray or introduce natural predators like ladybugs. If soil remains soggy after watering, check that drainage holes aren’t blocked. Yellowing leaves combined with soggy soil often suggest root rot—let soil dry and reduce watering frequency.
6. Harvesting
Your apples will be ready to harvest in about 70–90 days after flowering. Look for full color development—deep red, golden yellow, or green depending on the variety. The fruit should feel firm but give slightly under pressure and detach easily when twisted gently. To enhance sweetness, reduce watering in the final week to concentrate sugars. When harvesting, listen for the soft “pop” as the apple detaches cleanly—it’s a sign of perfect ripeness. Store apples in a cool, dark place at about 4–7°C (39–45°F) with ~85% humidity to keep fresh for up to 2 weeks. Leftover fruit can be pickled, dried, or frozen for year-round use.
Extra Tips for Perfect Results
- Companion plants: Grow chives, nasturtiums, or marigolds nearby to repel pests and attract beneficial insects.
- Rotate your pots every season to prevent soil fatigue and uneven sun exposure.
- Mulch with straw or shredded leaves to maintain steady humidity and regulate soil temperature.
- Use collected rainwater for watering—it’s softer and better for soil microbes than tap water.
- In windy spaces, group pots together to reduce moisture loss and provide stability.
- During hot spells, drape a thin fabric or shade cloth over midday sun hours to prevent leaf burn.
Common Mistakes and How to Fix Them
- Overwatering: Roots become soft and rot—wait until the top 2 cm dries before watering again.
- Weak growth: Your tree needs more sun—move it to a spot with at least 6 hours of direct light.
- Yellow leaves: Too much nitrogen fertilizer—switch to a higher phosphorus feed.
- Poor germination (if growing from seed): Seeds planted too deep—limit depth to 0.5–1 cm.
- Misshapen roots: Soil too compact—mix in extra coarse sand or perlite for root aeration.
Harvest and Storage
When harvesting, gently twist the apple to avoid damaging the stem or branches. Excess force can bruise fruit, making it spoil faster. Store apples in a cool, dark place at around 4–7°C (39–45°F) with humidity close to 85% to keep them crisp for up to 2 weeks. Beyond fresh eating, you can preserve apples by drying slices for snacks, freezing thinly sliced apples for baking, or pickling apples in spiced vinegar—each method brings unique textures and flavors. Don’t forget to save some seeds from your best fruits for next season; dry them slowly indoors, then keep seeds in a cool, dry container until fall planting.
What Success Looks Like
Imagine pulling your first ripe apple from a pot on your tiny balcony—the firm crunch, sweet aroma, and fresh warmth in your hands. That satisfying moment proves your patience and care paid off. Expect about 1–2 kg (2–4 lb) of apples per container annually if you nurture your tree consistently. Success isn’t measured only by yield but by the quiet connection you develop with your plant. Consistency, close observation, and timely adjustments are your best tools. That’s the true reward of urban apple growing.
Mini Recap — Your Success Checklist
- Pot depth: Minimum 30 cm (12 in).
- Soil mix: 70% loam, 20% compost, 10% coarse sand or perlite.
- Watering: Deeply, 2–3 times per week based on moisture check.
- Sunlight: At least 6–8 hours daily.
- Fertilizer: Every 3–4 weeks, low nitrogen formula.
- Harvest: 70–90 days after flowering.
Closing Reflection
Remember—successful gardening is never about perfection. It’s about observing your tree, learning its rhythms, and adjusting care accordingly. Each small act—watering just right, pruning thoughtfully, noticing leaf color—brings you closer to a thriving apple tree in your own urban oasis. Every plant you grow teaches you something new. Don’t rush it. Watch, adjust, and enjoy. That’s what makes you a gardener.

Hi there — I’m Kyla, the creator behind Kyla Garden Tips 🌿
I’ve always been passionate about plants, flowers, and the simple joy that comes from growing something beautiful. What started as a small balcony garden has turned into a love for helping others create their own green spaces — no matter how big or small.