
Grow Aloe Vera in Pots: The Healing Plant for Home
If you’ve been looking for a simple, beautiful, and genuinely useful plant to grow in your home or balcony, aloe vera is the one. This hardy succulent isn’t just easy to care for — it also offers countless benefits, from soothing sunburns to improving indoor air quality. Even if you have limited space or zero gardening experience, you can successfully nurture aloe vera in pots with just a little know-how. Here, I’ll walk you through every step clearly and practically, helping you overcome common hurdles and achieve abundant, healthy growth. Let’s turn your windowsill or patio into a healing garden!
Getting Ready — What You’ll Need
Before we dig in, it’s essential to gather the right materials. What you use will affect your aloe’s health and productivity, so here’s the list with reasons:
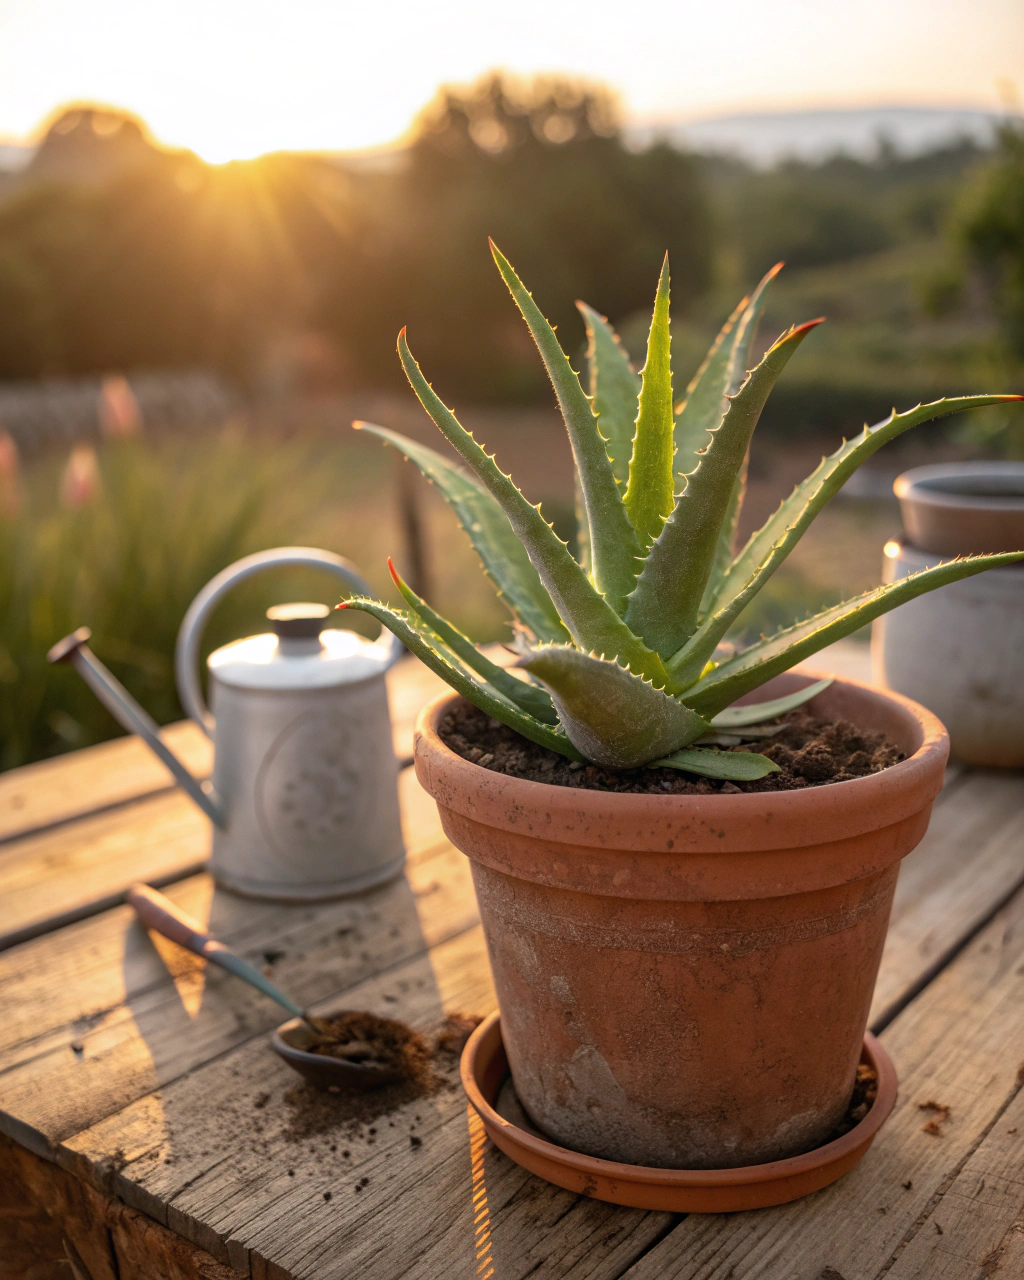
- Pot size: At least 25–30 cm (10–12 in) in diameter and similar depth. Aloe roots are shallow but need room to spread horizontally. (If you have limited space, a 20 cm (8 in) pot works but expect a smaller plant.)
- Pot type: Terracotta or clay pots are ideal as they breathe and keep the roots cool. Plastic pots work if kept out of strong heat. (For hot climates, clay is best to avoid root overheating.)
- Drainage: Pots MUST have at least 3–4 drainage holes to prevent root rot.
- Soil: Use a well-draining cactus or succulent mix. If mixing yourself, combine 70% loam or garden soil, 20% compost, and 10% coarse sand or perlite. This balance lets water flow freely while providing nutrients.
- Fertilizer: Choose a balanced, diluted liquid fertilizer (e.g., 10-10-10 NPK), low in nitrogen. Slow-release pellets designed for succulents are great alternatives.
- Light source: A bright spot with at least 6–8 hours of indirect or direct sunlight per day. A south-facing window is perfect. (If indoors, supplement with a grow light during winter.)
- Tools: Gardening gloves, a small hand trowel, clean scissors or pruning shears, and a spray bottle for misting.
- Plant material: You can start with an aloe vera pup (offset) from a healthy parent plant or seeds. Pups are easier and faster to establish.
Pro tip: Collect some fresh compost or use organic potting mix to feed your aloe naturally. Avoid heavy, soggy soils—they choke roots and encourage disease.
Step-by-Step — How to Grow Aloe Vera in Pots
1. Preparing Your Pot
Start by thoroughly cleaning your pot with warm water and mild detergent to remove old soil and pathogens. Rinse well and let it dry completely—this avoids transferring fungi or pests.
Next, create a drainage layer with 2–3 cm (1 in) of small stones or broken terracotta shards at the bottom. This layer allows excess water to drain away from roots, critical for a succulent sensitive to overwatering.
Fill the pot with your prepared soil mix, leaving about 3 cm (1.5 in) of space at the top. Aim for soil moisture that feels like a sponge wrung out: damp but not wet. Compress the soil lightly but don’t pack it; airy soil means roots get the oxygen they need.
Common mistake: Using a pot without holes or overly compacted soil suffocates roots and invites rot. Never skip the drainage stage.
2. Sowing or Planting
If you’re planting pups, gently remove them with roots intact from the mother plant. Let the pups dry in shade for 24–48 hours to form a callous over cuts—this prevents rot once in soil.
Plant each pup so the base sits just below the soil surface. Space multiple plants at least 20 cm (8 in) apart to allow room for leaves to spread.
If growing from seeds, sow them at a shallow depth of 0.5–1 cm (¼–½ in), lightly covering with sand or fine soil. Keep the temperature between 20–25°C (68–77°F). Seeds benefit from pre-soaking for a few hours in warm water to improve germination.
The soil surface should feel warm and slightly crumbly. After planting, do not water immediately; wait 24 hours to reduce rot risk.
Pro tip: Use a spray bottle for initial watering after sowing seed—this keeps tiny seeds in place without washing them away.
3. Watering and Sunlight
Aloe vera needs moderate watering. Aim to water deeply enough so water trickles out of the bottom, but only when the top 2–3 cm (1 inch) of soil is dry. This usually means watering 2–3 times per week in warm weather and less in cooler months.
Visual signs for watering: leaves should be plump and firm, never shriveled or dry to the touch. When you water, the soil should feel moist but not sticky or soggy.
If you live in a hot, dry, or windy area, group pots close together to reduce evaporation. Mulching around the base with small pebbles or straw helps retain moisture. Partial afternoon shade during peak heat prevents leaf scorch.
Aloe plants thrive in 6–8 hours of bright, indirect to direct sunlight daily. If you notice the leaves turning pale or stretched, move your pot to a sunnier spot or provide supplemental lighting.
4. Feeding and Maintenance
Feed your aloe every 3–4 weeks during the growing season (spring and summer) with a diluted liquid fertilizer low in nitrogen to encourage leaf growth without softness.
Maintenance means regular checks: remove any dry or damaged leaves by cutting at the base with clean scissors. This improves airflow and prevents pest infestations.
Keep the soil aerated by checking for compaction. Gently loosen the surface soil with your fingers or a small trowel every few weeks. Healthy roots need oxygen.
Watch for symptoms of imbalance: yellowing leaves often indicate too much nitrogen or overwatering, while pale leaves can mean insufficient light or nutrients.
“The secret is not more work — it’s regular care and observation.” Growing aloe taught me this. Consistent, small efforts trump infrequent heavy interventions every time.
5. Troubleshooting While They Grow
Aloe vera is tough, but it can still show signs of trouble. Here’s how to act:
- Yellow leaves: Usually from too much nitrogen fertilizer or overwatering. Reduce feeding and water only when soil feels dry.
- Stunted growth: Often lack of sunlight. Move your pots to a brighter location.
- Soft or mushy leaves: A clear sign of root rot. Check drainage and soil moisture. If severe, repot in fresh, dry soil.
- Pest presence (mealybugs, spider mites): Wipe leaves with a cotton swab dipped in alcohol or apply insecticidal soap once a week.
- Leaves curling or browning: Could be excessive direct sun or dry air. Use shade cloth or mist the air around the plant without wetting the leaves.
6. Harvesting
You’ll know your aloe is ready to harvest when it has at least 5-6 thick, fleshy leaves that feel firm and slightly waxy. This usually happens after about 70–90 days of growth.
To harvest, select a mature, outer leaf and cut it at the base close to the stem with a sharp knife. You should hear a slight resistance or “snap.” The leaf will be cool, thick, and slightly moist to the touch.
Before harvesting, reducing watering the final week helps concentrate the gel inside leaves, enhancing their potency.
Store harvested leaves in a cool, dark place at around 4–7°C (39–45°F) for up to 2 weeks. For longer storage, freeze aloe gel in ice cube trays or dry it for tea infusions.
Save seeds from mature flowers (if your plant flowers) by allowing seed pods to dry fully, then gently crush and collect the tiny black seeds for next season.
Extra Tips for Perfect Results
- Plant companion succulents such as sedum, echeveria, and haworthia alongside aloe vera to share similar water and light needs and deter pests.
- Rotate your pots with the seasons to promote even growth and prevent soil nutrient depletion.
- Mulch with thin layers of straw or dried leaves to maintain consistent soil humidity without trapping excess moisture.
- Use collected rainwater for irrigation to prevent build-up of chlorine or lime deposits that may harden your soil over time.
- In windy spots, group pots together carefully for shared moisture retention and added stability.
- During very hot midday sun, drape a light fabric or shade cloth over pots to prevent leaf sunburn.
Common Mistakes and How to Fix Them
- Overwatering: Leads to root rot and soft leaves. Always let the top 2 cm (¾ in) of soil dry before watering again.
- Weak, leggy growth: Caused by insufficient light. Move your plant closer to brighter windows or use supplementary LED grow lights.
- Yellowing older leaves: Means excess nitrogen. Switch to fertilizer with higher phosphorus or reduce feeding frequency.
- Poor germination of seeds: Usually due to sowing too deep. Keep seeds at 0.5–1 cm (¼–½ in) depth to ensure good emergence.
- Misshapen or corkscrew roots: Caused by compacted soil hindering airflow. Always mix in coarse sand or perlite for better drainage and aeration.
Harvest and Storage
Carefully cut mature leaves at the base. Avoid twisting or yanking as it can damage nearby stems and stunt growth. For best freshness, store leaves in a dark, cool place maintained at 4–7°C (39–45°F). Use them within 2 weeks for maximum healing benefit.
You can preserve aloe in various ways. Freeze gel portions in ice cube trays to add later to drinks or skincare. Thicker gel can be dried into powder form for use in teas or supplements. Pickling aloe leaf sections in vinegar or brine is another traditional method.
If you want to save seeds, wait for seed pods to fully dry on the plant, then harvest gently and store in paper envelopes in a cool, dry spot until the next season.
What Success Looks Like
Imagine running your fingers over thick, cool, jade-green leaves that taper to points but feel fleshy and resilient. When you snap one off, the gel inside glistens translucent and slightly sticky, ready to soothe your skin or nourish your health. This plant will reward you with an average yield of 1–2 kg (2–4 lb) per moderately sized container annually, depending on growth conditions.
Success isn’t just about numbers — it’s the knowing glance you share with your plant as it thrives, the quiet satisfaction in watching it grow slowly but surely day by day. By observing, adjusting, and caring consistently, you’re not just growing aloe; you’re cultivating connection with nature itself.
Mini Recap — Your Success Checklist
- Pot depth: Minimum 30 cm (12 in).
- Soil mix: 70% loam, 20% compost, 10% sand.
- Watering: 2–3 times per week, adjust based on dryness.
- Sunlight: Provide 6–8 hours of good light daily.
- Fertilizer: Apply every 3–4 weeks with low-nitrogen formulas.
- Harvest: After 70–90 days, when leaves are mature and firm.
Closing Reflection
Growing aloe vera isn’t about rushing or perfection. It’s a gentle practice of watching, adjusting, and appreciating small changes over time. Every leaf you nurture teaches you patience and attentiveness. So feel the soil, observe the leaves, and listen to your plant’s subtle signals. That’s how you grow not just a healing plant, but a rewarding relationship with your garden. You’ve got this.

Hi there — I’m Kyla, the creator behind Kyla Garden Tips 🌿
I’ve always been passionate about plants, flowers, and the simple joy that comes from growing something beautiful. What started as a small balcony garden has turned into a love for helping others create their own green spaces — no matter how big or small.