
Why Grow Ginger in Pots? A Tropical Root for Your Home
Ginger is more than just a spice; it’s a living piece of the tropics that you can nurture right on your windowsill, balcony, or small patio. Growing ginger indoors is rewarding because it transforms your space with lush green foliage and delivers fresh, aromatic roots that brighten cooking and health routines alike. You don’t need acres or a greenhouse — just a pot, quality soil, and care. In this guide, I’ll walk you step-by-step through the process, tackling common problems and helping you harvest vibrant, spicy rhizomes year-round. Trust me, you can do this even if space feels tight or when outdoor gardening isn’t an option. Let’s get your ginger growing strong and healthy, right where you live.
Getting Ready — What You’ll Need
Before diving in, gather these essentials. They set the stage for success:
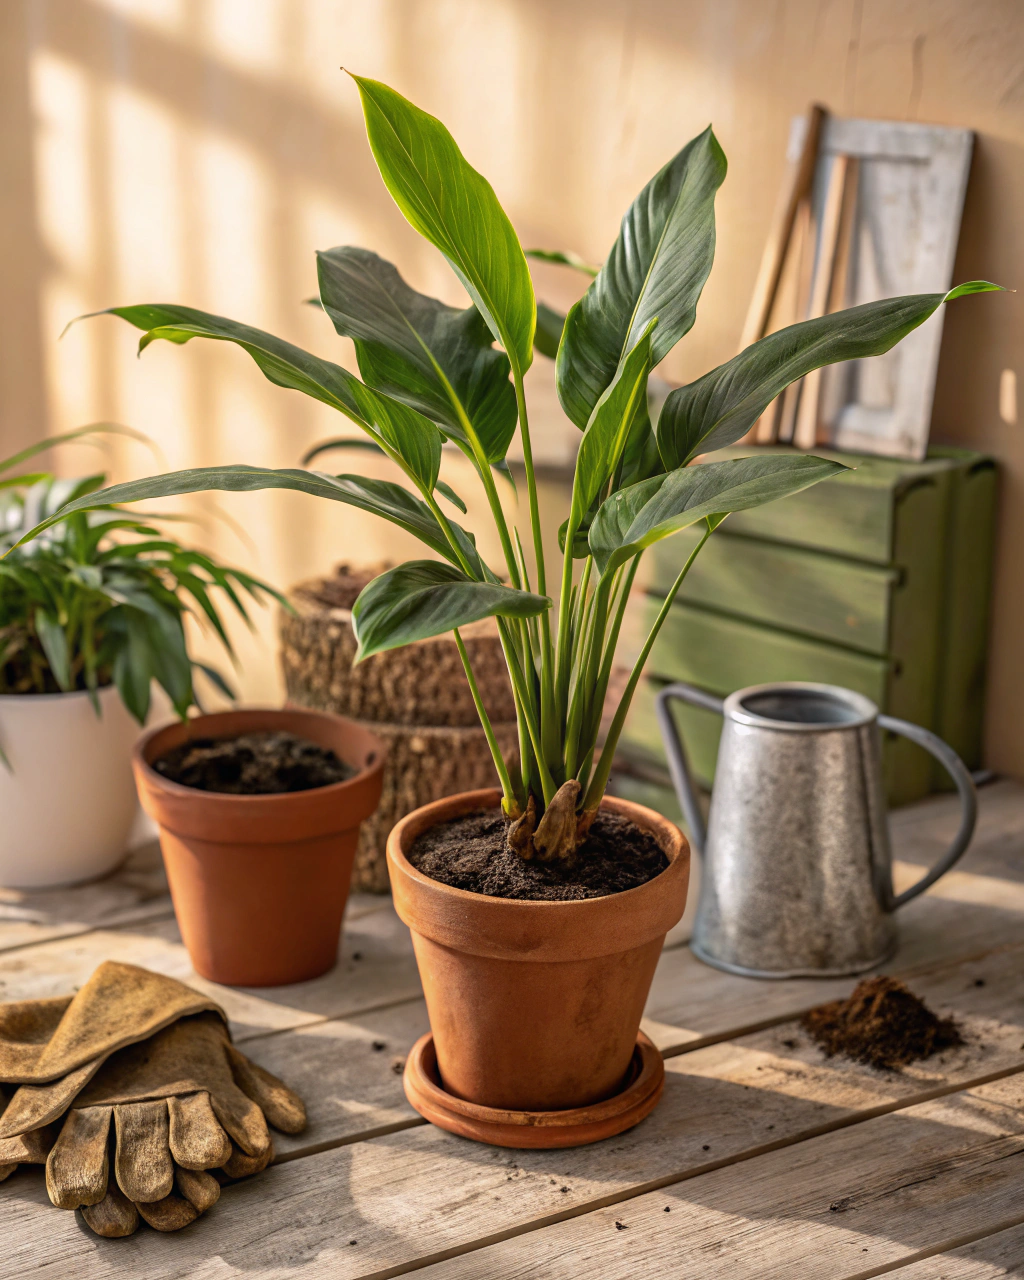
- Container: Choose a pot that’s at least 30 cm deep and 35 cm wide to give roots room to sprawl. Clay pots help keep roots cool in hot climates; plastic or ceramic work well indoors.
- Potting Soil: A loose, fertile mix is vital. Use a blend of 70% loamy soil, 20% organic compost, and 10% coarse sand or perlite to ensure drainage and airflow around the roots.
- Seed Ginger: Purchase fresh, plump ginger rhizomes with visible “eyes” or growth buds from a nursery or organic market. Avoid shriveled or moldy pieces.
- Fertilizer: Use a balanced, low-nitrogen fertilizer such as a 10-20-10 NPK ratio, or organic alternatives like fish emulsion or worm castings for steady feeding.
- Watering Can: A can with a fine rose for gentle watering to avoid soil disruption.
- Grow Light (if needed): If your indoor space is dim, a grow light providing 6–8 hours of light daily will keep your ginger happy.
- Hand Trowel and Pruning Shears: For soil preparation and trimming crowded shoots.
- Optional: Mulch materials like straw or shredded leaves to maintain humidity.
(Pro tip: If on a tight budget, recycle old pots ensuring they have drainage, and make your own compost with kitchen scraps for nutrient-rich soil.)
Step-by-Step — How to Grow Ginger in Pots
1. Preparing Your Pot
Start by cleaning your pot thoroughly with warm, soapy water to remove pathogens. Ensure the base has multiple drainage holes—this is non-negotiable to prevent waterlogging.
First, create a drainage layer by placing about 3–5 cm of small stones or broken pottery shards at the bottom. This stops water from pooling and drowning the roots.
Next, fill your pot with the prepared soil mix (70% loam, 20% compost, 10% coarse sand). Avoid compacting it—your soil should feel light and crumbly, much like a sponge wrung out so it’s moist but not soggy.
A common mistake is filling the pot with dense garden soil that compacts, suffocating roots and inviting rot. Also, never skip the drainage holes or overfill soil to the rim; leave about 2 cm of space so watering won’t spill over.
2. Sowing or Planting
Ginger grows from rhizome sections, not seeds. Cut your seed ginger into pieces, each about 5 cm long, ensuring each has at least one visible “eye” or growth bud.
Before planting, soak these pieces in warm water for 12 hours to hydrate them and encourage sprouting. This softens the outer skin and jumpstarts root development.
Plant each piece horizontally, shallowly buried at a depth of about 2–3 cm. Leave at least 15–20 cm spacing if you’re planting multiple pieces—crowding hinders airflow and growth.
You want the buds facing upward, just beneath the soil surface. The soil should feel warm—ideally between 21–27°C (70–80°F)—which stimulates sprouting. Indoors, place the pot near a warm sunny window or use a heat mat.
Pro tip: Cover the pot with breathable fabric or plastic wrap to retain moisture until shoots appear in about 2–3 weeks. Remove covering as soon as green tips show to avoid mold.
3. Watering and Sunlight
Keep the soil evenly moist but never soggy. Water deeply until you see moisture draining from the bottom, typically about 2–3 times per week during warm weather.
Check the soil by feel; it should be damp like a wrung sponge but not sticky or muddy. In hotter or drier indoor environments, increase watering frequency slightly. When watering, avoid splashing leaves to reduce fungal risk.
Ginger needs 6–8 hours of indirect sunlight daily. Direct midday sun can scorch leaves, so a bright east or north-facing window is perfect. If natural light is weak, consider a full-spectrum grow light timed to mimic daylight hours.
If your home is dry or windy, cluster pots to create a mini humid microclimate, or mist leaves lightly once a day. Mulching the pot surface with straw or shredded leaves helps lock in moisture.
4. Feeding and Maintenance
Fertilize your ginger every 3–4 weeks with a low-nitrogen formula to encourage root and shoot growth without excessive leafy growth. Liquid feeds like seaweed extract or fish emulsion applied at half strength work well.
As shoots grow, thin out crowded stems by snipping the weakest with clean scissors. This improves airflow and directs energy to stronger shoots.
Keep soil aerated by gently loosening the top 2 cm of soil if it crusts or hardens, taking care not to damage roots.
Watch for yellowing leaves or overly soft stems — these often signal overwatering or nutrient imbalances, so adjust accordingly.
“The secret is not more work — it’s regular care and observation.” Over the years, I’ve found that patience and small consistent actions make all the difference.
5. Troubleshooting While They Grow
Lost leaves, slow growth, or pests require prompt attention:
- Yellow leaves: Usually too much water or excess nitrogen. Cut back watering and switch to a fertilizer higher in phosphorus.
- Stunted growth: Not enough light. Move your pot to a sunnier spot or supplement with grow lights.
- Soft, rotten roots: Poor drainage or overwatering. Check soil moisture, improve drainage, and prune affected roots.
- Pests like spider mites or aphids: Wipe leaves with a soft cloth dipped in mild soapy water or use organic insecticidal soap.
- Mold or mildew: Reduce humidity, improve airflow, and avoid overhead watering.
6. Harvesting
Ginger is typically ready to harvest between 70–90 days after planting your rhizomes. You’ll notice the lush leaves start to yellow and die back, signals that the rhizomes have matured beneath the soil.
To harvest, gently loosen the soil around the base with your fingers or a hand fork, then carefully pull the rhizome out. It should feel firm, plump, and release that unmistakable spicy, fragrant ginger aroma.
Pro tip: To intensify flavor, reduce watering the final week before harvest. This concentrates essential oils in the root.
After harvesting, clean the rhizomes by brushing off soil (do not wash if you plan to store long-term) and store them in a cool, dark place at a temperature between 4–7°C (39–45°F). They will keep fresh for up to 2 weeks.
Alternatively, preserve ginger by pickling, drying, or freezing in sealed bags for longer storage.
Extra Tips for Perfect Results
- Grow companion plants like lemongrass, basil, or mint nearby — they enhance soil health and deter pests naturally.
- Rotate pots each season to fresh soil or a new spot, preventing nutrient depletion and soil fatigue.
- Mulch with straw or dry leaves to maintain consistent moisture and moderate soil temperature.
- Use rainwater for irrigation when possible; tap water can make the soil hard over time due to minerals.
- In windy locations, group your pots closely to reduce evaporation and provide mutual shelter.
- On very hot days, use lightweight fabric shade during peak afternoon sun to protect tender leaves and roots.
Common Mistakes and How to Fix Them
- Overwatering: Causes root rot and soft rhizomes. Let the top 2 cm of soil dry out fully between watering. Use well-draining soil to help.
- Weak growth: Insufficient light is the main culprit. Shift your pots to a brighter location or provide supplemental lighting.
- Yellow leaves: Typically from excess nitrogen fertilizer. Switch to fertilizer with higher phosphorus to encourage roots and healthy shoots.
- Poor germination: Planting ginger pieces too deep stifles shoot emergence. Keep depth at no more than 3 cm.
- Misshapen roots: Soil that’s too compacted limits root expansion. Always mix coarse sand or perlite into your soil for aeration.
Harvest and Storage
When harvesting, handle rhizomes gently to avoid bruising, which can invite rot. Use clean tools and your hands to untangle roots carefully. After harvest, store your ginger in a dark, cool spot at around 4–7°C (39–45°F) with moderate humidity — about 85% is ideal.
Freshly harvested ginger keeps well for up to 2 weeks. For longer preservation, try:
- Pickling: Slice thinly and store in vinegar with spices for months of flavor.
- Drying: Cut into pieces and air-dry or use a dehydrator, then keep in airtight jars.
- Freezing: Peel and cut into chunks or grate, stored in freezer bags.
Lastly, save a few healthy rhizome pieces to plant next season. Store these in a cool, dry place until the next planting window.
What Success Looks Like
Picture pulling a firm, golden root from your pot, the spicy-sweet aroma filling your hands and home. That first harvest, weighing around 1–2 kg (2–4 lb) per large pot, is proof that your effort pays off. The glossy leaves should be deep green, and the soil moist yet airy.
Beyond the harvest, success is in your connection to the plant’s slow progress — the daily greening, the rich scent after watering, and the comfortable warmth of soil between your fingers. This cycle of observation and care makes you not just a grower, but a gardener.
Mini Recap — Your Success Checklist
- Pot depth: Minimum 30 cm (12 in) for root space.
- Soil mix: 70% loam, 20% compost, 10% sand/perlite for drainage and nutrients.
- Watering: 2–3 times per week, adjust by feel (keep soil moist, not wet).
- Sunlight: 6–8 hours indirect daily light.
- Fertilizer: Apply every 3–4 weeks, low nitrogen high phosphorus ratio.
- Harvest: Between 70–90 days, when leaves yellow and roots firm.
Closing Reflection
Growing ginger indoors is a wonderful blend of patience, attention, and reward. It doesn’t demand perfection—just your willingness to observe and adjust. Every plant you tend teaches you something new. Take your time, feel the soil beneath your fingertips, listen to the quiet growth. This is what transforms soil and seed into fresh, fragrant ginger and what makes you a gardener — not just by what you grow, but by how you care.

Hi there — I’m Kyla, the creator behind Kyla Garden Tips 🌿
I’ve always been passionate about plants, flowers, and the simple joy that comes from growing something beautiful. What started as a small balcony garden has turned into a love for helping others create their own green spaces — no matter how big or small.