
Balcony Beans: How to Grow Green Beans in Pots
Growing green beans right on your balcony is simpler and more rewarding than you might think. You don’t need a sprawling garden—just a few pots and the right know-how. Green beans produce fresh, crunchy pods packed with flavor and nutrients. They grow quickly, giving you a delicious harvest in just a couple of months. With simple steps and a bit of care, you’ll nurture thriving plants that brighten your space and your plate. Stick with me, and you’ll learn how to conquer limited space, soil challenges, and pests—all while enjoying the satisfaction of growing your own fresh beans.
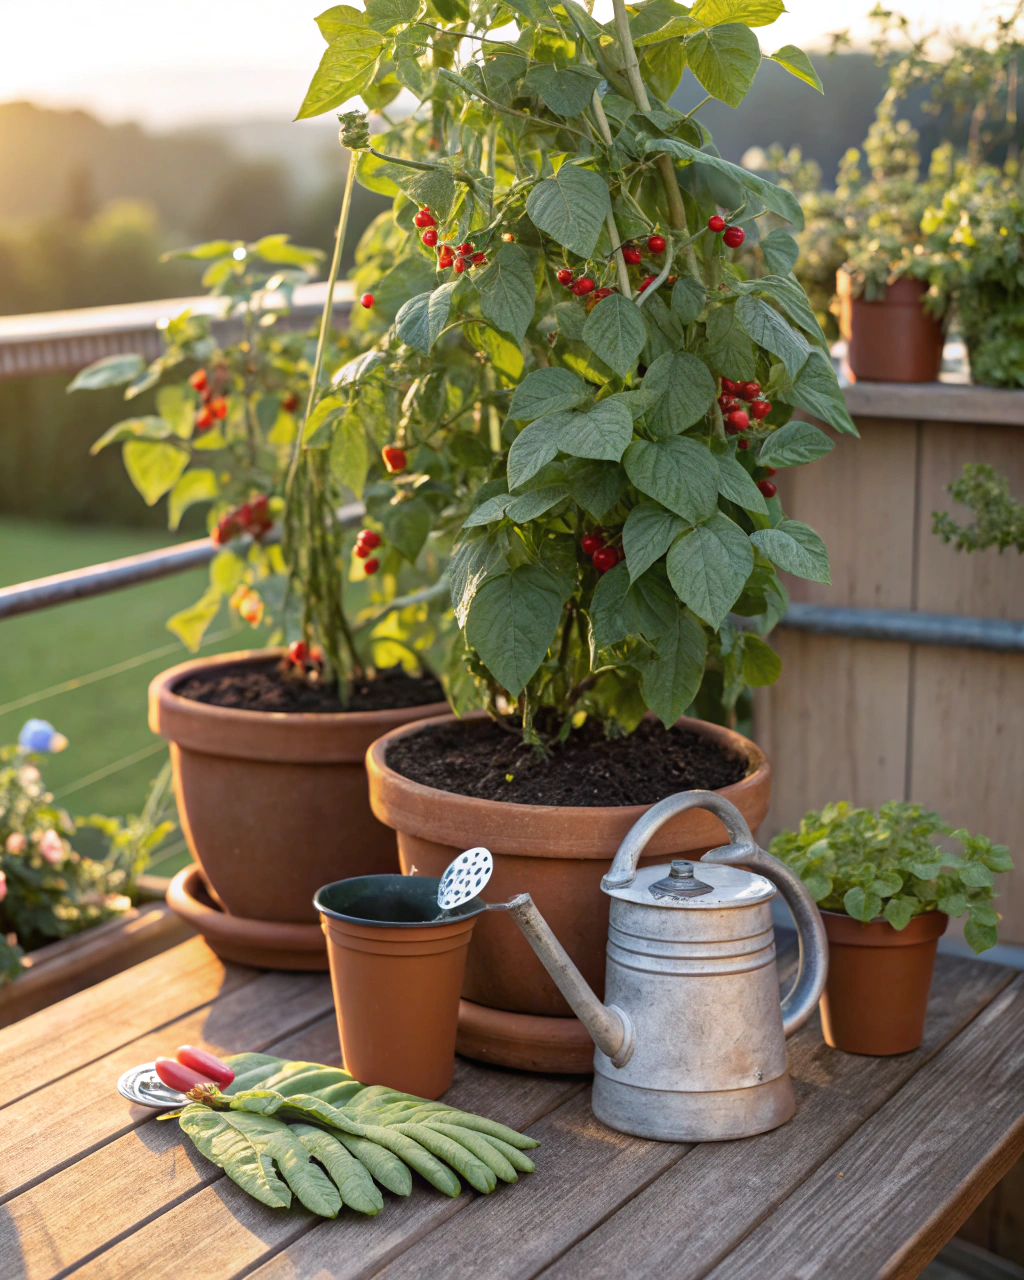
Getting Ready — What You’ll Need
Before planting your green beans, gather these essentials to set yourself up for success:
- Container: Choose pots with a minimum 30 cm (12 in) depth and at least 20 cm (8 in) diameter for each plant. This allows roots room to grow. Terracotta or plastic pots work well. (If your balcony gets hot, clay pots help keep roots cool.)
- Drainage: Ensure pots have at least 3–4 drainage holes to prevent waterlogging.
- Soil mix: Use a well-draining mix made of 70% loamy soil, 20% compost, and 10% coarse sand or perlite. This combination retains moisture but keeps roots aerated and happy.
- Green bean seeds: Pick bush varieties like ‘Contender’ or pole varieties like ‘Blue Lake’ if you have vertical space for supports.
- Fertilizer: Use a balanced, low-nitrogen fertilizer such as a 5-10-10 ratio or organic seaweed liquid fertilizer.
- Sunlight: Find a sunny spot with at least 6–8 hours of direct light daily.
- Tools: A small trowel, watering can with a fine rose, and gardening gloves will make your work easier.
Optional items: A trellis or stakes for pole beans, mulch (straw or dry leaves), and a small spray bottle for pests. If you prefer eco-friendly options, collect rainwater for irrigation and use homemade compost instead of commercial fertilizer.
Step-by-Step — How to Grow Green Beans in Pots
1. Preparing Your Pot
Start by thoroughly cleaning your pots to avoid disease buildup. Scrub the surface and rinse well.
Place a drainage layer of about 2–3 cm (1 inch) of gravel or broken terracotta at the bottom. This layer prevents waterlogging and root rot.
Fill the pot with your prepared soil mix—remember, 70% loam, 20% compost, and 10% sand or perlite—leaving about 3 cm (1 inch) from the top. Aim for soil moisture that feels like a sponge wrung out—the soil should be damp but not soggy.
Common mistake: Never compact the soil tightly. Compacted soil suffocates roots and blocks drainage. Also, be sure the pot has enough drainage holes to allow excess water to escape.
2. Sowing or Planting
Green bean seeds need to be sown at a precise depth and spacing for best results. Plant seeds about 1–2 cm (0.4–0.8 inch) deep. Space multiple seeds within a pot at least 8 cm (3 inches) apart if the pot is wide enough.
Pre-soaking seeds in lukewarm water for 6–12 hours before planting softens their tough outer coat and boosts germination speed. You’ll notice the seed swells and feels slightly tender—this is a good sign.
Ideal soil temperature for germination is between 18–24°C (65–75°F). At this warmth, sprouts usually emerge within 7–10 days.
Pro tip: Sow two seeds per space to ensure at least one strong sprout; you can thin the weaker seedling after they emerge.
3. Watering and Sunlight
Water deeply at sowing to settle soil around seeds, then keep soil consistently moist but not wet. In warm weather, this means watering your pots about 2–3 times per week, depending on heat and wind.
Check moisture by touching the top 2 cm (0.8 inches) of soil: if dry, it’s time to water. Avoid soggy soil to prevent root rot.
Green beans love sun. Aim for a spot where they receive 6–8 hours of direct sunlight daily. If in a cloudier region, supplement with reflective surfaces nearby to bounce light or consider a south-facing window or balcony.
In hot or windy areas, group your pots close to reduce moisture loss and apply a light mulch layer (2–3 cm straw or shredded leaves) to protect roots. Alternatively, provide a shade cloth during midday to avoid scorching.
4. Feeding and Maintenance
Feed your beans every 3–4 weeks using a fertilizer low in nitrogen but higher in phosphorus and potassium to encourage strong pods and flowers. For example, a balanced ratio like 5-10-10 or organic alternatives like compost tea or liquid seaweed works well.
Thin seedlings early if two emerged in one spot, leaving the healthiest plant.
Prune only if you notice leggy growth; usually, beans don’t require heavy pruning. Instead, focus on gently loosening the soil surface once a month to improve aeration and absorbing capacity.
If you spot pale or yellow leaves, it might mean nutrient imbalance or overwatering. Adjust feeding accordingly.
“The secret is not more work — it’s regular care and observation.” From experience, even busy gardeners can succeed with these simple routines.
5. Troubleshooting While They Grow
Keep an eye on the overall health of your plants:
- Yellow leaves: Often excess nitrogen. Stop fertilizing for a week or switch to fertilizer higher in phosphorus.
- Stunted growth: Too little light or compacted soil. Move pots to a sunnier spot and gently aerate soil.
- Soft or rotting roots: Likely poor drainage or overwatering. Verify drainage holes and reduce watering frequency.
- Pests: Look for aphids or spider mites. Use a strong spray of water or horticultural soap spray to remove them.
- Leaves curling or spots: Could be fungal issues. Remove affected leaves and avoid overhead watering.
Respond quickly; green beans hide problems poorly but bounce back beautifully when corrected.
6. Harvesting
Green beans are ready to harvest when pods reach about 10–15 cm (4–6 inches) long, feel firm, and snap crisply when bent—not soft or fibrous.
This usually happens 70–90 days after sowing, depending on the variety and conditions.
Try gently pulling pods from stems; a satisfying, clean snap means you’ve picked at the perfect time.
Pro tip: Reduce watering in the final week before harvesting to concentrate sweetness and enhance flavor.
Store fresh beans in a breathable bag or container in the fridge at around 4–7°C (39–45°F), where they remain fresh for up to 2 weeks. For longer preservation, blanch and freeze, or try pickling the beans for a tangy treat.
Extra Tips for Perfect Results
- Companion planting: Add nasturtiums to deter aphids, marigolds to repel beetles, basil for flavor enhancement, and radishes to attract beneficial insects.
- Rotate your pots each season to avoid soil fatigue and disease build-up.
- Apply a 2–3 cm (1 inch) mulch layer with straw or dry leaves to retain humidity and suppress weeds.
- Use collected rainwater when possible—tap water, especially hard water, can lead to soil crusting and reduce nutrient uptake.
- In windy spots, cluster pots to create a microclimate that reduces evaporation and improves stability.
- During intense heat waves, provide light fabric shading between 11 a.m.–3 p.m. to prevent leaf scorch.
Common Mistakes and How to Fix Them
- Overwatering: Roots become soft and rot. Let the top 2 cm (0.8 in) of soil dry before watering again.
- Weak growth: Lack of light. Move your pots to a sunnier location, or add reflective surfaces to boost light.
- Yellow leaves: Excess nitrogen from fertilizer. Switch to a fertilizer with higher phosphorus.
- Poor germination: Seeds planted too deep—limit depth to 0.5–1 cm (0.2–0.4 in) for easier sprouting.
- Misshapen roots or stunted plants: Soil too compacted. Mix in coarse sand or perlite to keep soil loose and airy.
Harvest and Storage
Harvest your beans gently. Use your fingers or garden scissors, holding the stem firmly and snapping off the pod without tugging roots. Fresh pods have a firm snap and release a faint, earthy scent.
After harvesting, store beans in a cool, dark place at about 4–7°C (39–45°F), with moderate humidity to avoid drying out. They’ll keep well for up to 2 weeks.
For longer storage, blanch beans in boiling water for 2–3 minutes, then plunge into ice water, drain, and freeze.
Pickling or drying beans also preserves harvests; experiment with spices and vinegar to create your own pantry staples.
Save seeds from the healthiest pods, drying them thoroughly and storing in airtight containers for next season’s planting.
What Success Looks Like
When you pull your first crisp, vibrant green bean from the pot, you’ll experience a quiet satisfaction—a touch of warmth from the sun, the faint aroma of earth in your hands, and the satisfying snap of a fresh pod. Expect around 1–2 kg (2–4 lb) of beans per large pot over the growing season.
Success comes from patience, observation, and gentle care. Each harvest connects you deeper to your small balcony ecosystem. It’s not just about the beans; it’s about the joy of growing, nurturing, and sharing life from your own hands.
Mini Recap — Your Success Checklist
- Pot depth: Minimum 30 cm (12 in).
- Soil mix: 70% loam, 20% compost, 10% sand or perlite.
- Watering: Deep, 2–3 times per week, adjust by soil moisture.
- Sunlight: At least 6–8 hours daily.
- Fertilizer: Every 3–4 weeks, low nitrogen, higher phosphorus.
- Harvest: Roughly 70–90 days after sowing.
Closing Reflection
Remember, gardening isn’t about perfection. It’s about those small, steady moments of care—checking your plants, learning from the changes, and celebrating growth. Every bean you grow teaches you something new. Don’t rush the process; watch, adjust, and enjoy. That’s the true essence of being a gardener, and I’m confident you’ve got what it takes.

Hi there — I’m Kyla, the creator behind Kyla Garden Tips 🌿
I’ve always been passionate about plants, flowers, and the simple joy that comes from growing something beautiful. What started as a small balcony garden has turned into a love for helping others create their own green spaces — no matter how big or small.