
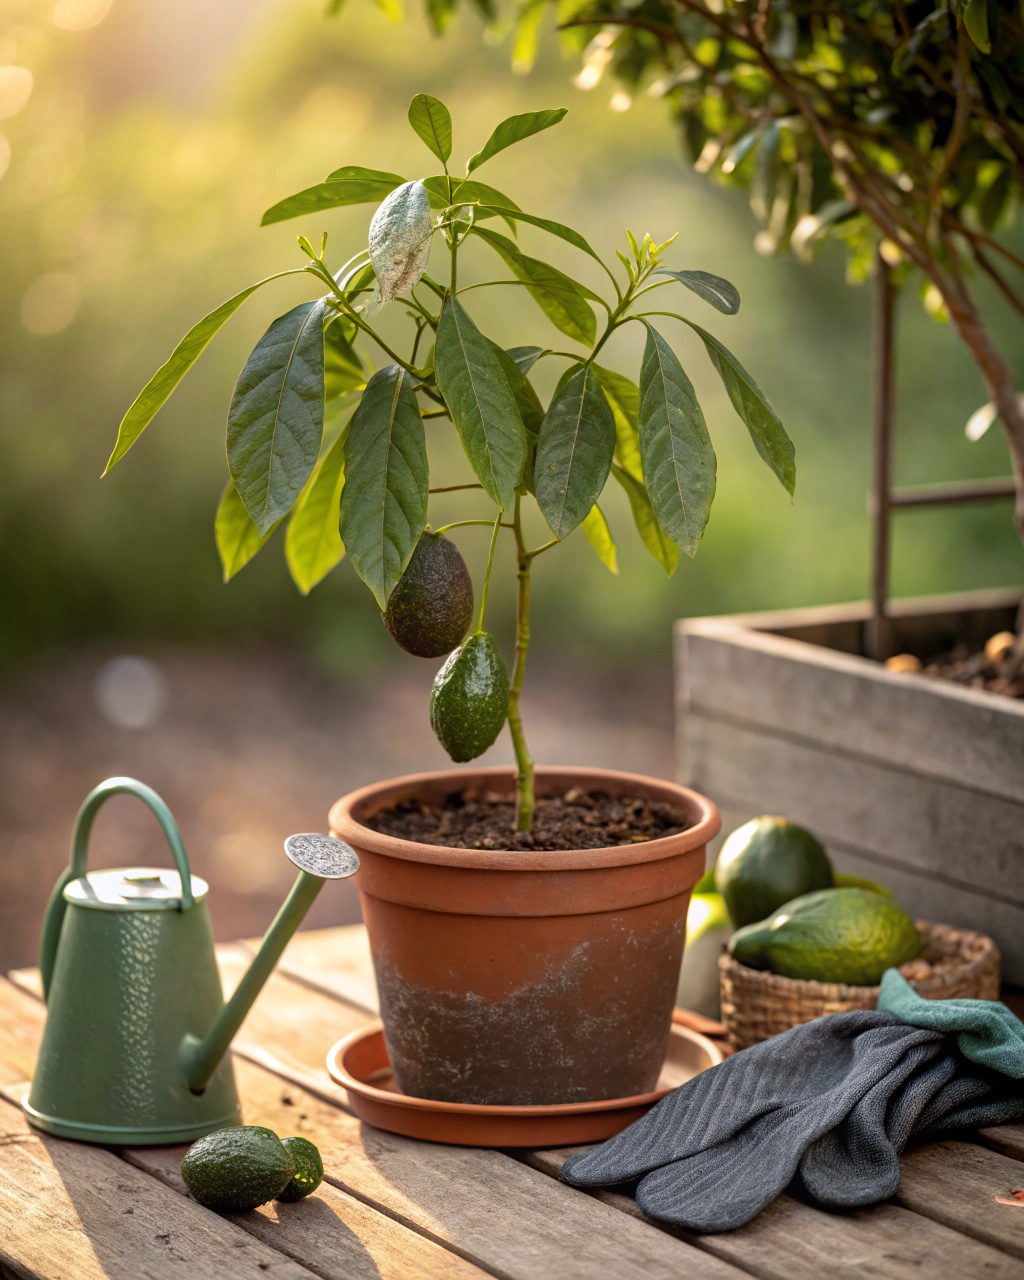
Why Grow Avocado in a Pot Indoors?
Growing an avocado from seed indoors is a rewarding project that fits beautifully into small spaces, like a balcony or sunny windowsill. You get to witness the entire life cycle — from seed to sprout to a thriving, glossy-leafed tree. Even if you don’t have a backyard, you can nurture this tropical gem, turning your home into a green oasis. Plus, growing from seed is economical, endlessly satisfying, and perfect for gardeners who love a hands-on challenge. With clear, simple steps, you’ll avoid common pitfalls like poor germination or overwatering. I’m here to guide you through every stage — so roll up your sleeves, and let’s get started!
Getting Ready — What You’ll Need
Before you start, gather the essentials to ensure your avocado seed takes off with the best possible chance.
- Container: A pot at least 30 cm (12 in) deep with drainage holes. (If you’re on a budget, recycled plastic pots work fine. Clay pots help keep roots cool if temperatures rise above 28°C (82°F).)
- Soil: Well-draining, rich mix — ideally 70% loam, 20% organic compost, and 10% coarse sand or perlite for aeration. Avoid heavy clays that hold water.
- Seeds: Fresh, large avocado pits from ripe fruit. Varieties like Hass or Fuerte work well indoors because they germinate reliably.
- Fertilizer: Balanced, water-soluble with low nitrogen to avoid too much leafy growth early — think ratios like 5-10-10. Organic options include fish emulsion or liquid seaweed.
- Light source: A sunny window offering at least 6–8 hours of direct or bright indirect sunlight. Supplemental grow lights can help, especially in low-light seasons or northern latitudes.
- Watering tools: A watering can with a narrow spout or spray bottle to gently moisten soil without flooding it.
- Thermometer (optional): To check soil and room temperature, aiming for 20–25°C (68–77°F) for optimal germination.
- Additional tools: Small hand trowel for planting, pruning shears for maintenance, and a spray mister for humidity.
Pro tip: If you want to be eco-friendly, compost your kitchen scraps to add to your soil mix and collect rainwater for watering. Natural materials boost microbial life beneficial for your avocado.
Step-by-Step — How to Grow in Pots
1. Preparing Your Pot
Start with the pot — it’s crucial for healthy roots. First, clean the pot thoroughly with warm, soapy water to remove any residue or pathogens. Ensure you have at least 1–2 cm (0.4–0.8 in) of drainage gravel or small stones at the bottom. This layer lets excess water escape, preventing root rot.
Next, fill your pot with the prepared soil mix, leaving about 3–4 cm (1.2–1.6 in) of space below the rim to avoid spills during watering. The soil should feel like a sponge that’s been firmly wrung out — moist but not soggy. Stick your finger in about 3 cm (1.2 in) deep; it should feel pleasantly damp, never wet. Avoid packing the soil tightly; roots need air just as much as water.
Common mistake to avoid: Using a pot without drainage holes or compacting soil too much, both of which suffocate roots and stunt growth.
2. Sowing or Planting
Let’s talk avocado seeds. Carefully remove the large, smooth pit from a ripe avocado, wash off any fruity residue, and dry it for a day. You don’t necessarily need to scarify (scratch) or soak it beforehand, but gently soaking in lukewarm water overnight can speed germination.
Plant your seed with the pointed end up, just barely covered with soil — no more than 1 cm (0.4 in) deep. Press the soil gently around to hold it upright. Space is less of a concern, as you’ll likely plant one seed per pot. Keep your pot in a warm spot where temperatures stay between 20–25°C (68–77°F). This warmth encourages sprouting. You should see a crack and sprout emerge within 2–6 weeks, depending on seed freshness and temperature.
Pro tip: To improve success, some gardeners suspend the seed in water using toothpicks just above water for the first few weeks, then transplant it into soil once sprouts appear.
3. Watering and Sunlight
Watering is about balance. Water the soil deeply so moisture reaches the root zone, which usually means watering until excess drains from the bottom. In warm, dry indoor air, this generally happens 2–3 times per week. Check daily by touching; the top 2 cm (0.8 in) should dry before you water again.
If your environment is hot and dry, cluster your pots to create a microclimate, mulch the surface, or set a small humidifier nearby. During hotter midday hours, a thin fabric shade can protect leaves from scorching sunlight.
Sunlight is non-negotiable for avocados. They thrive with 6–8 hours of bright light daily. A south-facing window is ideal. In cloudier areas, supplement with LED grow lights held 15–30 cm (6–12 in) above your plant to maintain healthy growth.
4. Feeding and Maintenance
Feed your avocado every 3–4 weeks with a diluted fertilizer low in nitrogen but rich in phosphorus and potassium to encourage root and fruit development. Apply fertilizer after watering so nutrients absorb steadily.
Thin any excess seedlings if multiple start in one pot — keep the strongest to avoid competition. Prune weekly by trimming the top tips to encourage bushier growth and prevent legginess.
Loosen soil occasionally if it starts compacting, being careful not to damage roots. Keep an eye out for yellowing leaves or drooping stems — signs of nutrient imbalance or overwatering.
As I like to say, “The secret is not more work — it’s regular care and observation.” Watch your plant’s signals closely and respond calmly.
5. Troubleshooting While They Grow
Avocado seedlings can face several common issues:
- Yellow leaves: Usually excess nitrogen or poor drainage. Switch to a fertilizer higher in phosphorus, and ensure your pot drains well.
- Stunted growth: Often too little light or root crowding. Move it to brighter spots or repot if roots outgrow the container.
- Brown leaf edges: Dry air or inconsistent watering. Increase humidity by misting and keep watering regular.
- Seedling collapse: Fungal root rot from waterlogged soil. Reduce watering immediately and check drainage holes aren’t blocked.
- Pests: Mealybugs or spider mites may show up indoors. Wipe leaves with diluted neem oil or insecticidal soap.
6. Harvesting
Growing avocado trees indoors to fruiting stage can take years, but you’ll enjoy beautiful foliage and the leafy, tropical feel. However, if you do have access to fruiting material or try grafted varieties that fruit sooner, here’s how to harvest:
Check that fruit has matured by color and firmness — mature avocados soften slightly when gently squeezed, not mushy, but with a slight give. Harvest typically happens 70–90 days after flowering, depending on variety.
If harvesting roots (from seedling experiments or transplanting), you want them to feel firm and plump when gently tugged — not brittle or mushy.
For storage, place harvested fruit in a dark, cool area around 4–7°C (39–45°F), on a tray or basket so air circulates. These conditions keep avocados fresh for up to 2 weeks. Avoid refrigeration if the fruit isn’t mature yet, as cold halts ripening.
To preserve excess fruit, consider drying slices in low oven heat, pickling slices, or freezing pureed pulp in airtight containers.
Save seeds: Let leftover fruit rot away pulp, then clean, dry and store the seed in a paper bag in a cool spot for next season’s planting.
Extra Tips for Perfect Results
- Plant companion herbs: Basil, marigold, or nasturtium deter pests and attract pollinators if your tree flowers indoors.
- Rotate your pot every season to ensure even growth and prevent soil nutrient depletion on one side.
- Mulch with straw or shredded leaves to conserve moisture and moderate soil temperature.
- Use collected rainwater whenever possible — it’s softer and prevents mineral buildup that tap water may cause.
- Group pots together in windy indoor areas for mutual support and to boost local humidity.
- In particularly hot indoor summers, provide a thin fabric shade midday to avoid leaf scorch.
Common Mistakes and How to Fix Them
- Overwatering: If roots feel soft or smell sour, dry the soil thoroughly before watering again. Let top 2 cm (0.8 in) dry.
- Weak growth: Relocate to a brighter window or add supplemental grow lights for at least 6 hours daily.
- Yellow leaves: Switch fertilizer to one with a higher phosphorus-to-nitrogen ratio; flush soil if mineral build-up is visible.
- Poor germination: Plant seeds no deeper than 1 cm (0.4 in) to prevent choking sprouts.
- Misshapen roots: Add coarse sand or perlite for better aeration; repot if roots appear overcrowded or circling.
Harvest and Storage
When harvesting avocado seeds for storage or replanting, pull gently — no yanking — to protect delicate rootlets. For fruit, cut carefully with pruning shears to avoid damaging the attached stem that helps prolong shelf life.
Store mature fruit around 4–7°C (39–45°F), dry, and dark for up to 2 weeks. Unripe avocados should stay at room temperature, near 20–25°C (68–77°F), until softened.
To preserve or save seeds, clean thoroughly and dry in a shady, well-ventilated spot for a few days before storing in a paper bag or breathable container. Keep seeds cool but not refrigerated if you intend to plant within a few months.
What Success Looks Like
Imagine pulling a firm, vibrant green avocado seedling from its pot after months of attentive care. The texture of its thick, glossy leaves, the warm earthy aroma of moist soil, and the sight of tender roots softly weaving through the mix — all remind you of your patience. While indoor avocados may not fruit abundantly, expect an average yield of 1–2 kg (2–4 lb) per mature container-grown tree after several years, depending on variety and conditions.
Success isn’t just in the harvest but in your daily connection to this living project. Careful observation, consistent watering, and subtle adjustments turn a simple seed into your own personal slice of the tropics. That is the true reward.
Mini Recap — Your Success Checklist
- Pot depth: At least 30 cm (12 in).
- Soil mix: 70% loam, 20% compost, and 10% sand or perlite.
- Watering: Deep watering 2–3 times per week, allowing 2 cm (0.8 in) topsoil to dry before next.
- Sunlight: Minimum 6–8 hours bright light daily.
- Fertilizing: Every 3–4 weeks with low nitrogen.
- Harvest: Typically 70–90 days after fruit reaches maturity (if fruiting).
Closing Reflection
Remember, growing an avocado seed indoors is about more than just the plant. It’s about tuning in to nature’s rhythms and building patience. Every leaf unfurling and root stretching is a lesson, a small victory. Don’t rush the process — watch, feel, and adjust. This mindful attention makes you more than a gardener — it makes you a caretaker of life. Your avocado will thank you with lush greenery and the gentle promise of future fruit. Keep going, and enjoy every step of the journey.

Hi there — I’m Kyla, the creator behind Kyla Garden Tips 🌿
I’ve always been passionate about plants, flowers, and the simple joy that comes from growing something beautiful. What started as a small balcony garden has turned into a love for helping others create their own green spaces — no matter how big or small.